|
TEXAS
GLORY
AS
HISTORY
-
THE
1836
CAMPAIGN
Or,
How
Santa
Anna
and
Houston
Played
the
Game
By Carl Willner
This campaign history describes how the historical 1836 campaign of the
Texan Revolution, from the weeks of February 21 through April 21 (Turns
1-9 of the 1836 scenario) would have corresponded with the TEXAS GLORY
game. The last three turns (Turns 10-12) were never
“played” historically due to the capture of Santa Anna on Turn 9 (April
21, at the Battle of San Jacinto), which ended the
campaign. The history covers the various actions permitted
by the cards, taking into account all movement of land units, including
movement by sea, and all battles that occurred during the period of the
1836 campaign of the Texan Revolution. The specific events on the
action cards are assigned to a particular turn where a unique event
clearly occurred that turn (e.g., Surprise, Deguello). The
effects of supply on individual units are discussed in broader terms by
turns and over the course of the campaign, and are sometimes though not
always identified on a turn-by-turn basis. It is not always possible to
recreate the historical events exactly as they occurred in game terms,
given the unavoidable limits of what is possible in a playable game,
but the game allows the general course of all the principal events of
the campaign to be repeated.
Click
here to order Texas Glory now.
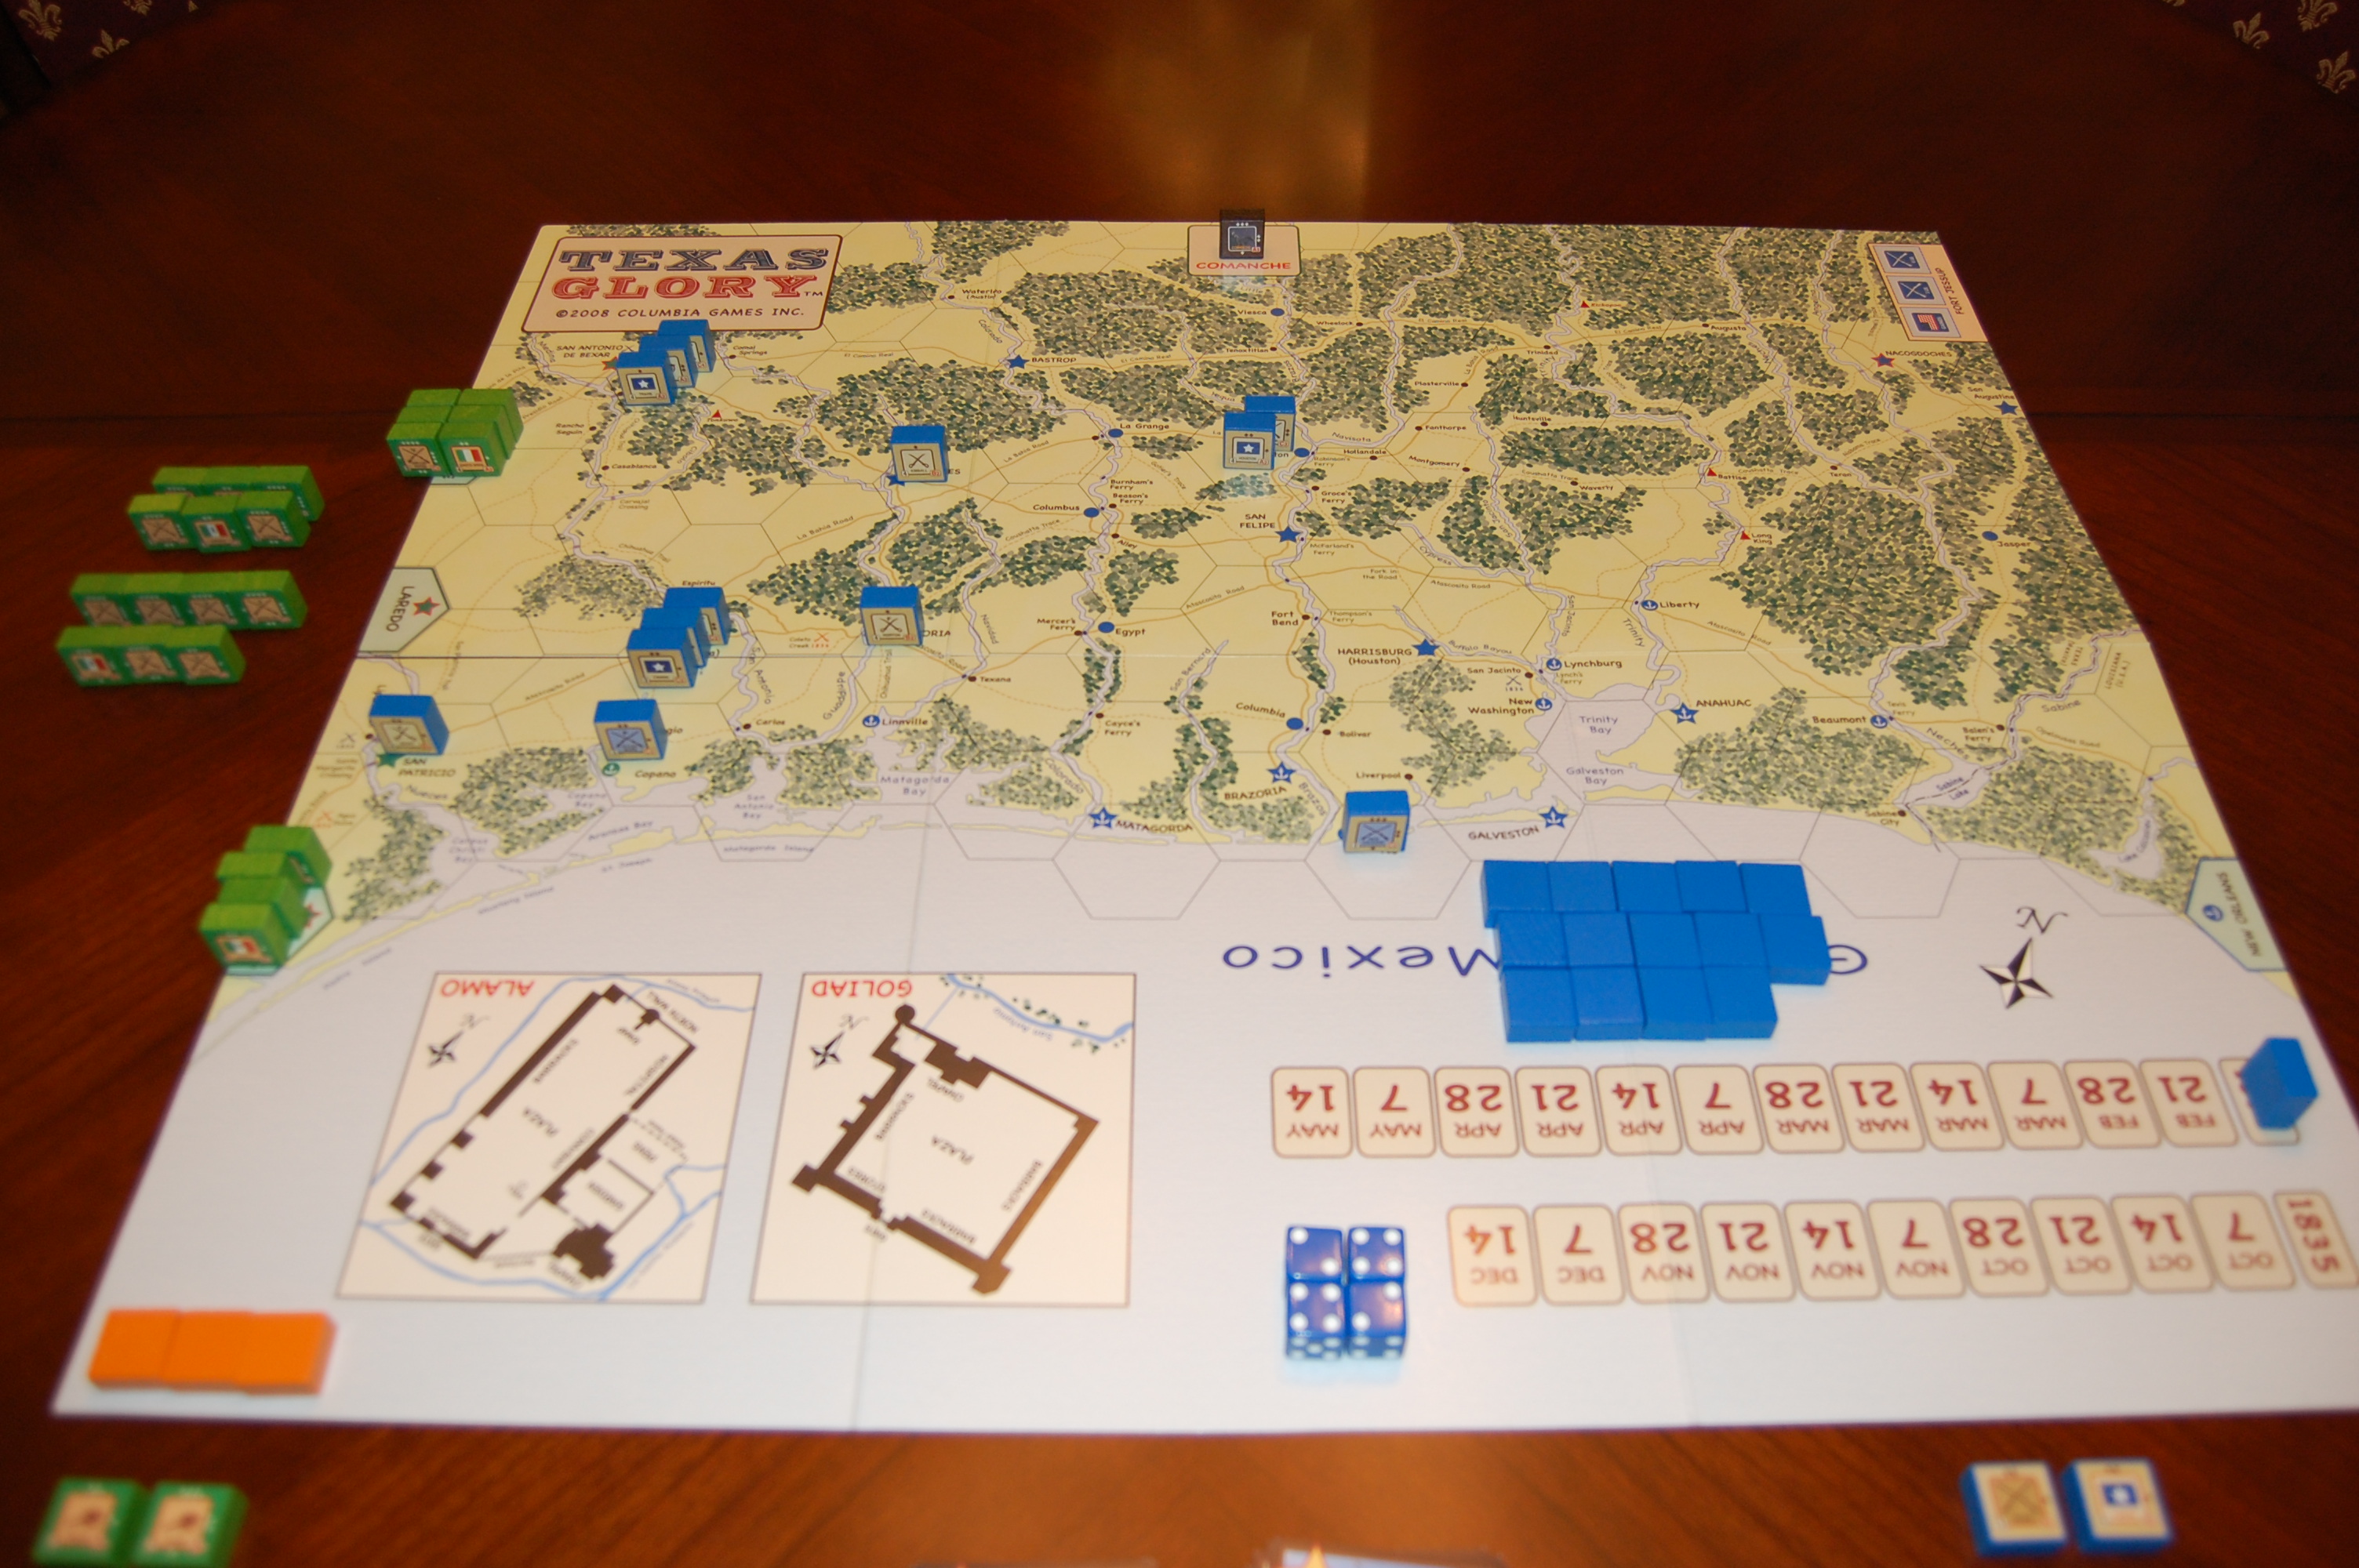
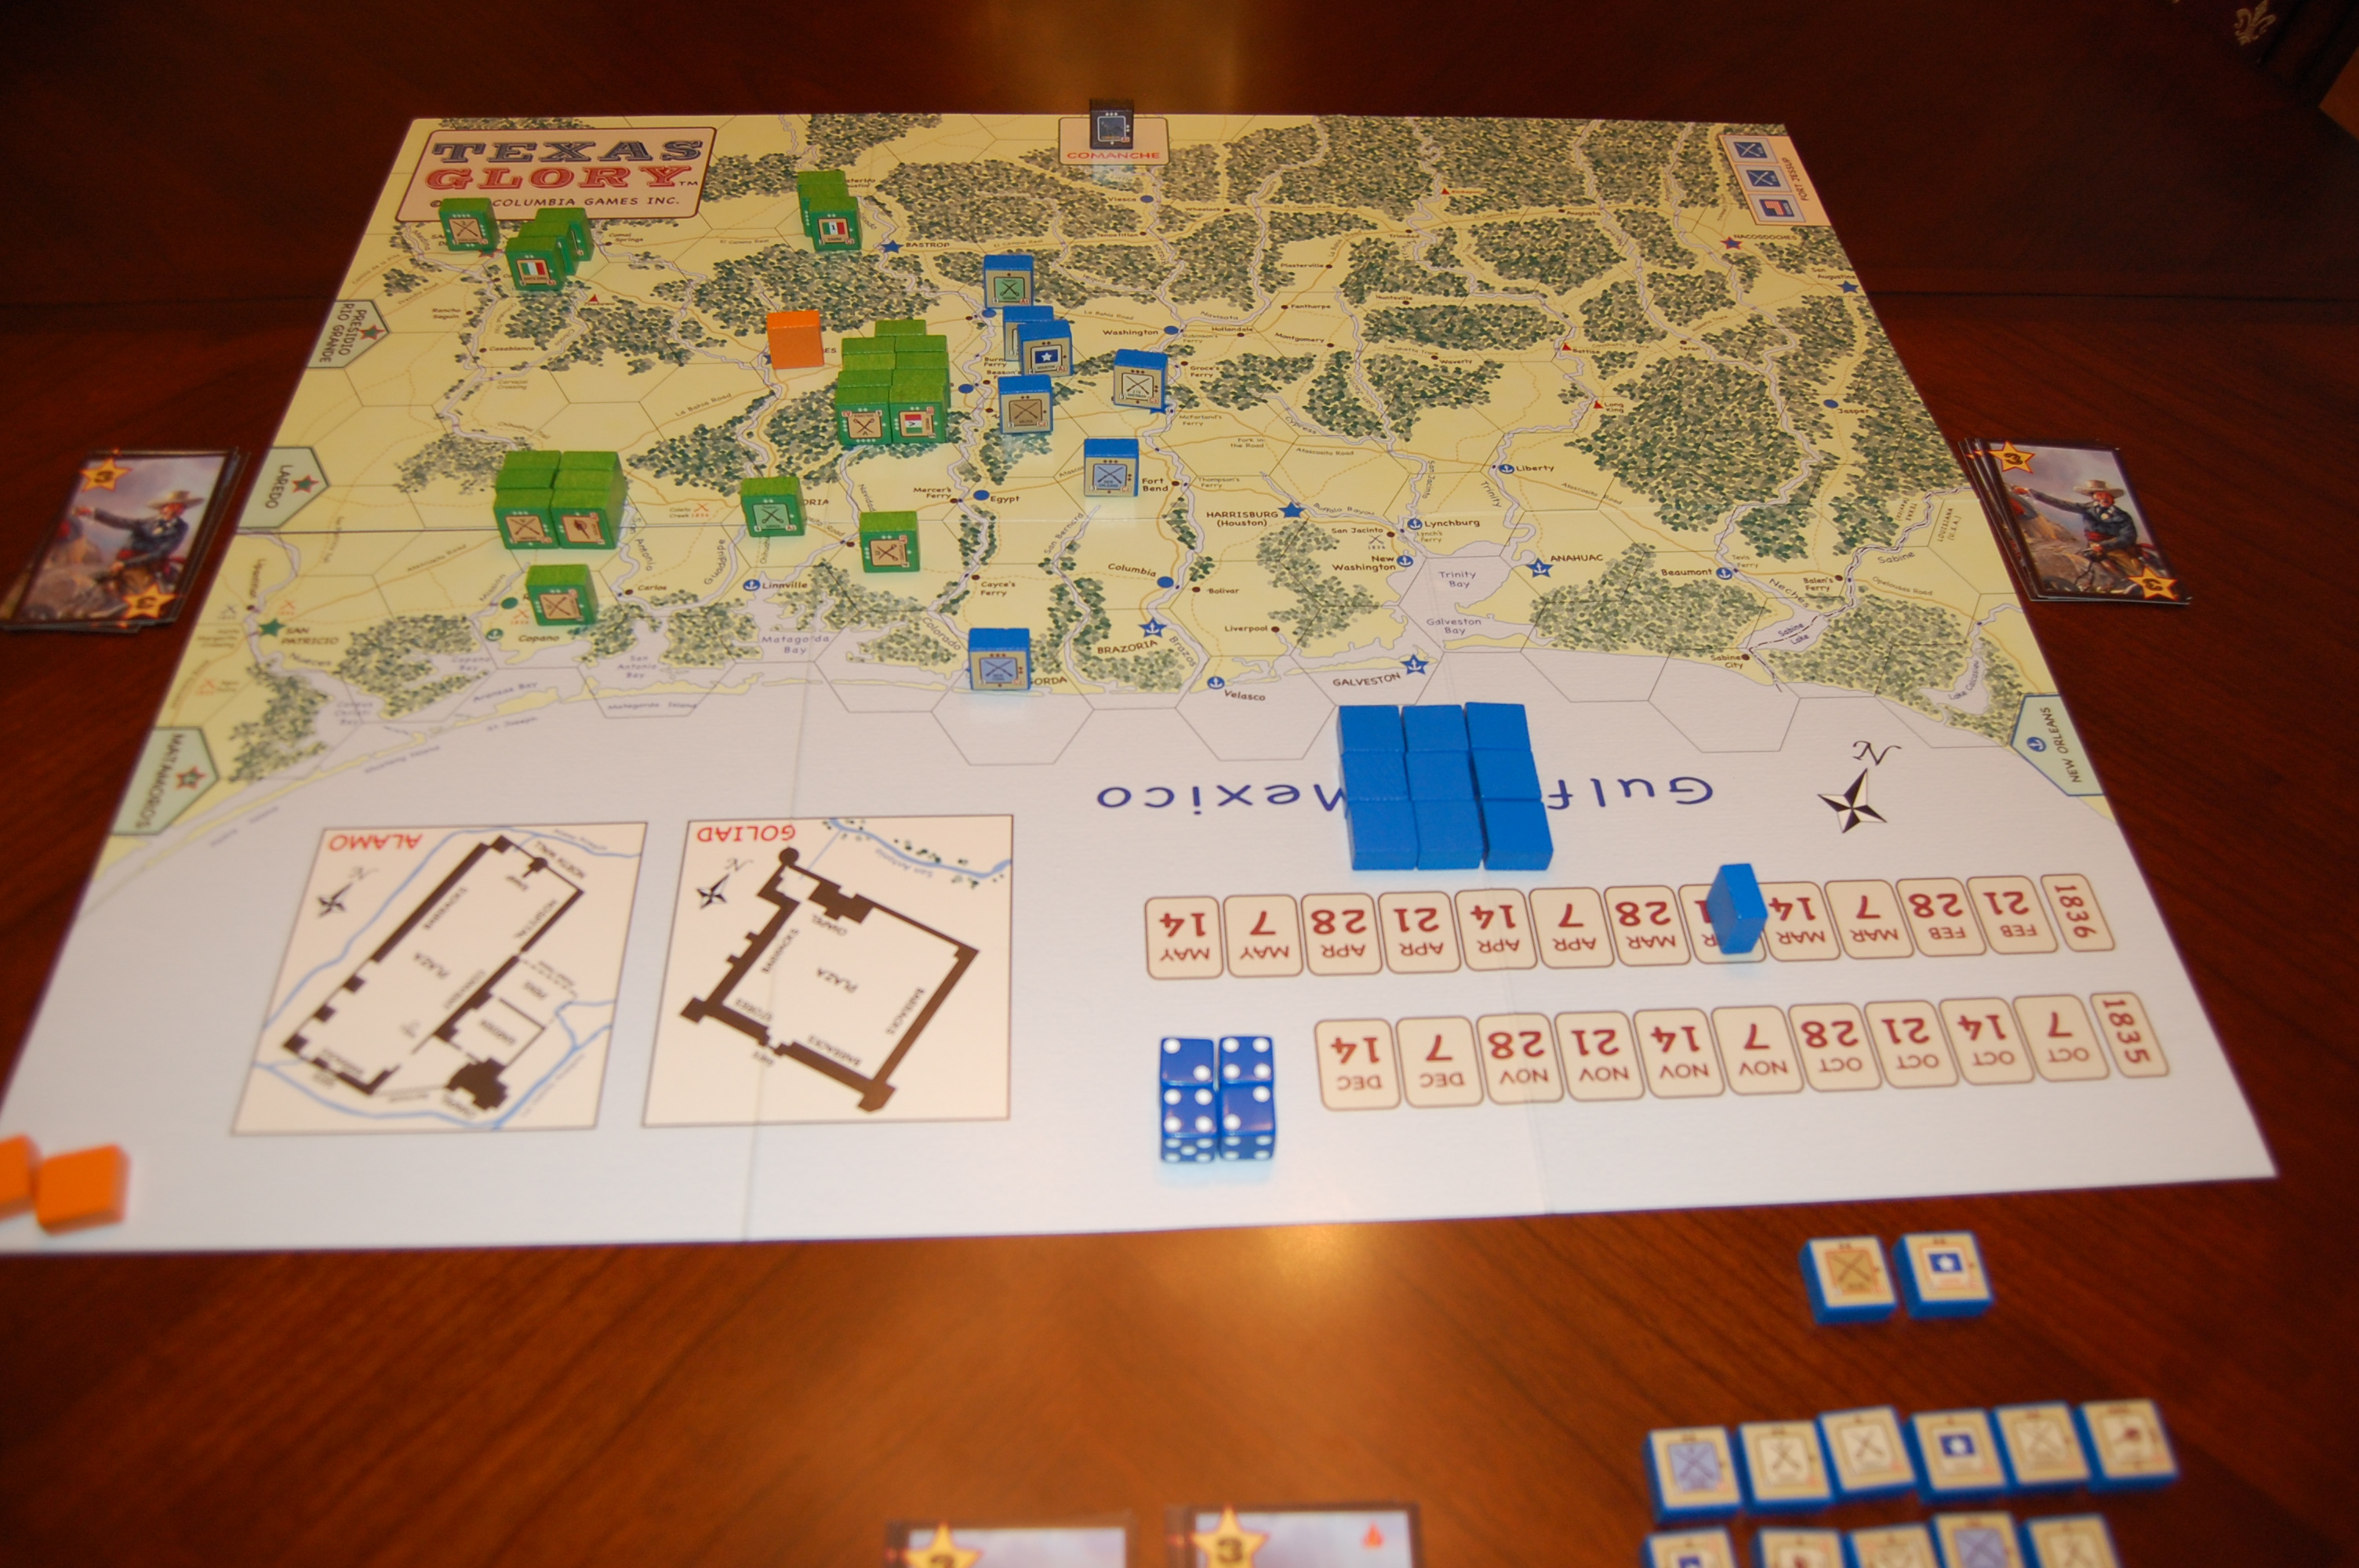
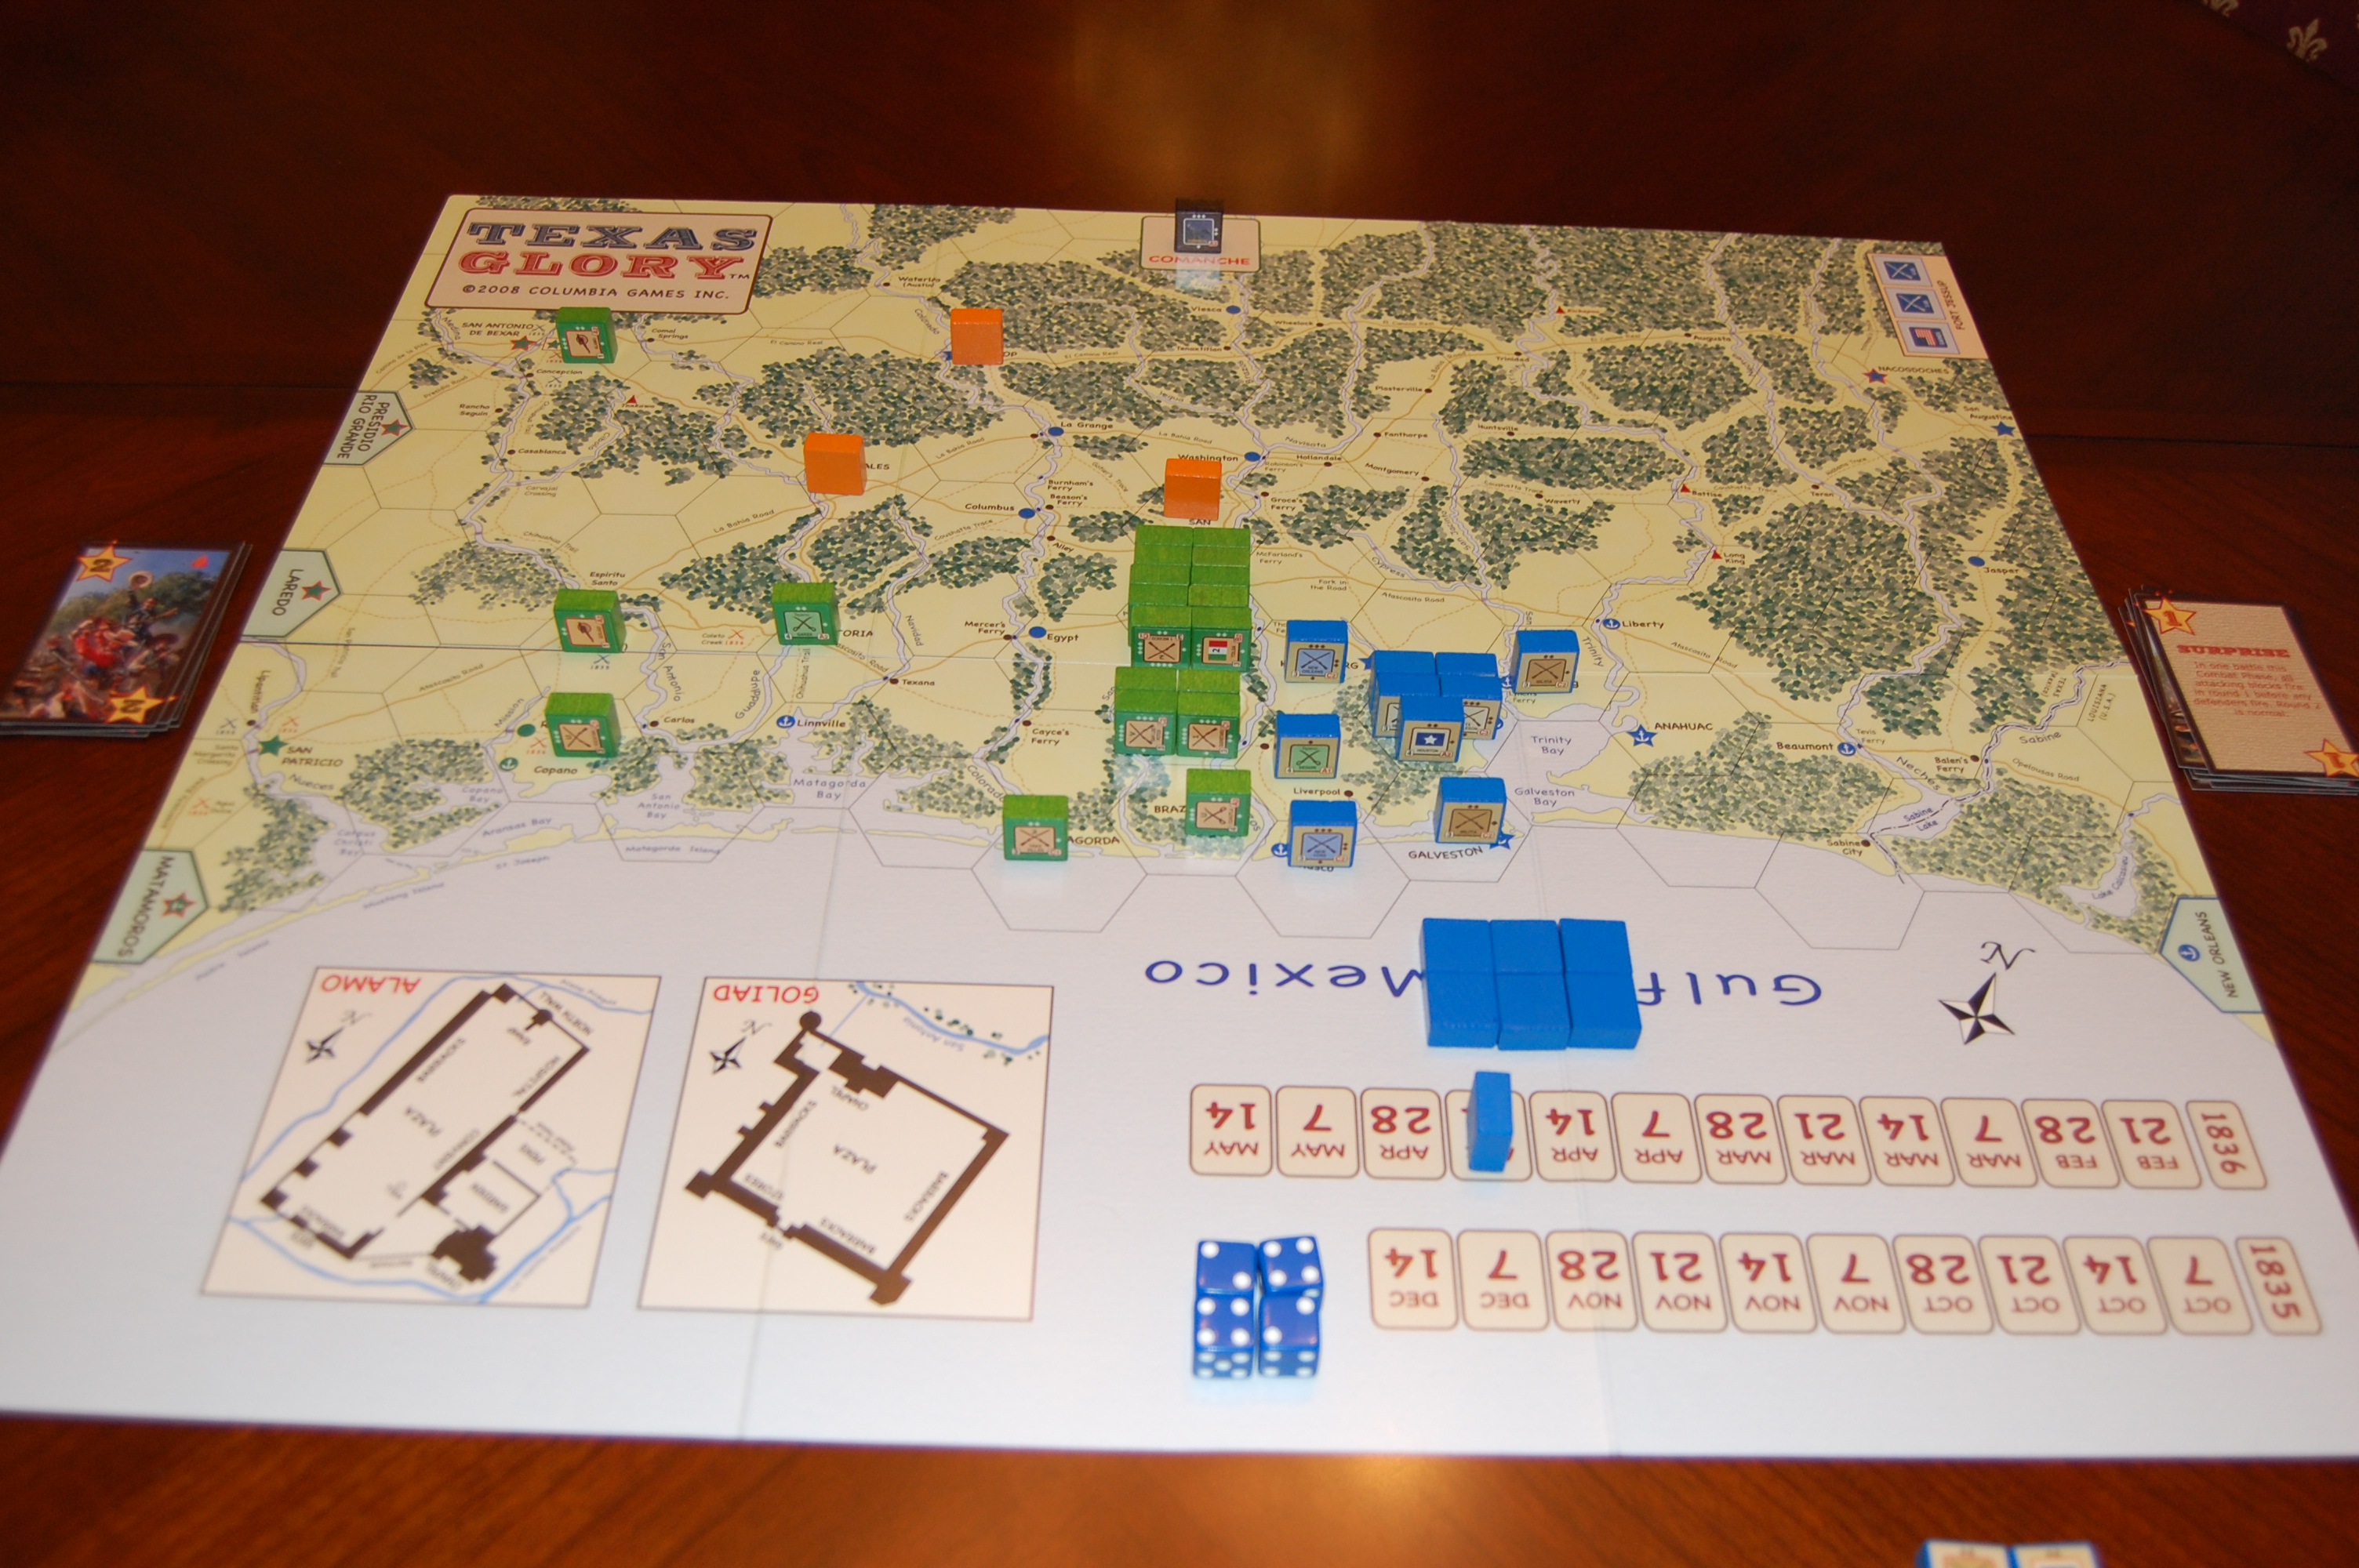
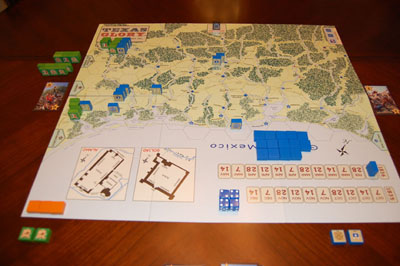
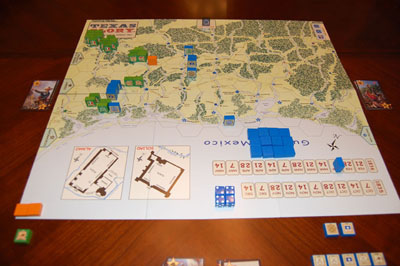
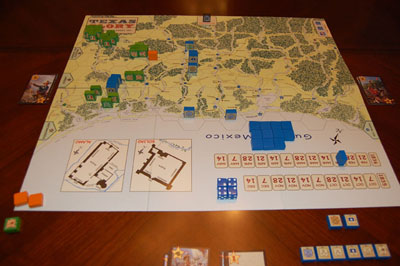
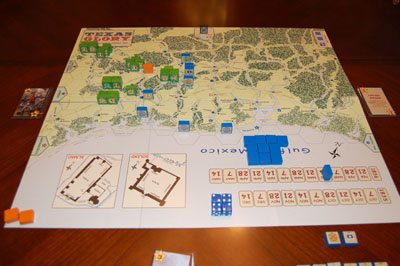
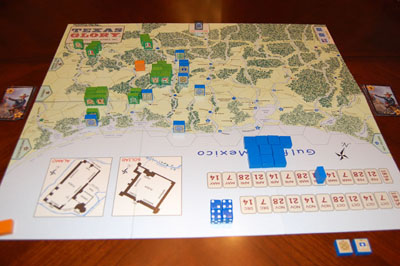
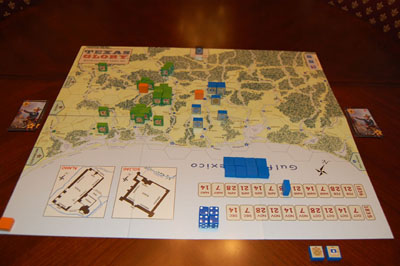
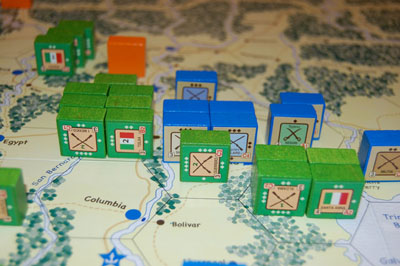
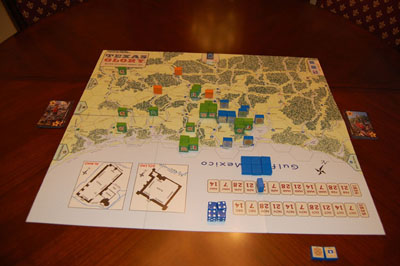
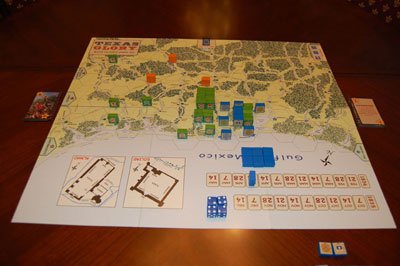
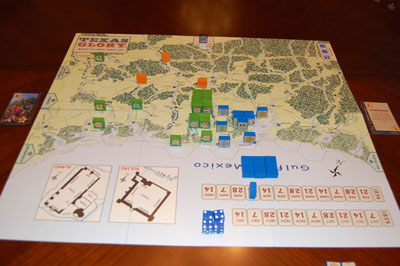
1836 Game Set up.
All
pictures can be expanded by clicking on them.
The small navies of Texas and Mexico are not represented by units in
the game, but reflected abstractly through the range limitations on sea
attacks. Historically, during the 1836 campaign, the Texan
navy did a limited amount of commerce raiding, but generally remained
at Galveston island where its primary mission was protecting the
approaches to Galveston Bay, guarding against a possible Mexican
invasion by sea. Meanwhile, the Mexican navy focused on escorting
the supply ships needed by the army, which were arriving at Copano and
Matagorda after the Mexicans retook these ports. There were
no fleet actions during the period of the 1836 campaign and only one
instance in which a Texan warship engaged a Mexican one, on April 3,
1836 (Turn 6).
The campaign history shows that one side often moved three groups or
individual units during a week, more often for the Mexicans but
sometimes for the Texans as well, and during about half of the weeks at
least two groups moved on each side, with instances of only one group
moving usually related to events. The card deck includes 3
cards with 4 CPs and 6 with 3 CPs, as well as 7 with 2 CPs, 7 with only
1 CP (including four events) and 2 0s (both of which are
events). To recreate what happened historically and enable
the players to do as much as their historical counterparts, all three
of the 4s and all six of the 3s must be used during the nine turns
played, along with five of the 2s and four of the 1s (including three
events with one action each), and neither of the 0s appearing during
the nine turns. During these nine turns, the Mexicans have some
advantage over the Texans in total actions, with 25 CPs for the
Mexicans to 19 CPs for the Texans. The historical Texans, in game
terms, have a particularly weak hand in the initial turns, reflected in
the passive behavior of Fannin who allows himself to be outmaneuvered
and destroyed by Urrea. However, a player’s choice to use his
better cards in the early and mid game, as the historical Mexicans do
in game terms, has significant consequences for his end game. Had
the campaign continued past Turn 9, in game terms there would have been
a dramatic slowing in the pace of the Mexican advance, with the best
cards nearly exhausted and the Mexicans struggling to sustain their
movement toward the final objectives in the last three turns. In
real life it is likely that this would have happened as well, as the
Mexicans encountered increasing difficulty continuing their campaign
deeper into Texas due to supply, exhaustion and political
concerns. Even without the decisive victory at San Jacinto or
timely American intervention, the Texans would have had a good prospect
of winning the campaign simply by holding onto the last victory
objectives, and forcing the Mexicans to negotiate a
peace.
Turn 1 (February 21) - The
Arrival of Santa Anna and the Battle of San Patricio.
The Mexican plays a 2 CP card and the Texan a 1. The Mexican has
the initiative and makes two group moves, activating the Santa Anna and
Urrea leaders: 1) Santa Anna, with Sesma, Dolores, Jimenez, Matamoros,
and San Luis Potosi, advance from Presidio Rio Grande to San Antonio
and the Alamo, most of the Mexican units moving to the Alamo (across
two separate fords) while Santa Anna remains in San Antonio with
Dolores; 2) Urrea, with Cuautla and Yucatan, and the Tejano Garza
advance from Matamoros to San Patricio (across two separate
fords).
Historically, the Garza
Tejano
unit was really forming up and growing in strength over the course of
the first three turns as Tejanos loyal to Mexico joined Urrea’s forces,
but its entry has been simplified for game purposes.
The Texan makes one individual move, sending Kimball from Gonzales to
reinforce the Alamo.
Historically this move
occurred
in the following week a few days before the Alamo was stormed, and if
the Texans were to get the first move on turn 2, Kimball as a cavalry
unit could try to enter the fort then as well, by moving into the Alamo
hex and then retreating inside, at the risk of taking fire from any
Mexican cavalry besieging the fort.
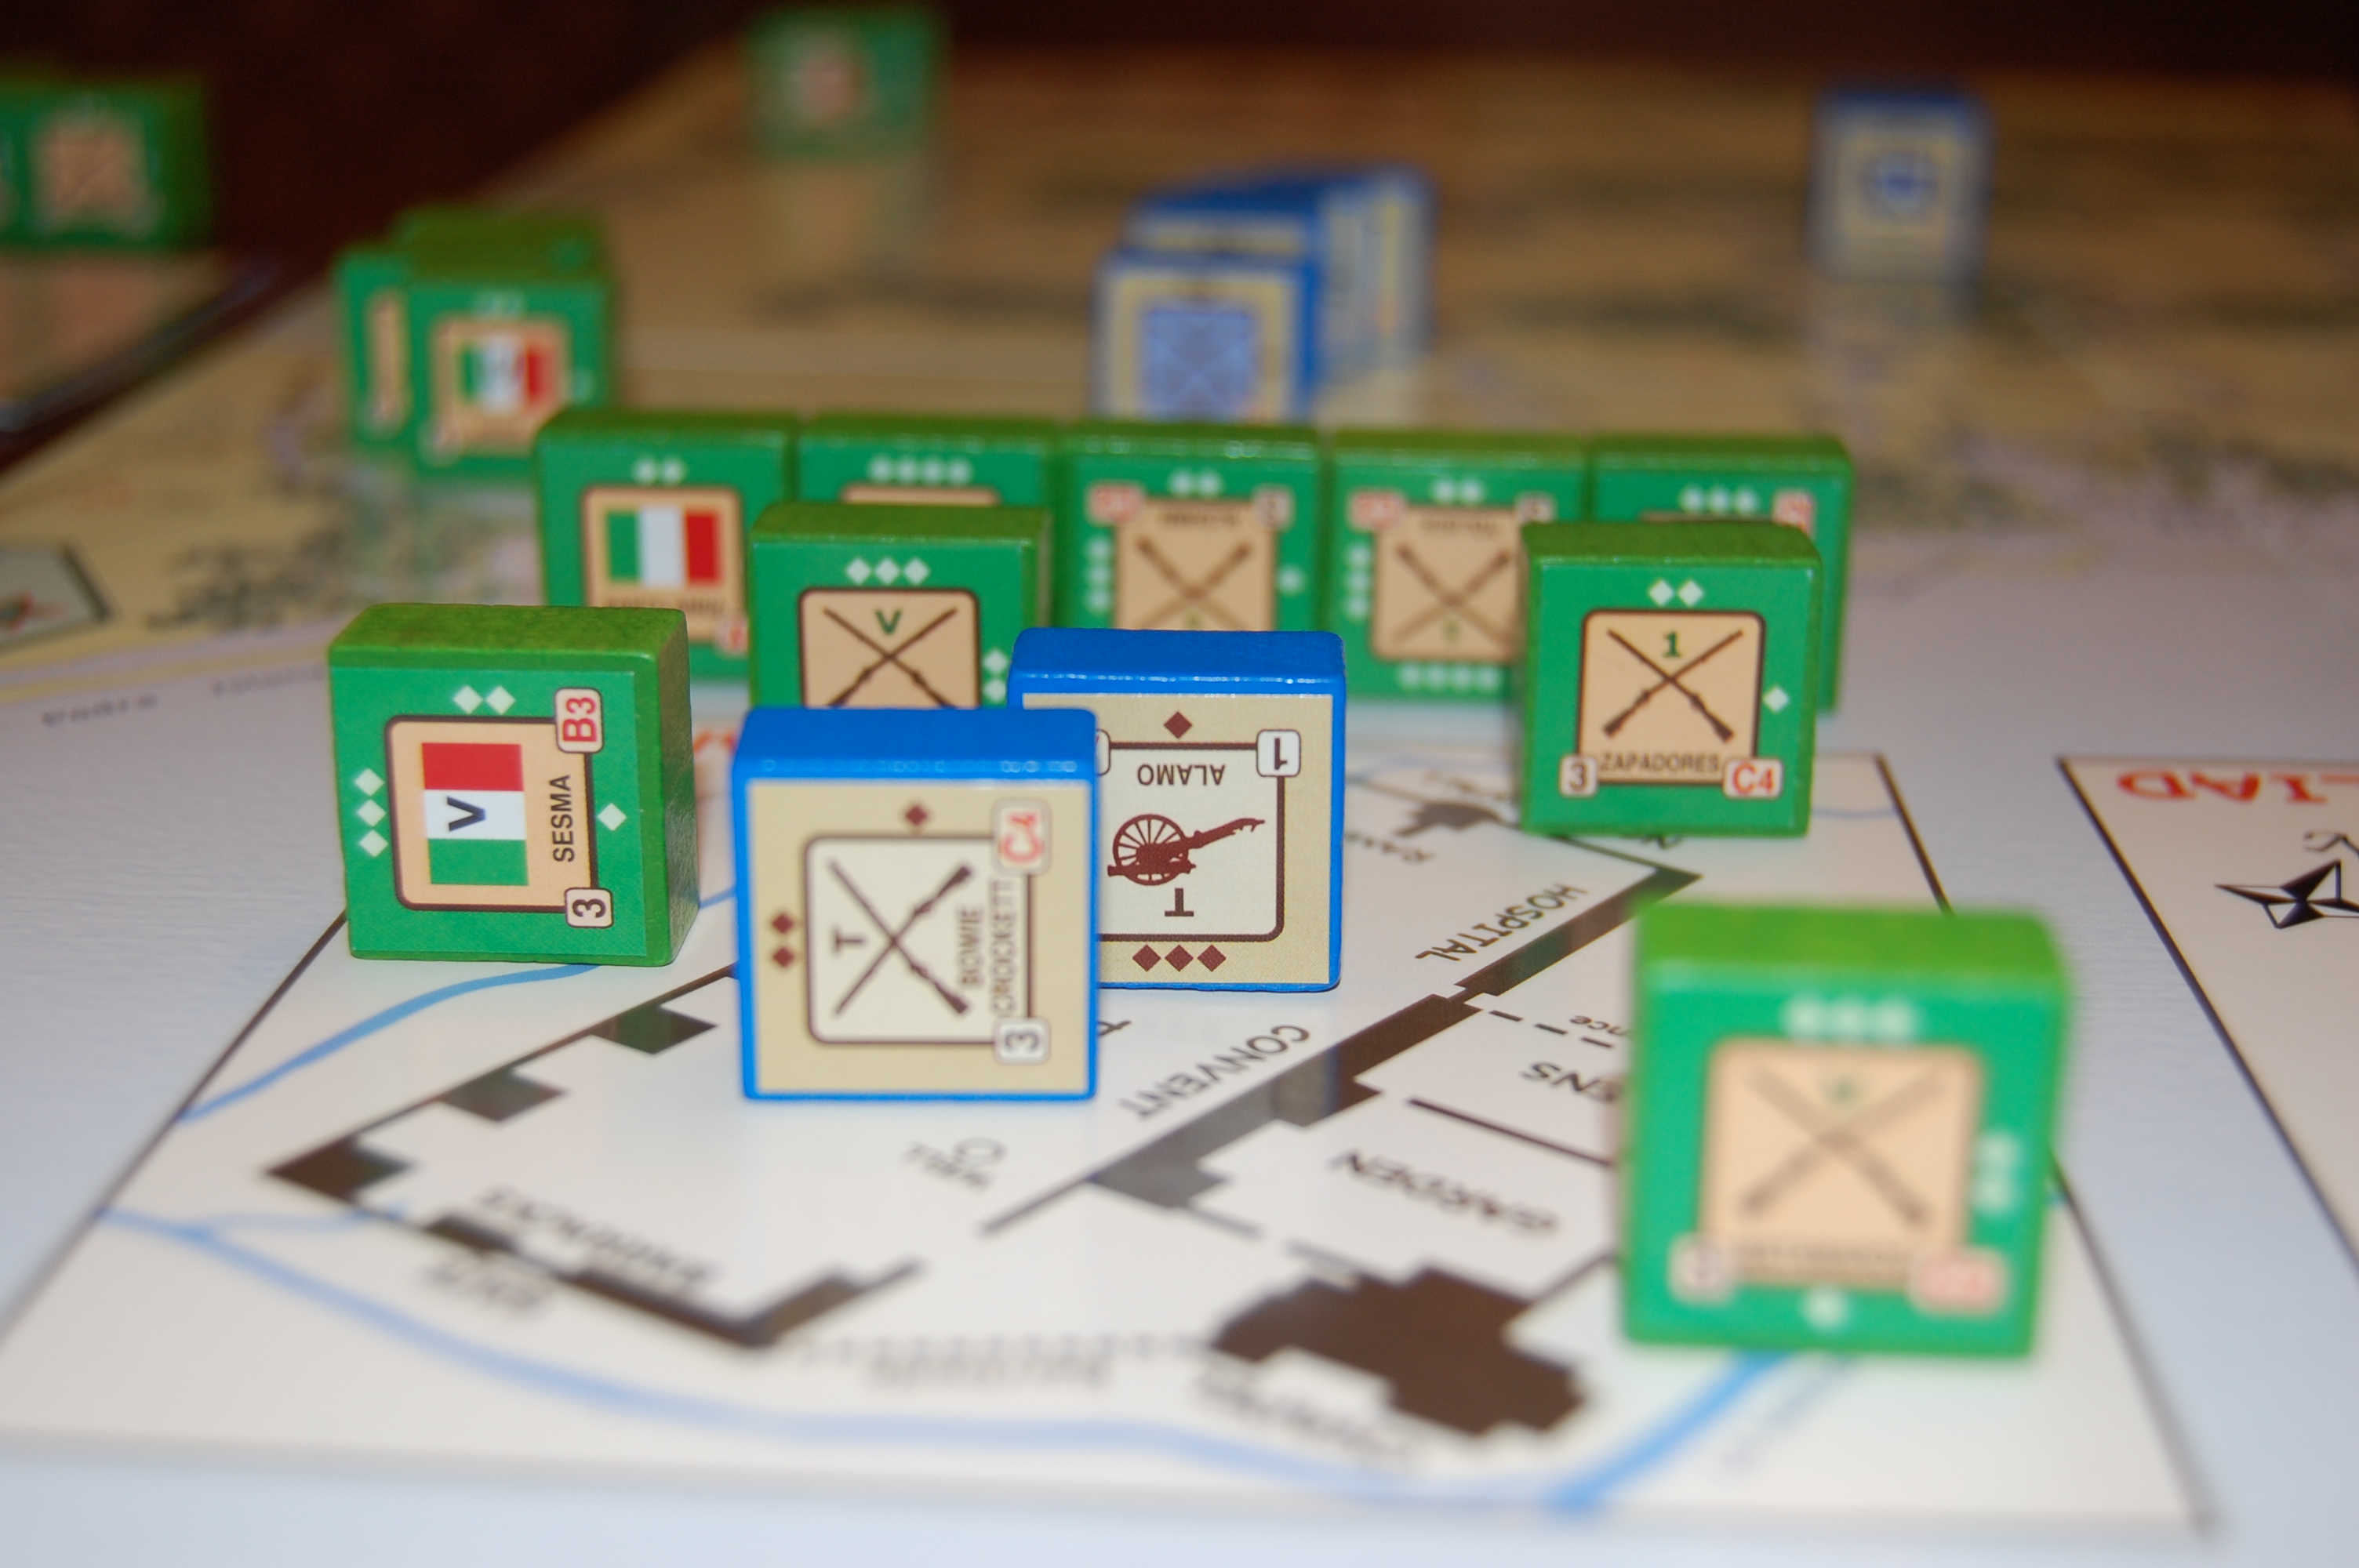
The Texans at the Alamo, including Kimball, decline battle and withdraw
into the mission fort with all four blocks there, and are
besieged. The Mexican passes on siege combat, while the Texan
then initiates a cannonade for one round against the Mexicans with the
Alamo Artillery (3 steps) and Travis (1 step), receiving counterbattery
fire from Sesma (3 steps); no hits are inflicted on either side (the
Mexicans would need two hits to inflict one on the Alamo defenders due
to double defense). At San Patricio, Urrea (2 steps), Cuautla (3
steps), Garza (2 steps) and Yucatan (3 steps) attack Grant (2 steps,
and the Cuautla and Garza cavalry and Urrea (all As) fire first and
destroy the Texan B unit before it can retreat with no loss to
themselves.
Historically, the
elimination
of this scattered Texan force took place in two battles, one at San
Patricio at the end of this week that destroyed half of the force, and
one early in the following week nearby at Agua Dulce that destroyed the
other half.
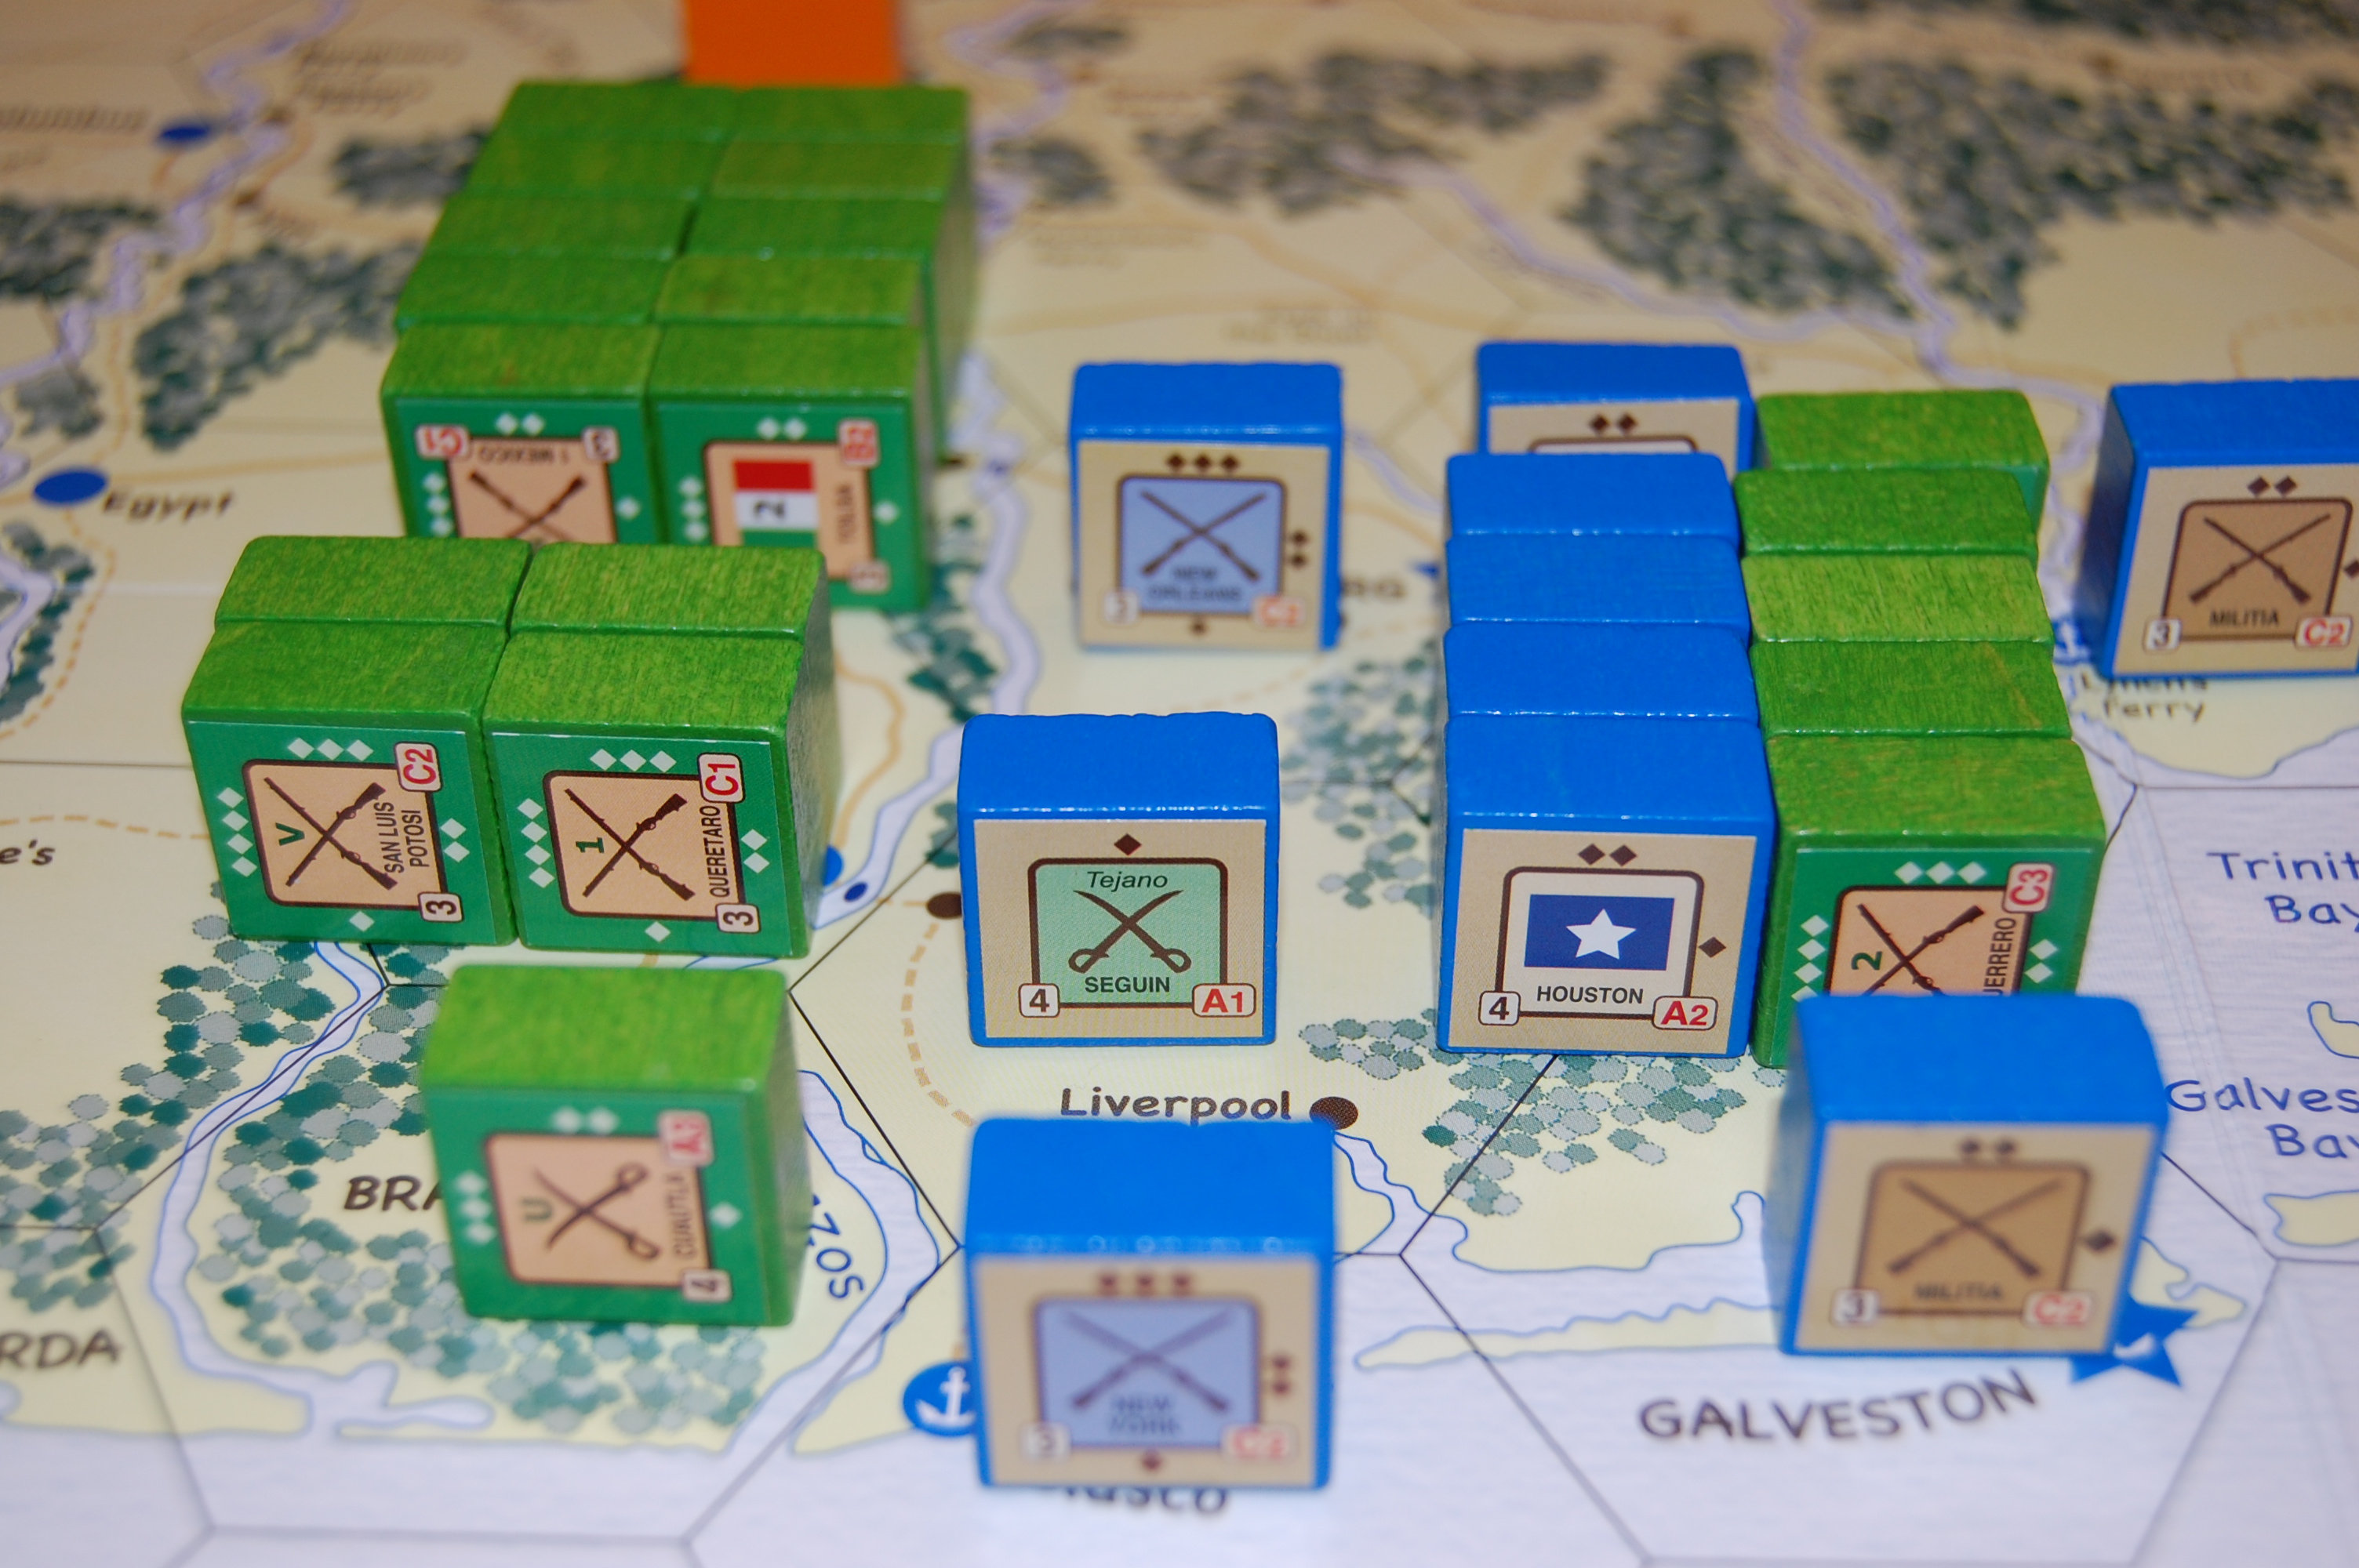
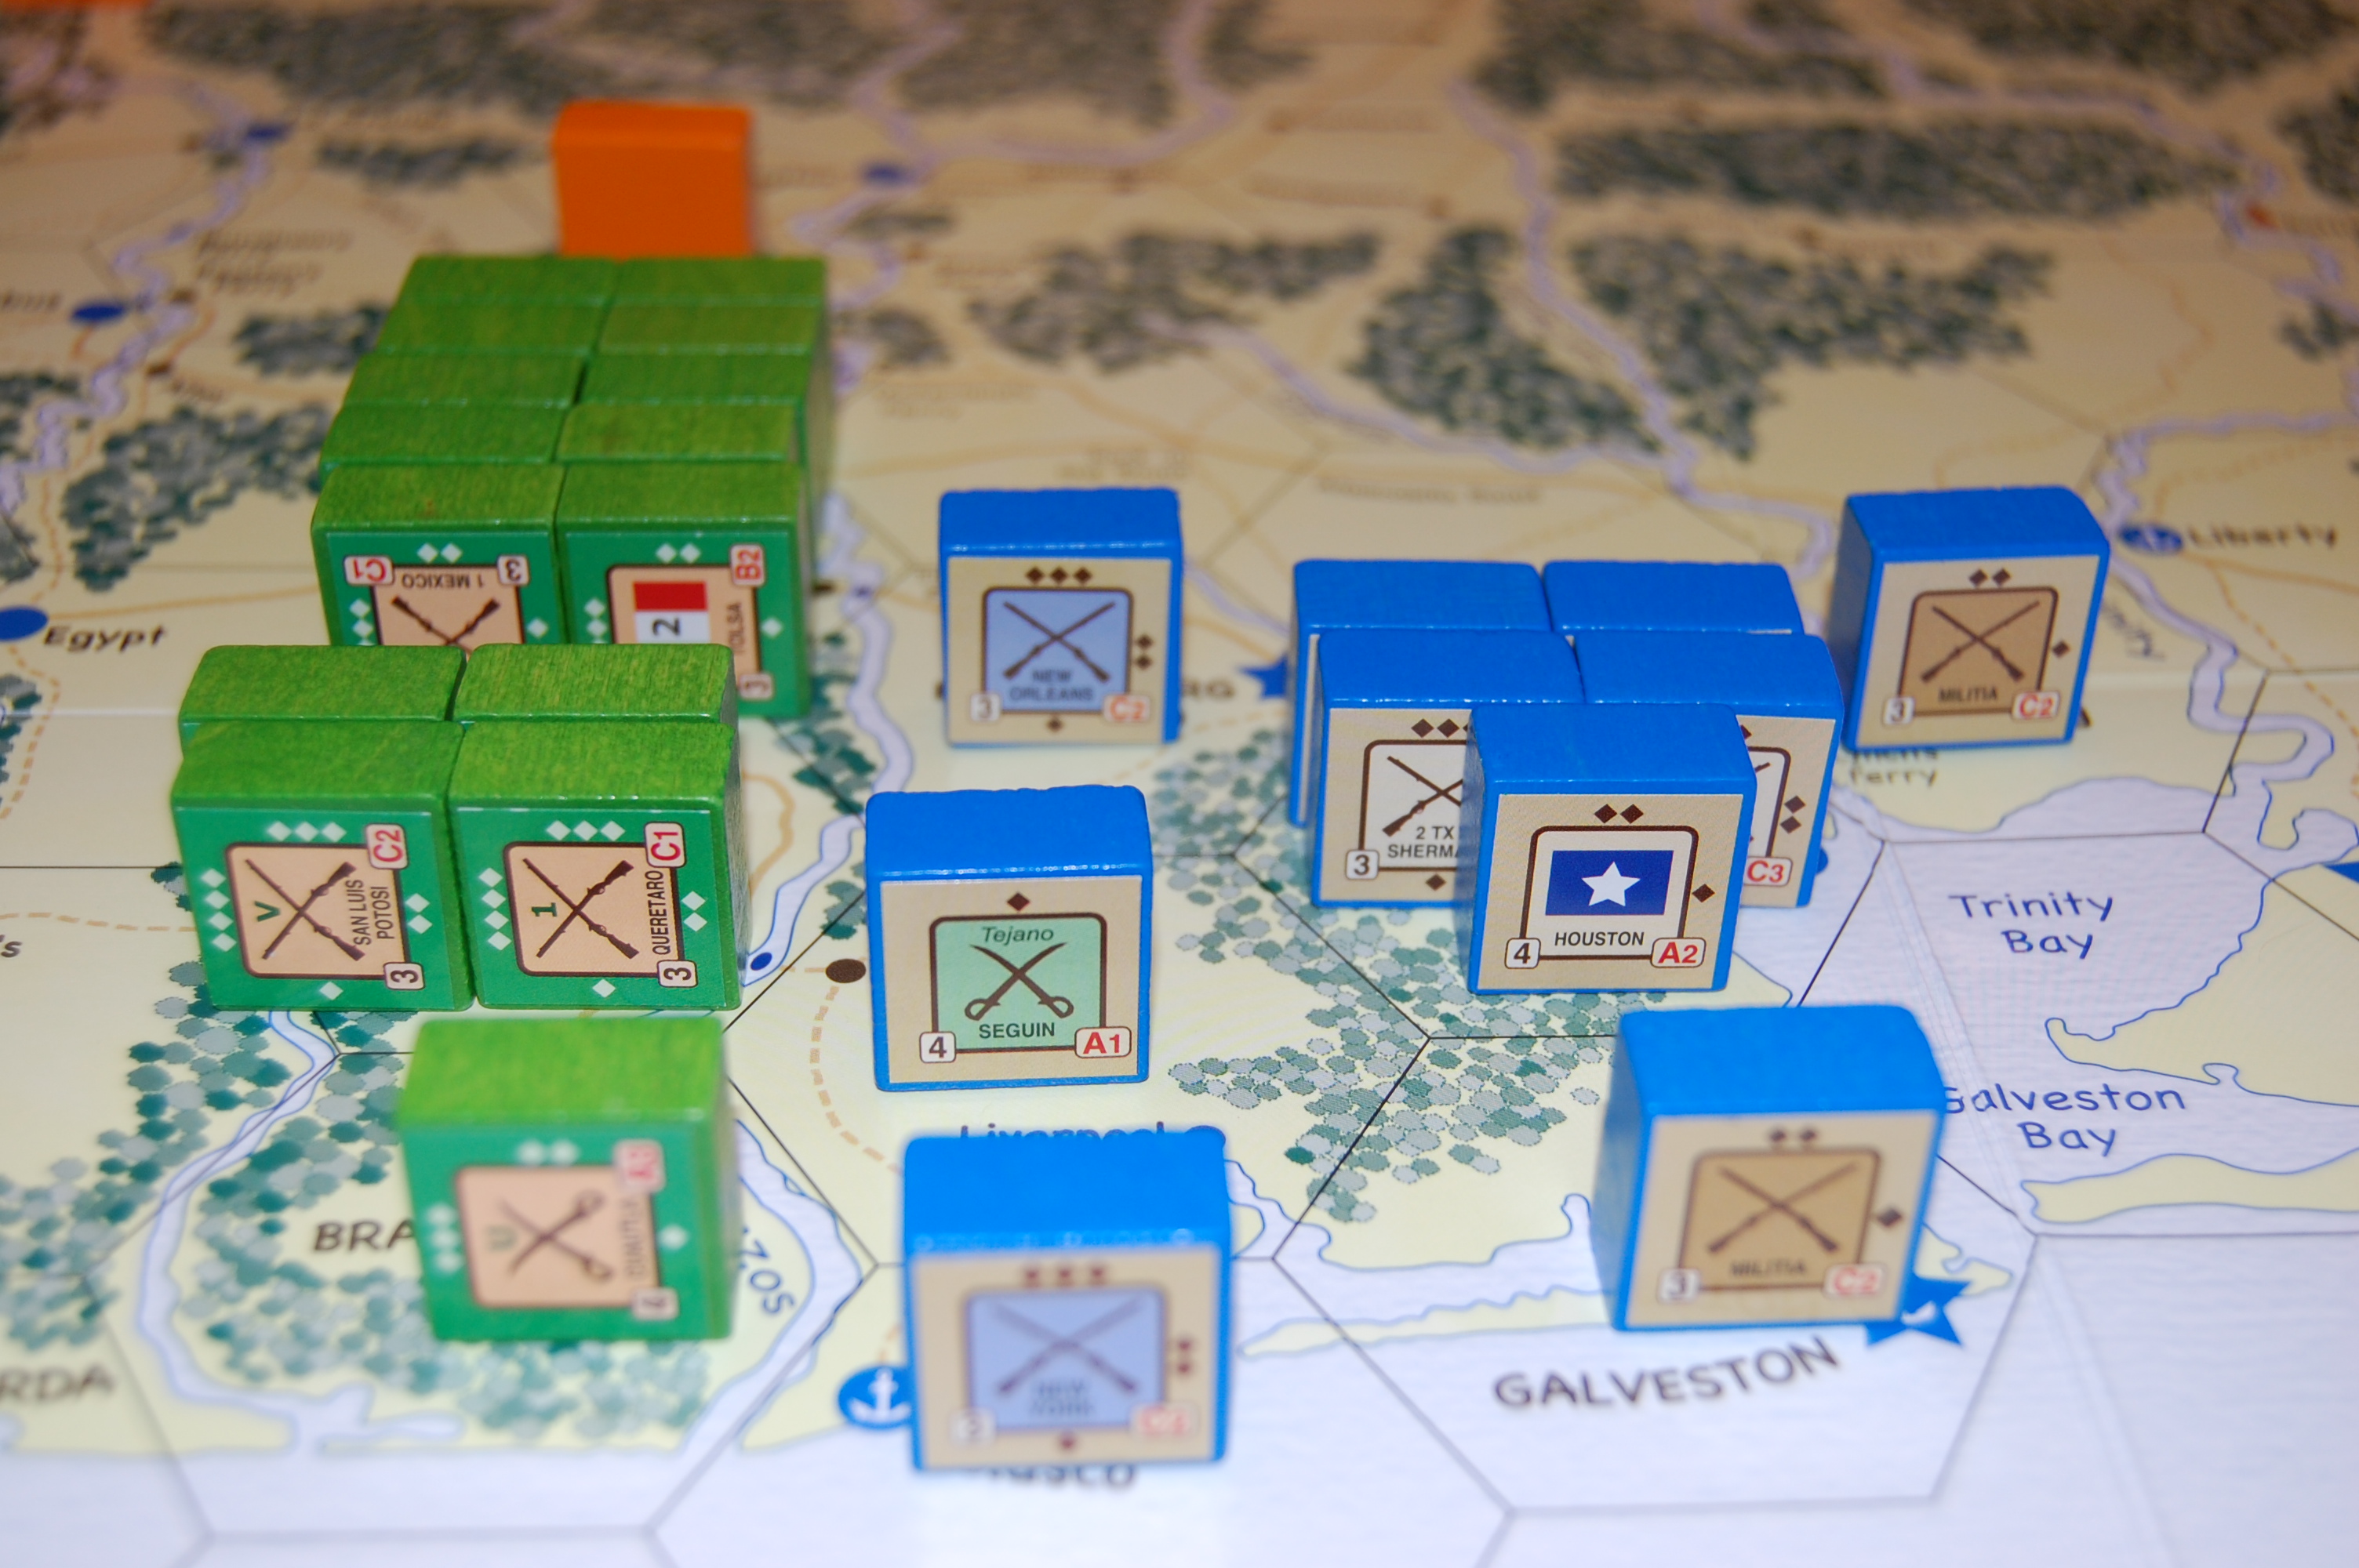
Both the Mexicans at the Alamo (1 over supply limits) and the Texans
inside (2 over supply limits) face the risk of supply attrition but
suffer no losses. Gaona’s brigade, with Aldama, Toluca,
Zapadores, Guanajuato and Queretaro, becomes available in the Presidio
Rio Grande box for the Mexicans, while the Texans receive their Seguin
Tejano cavalry unit (1 step) at Gonzales.
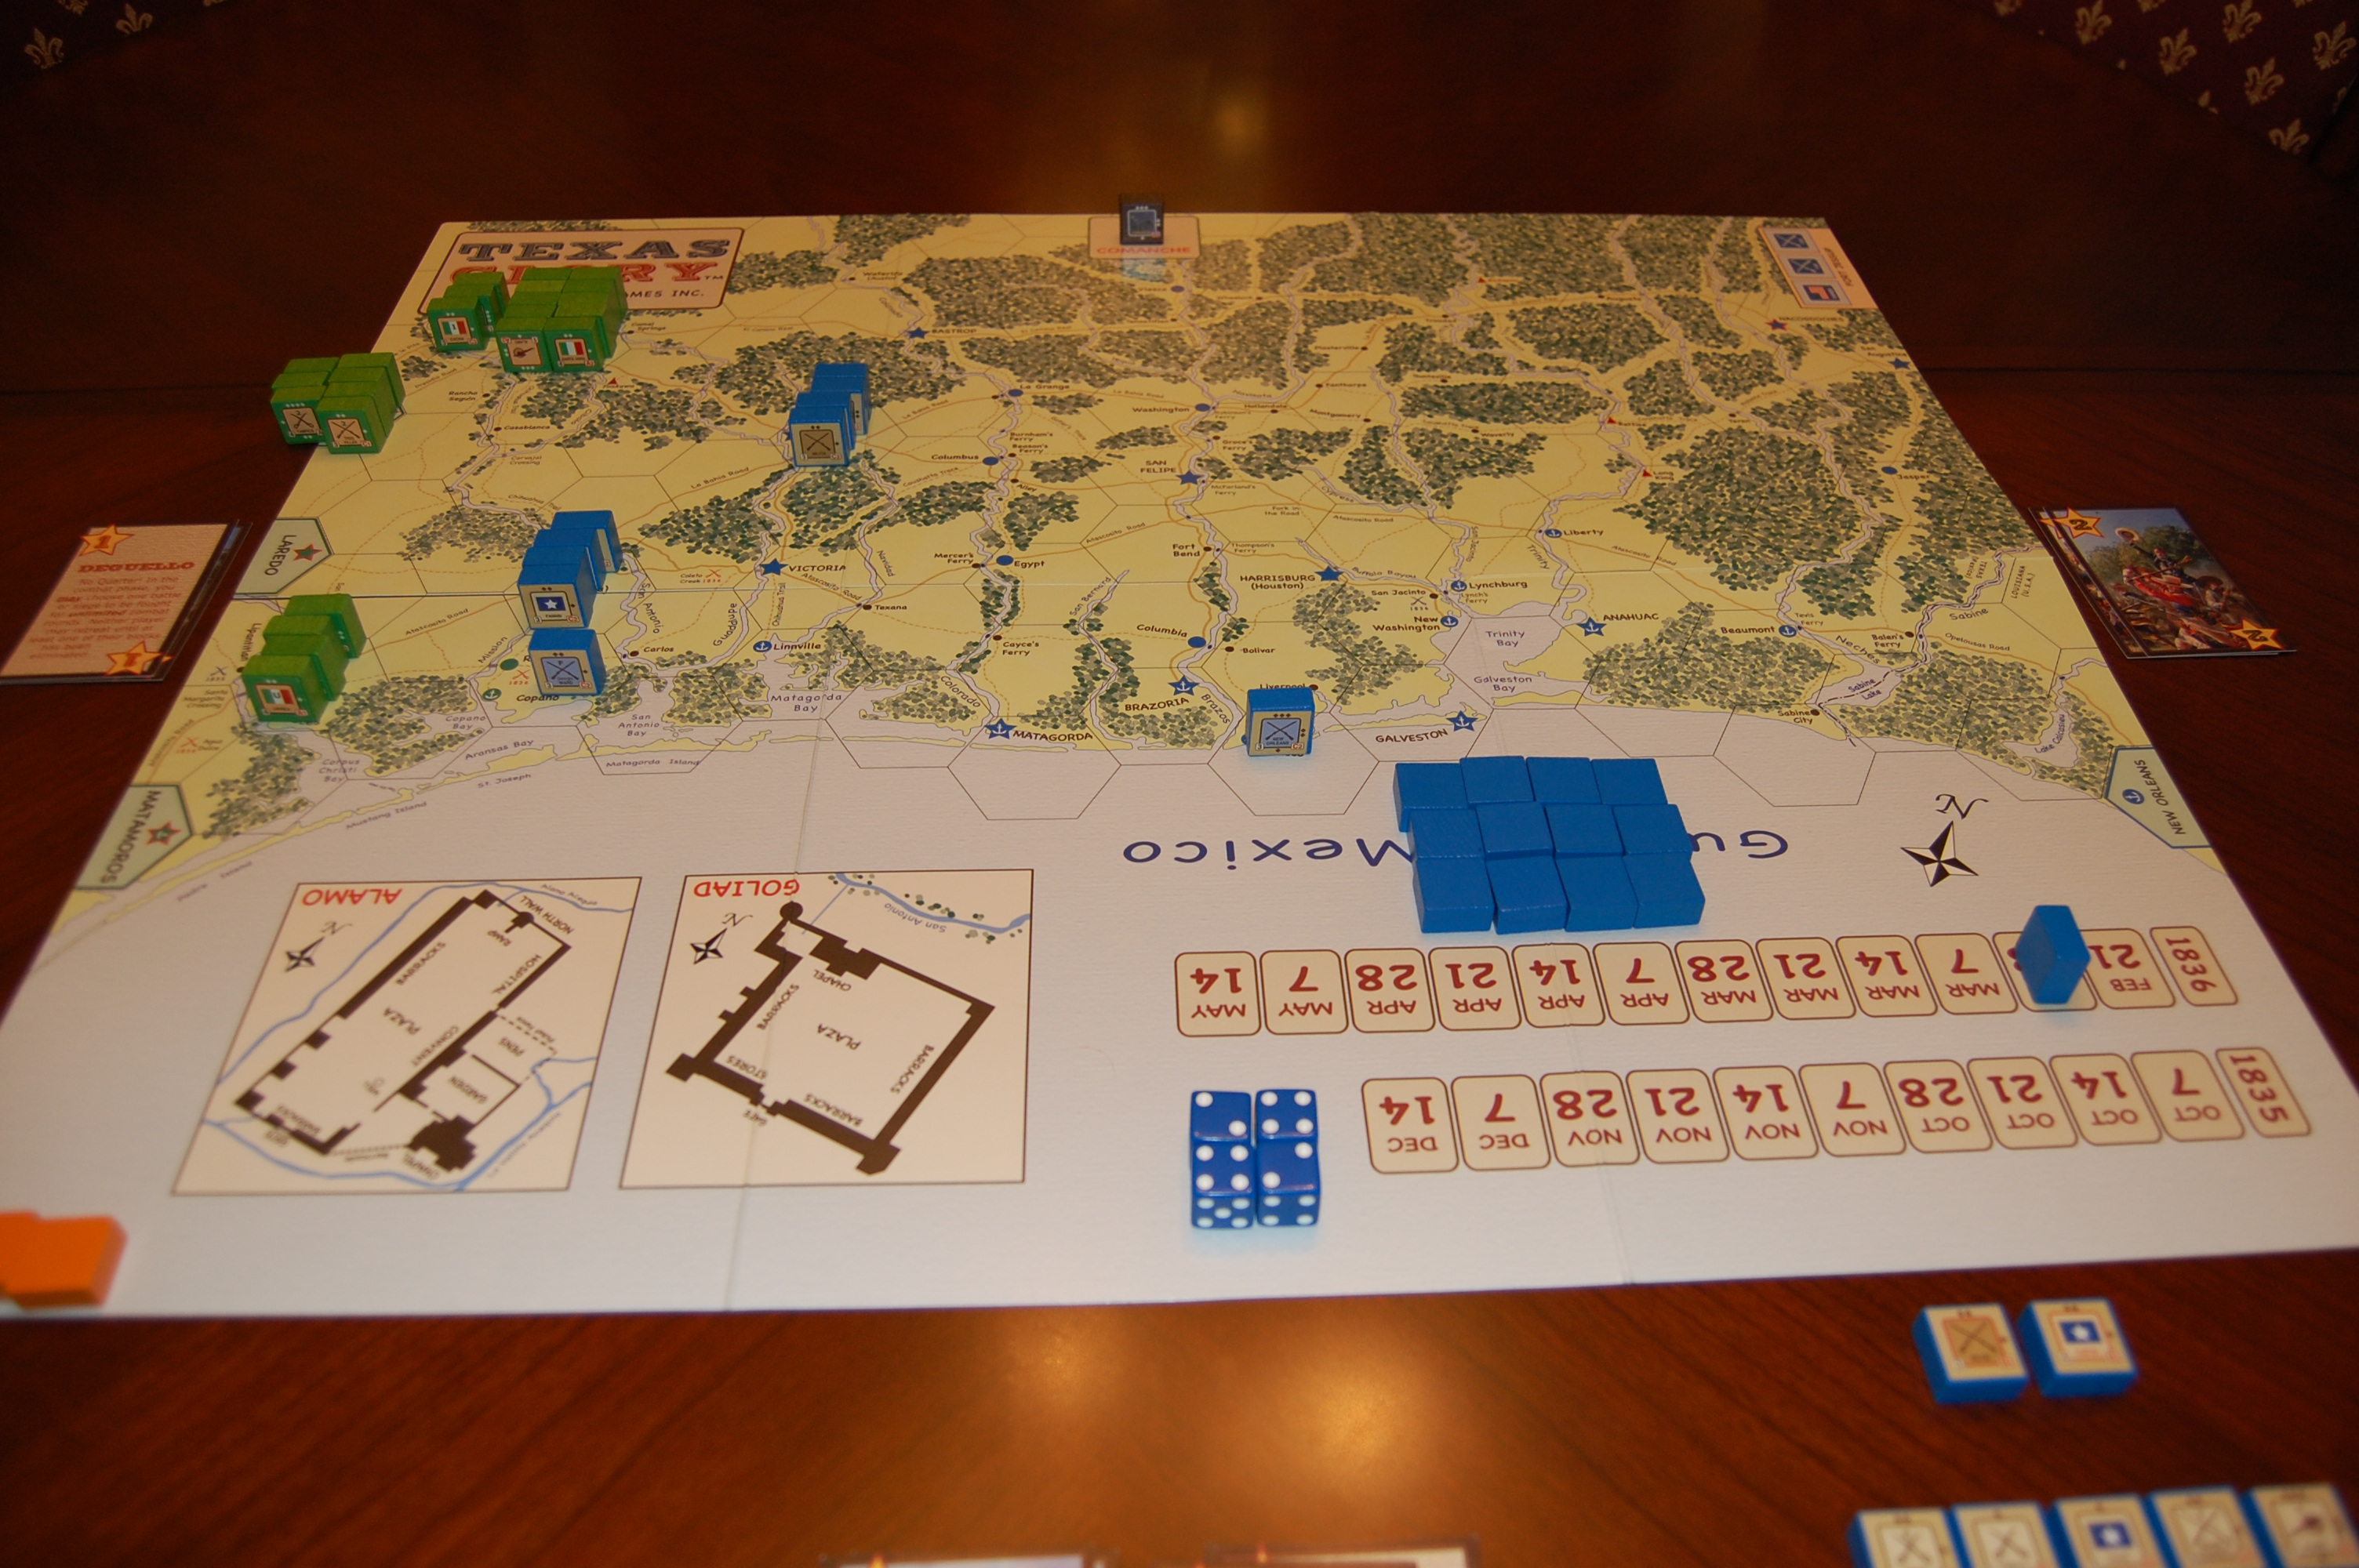
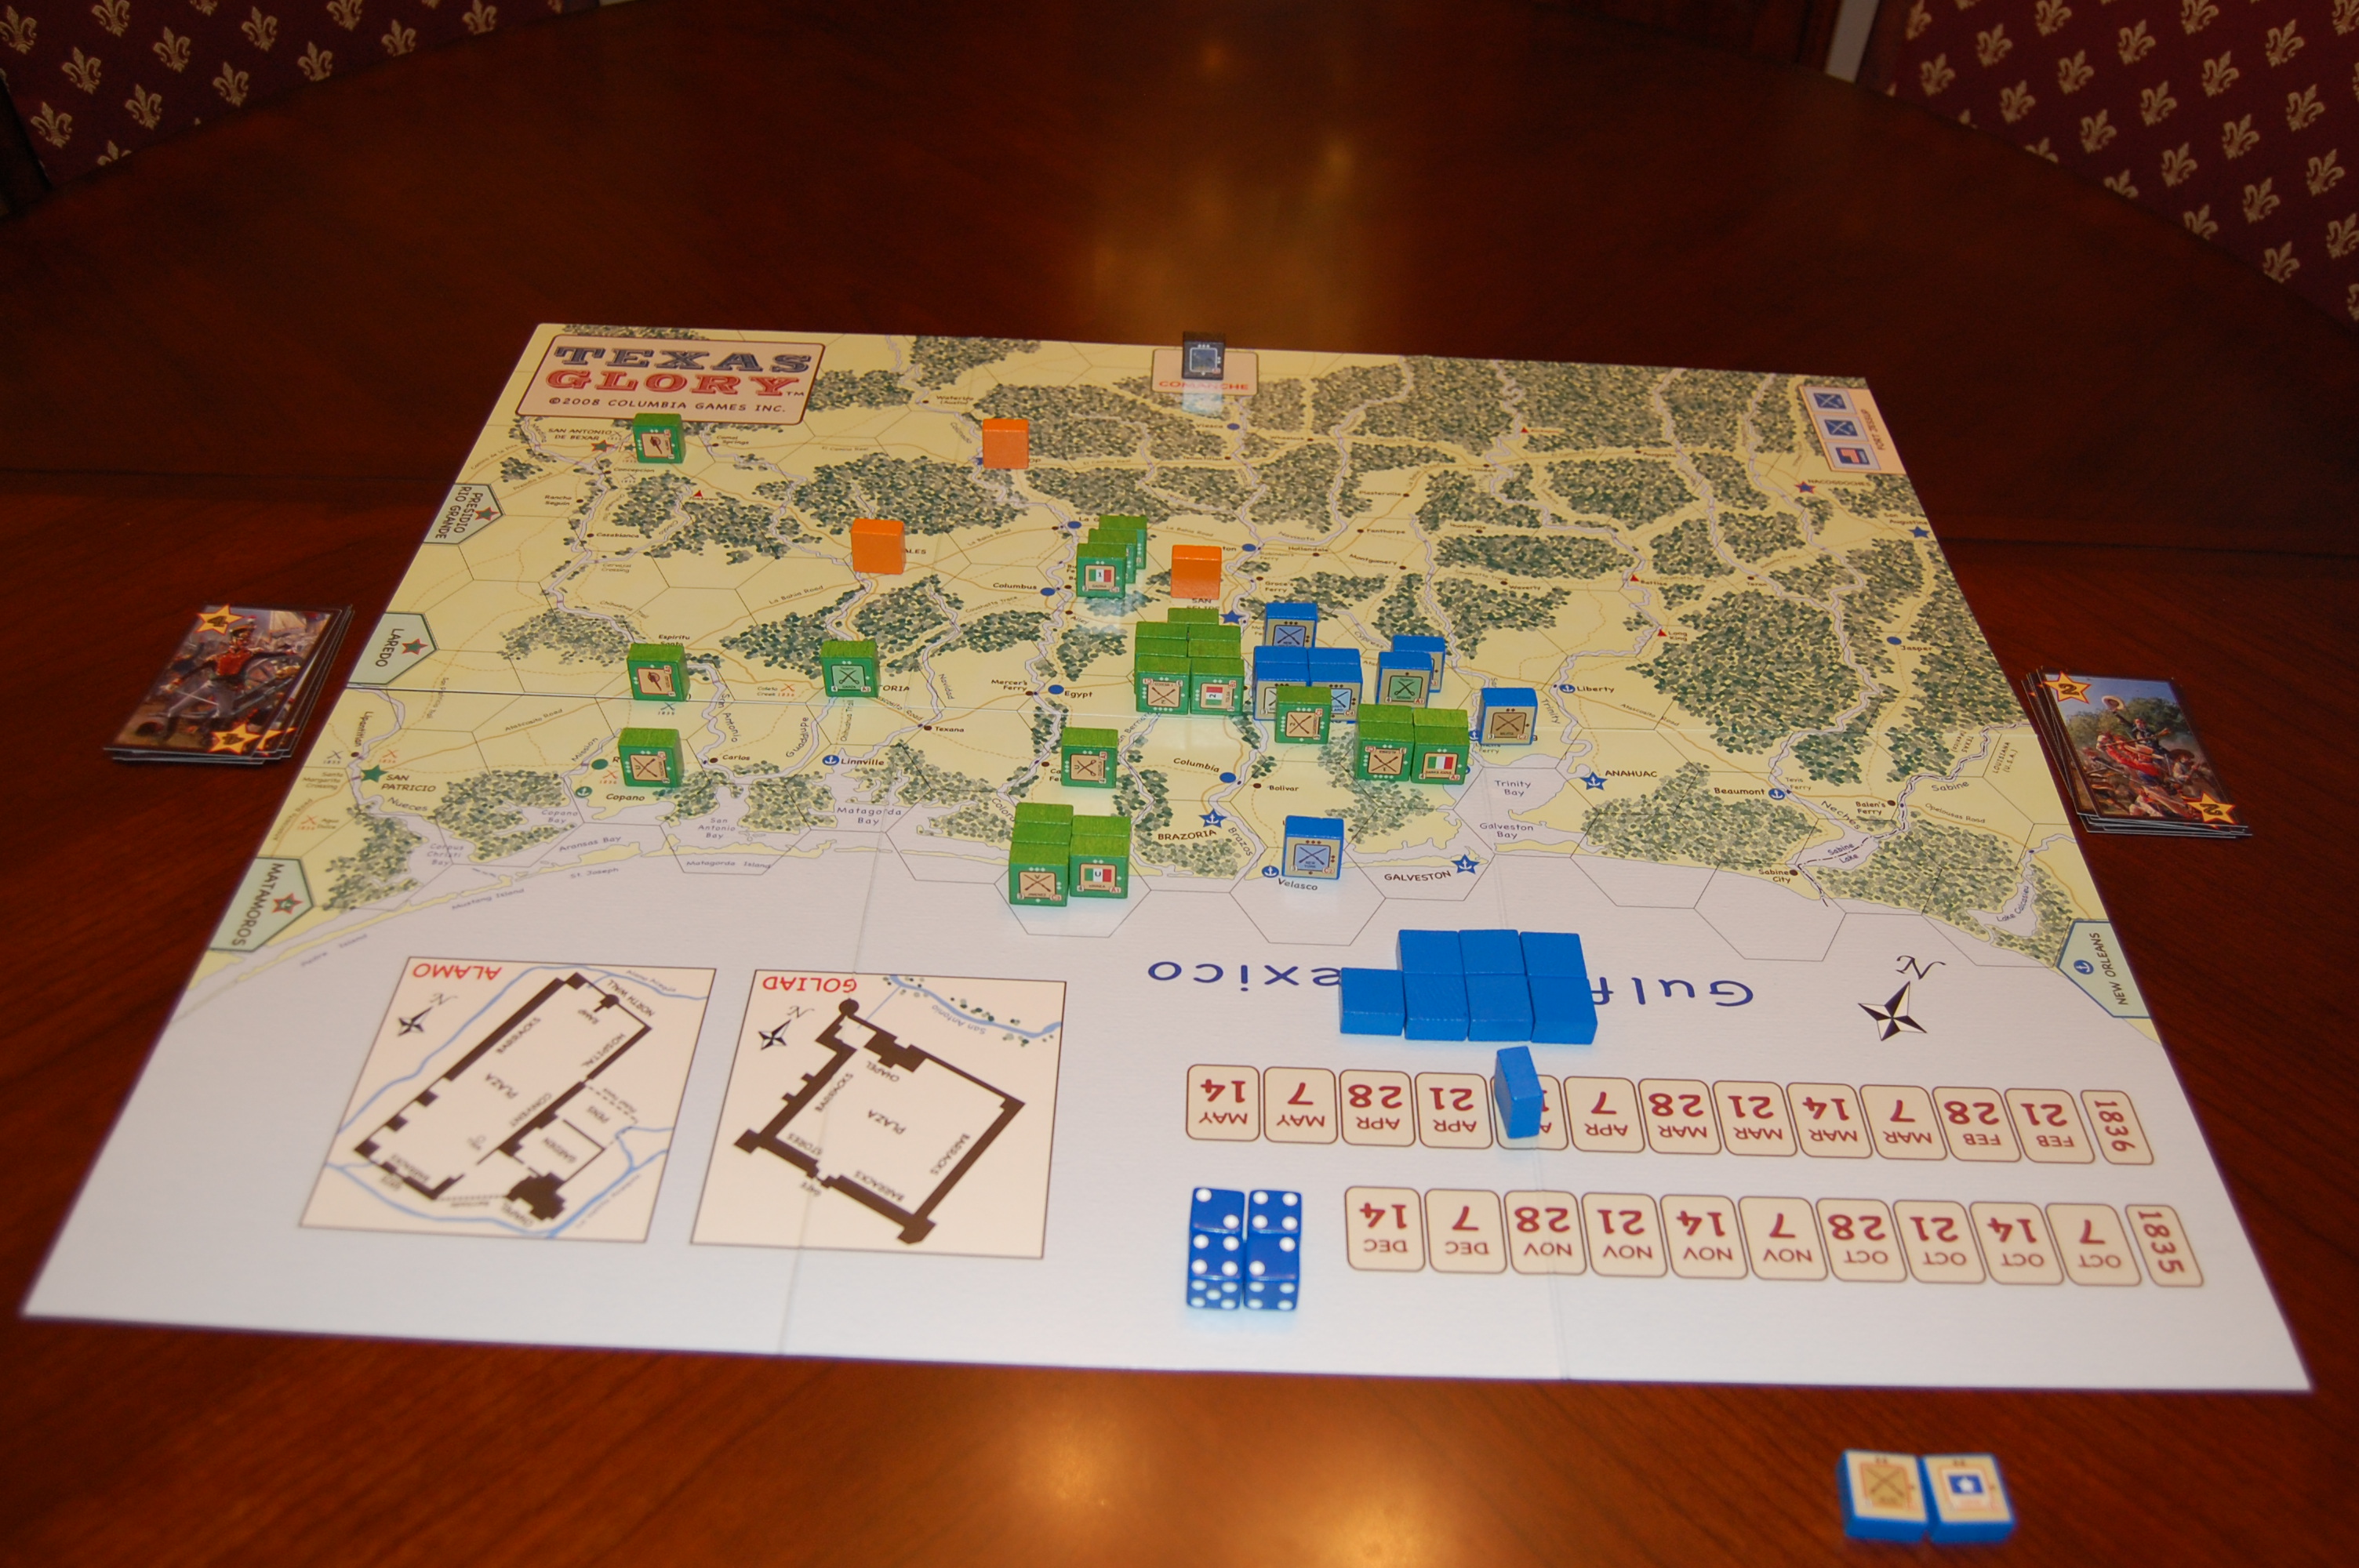
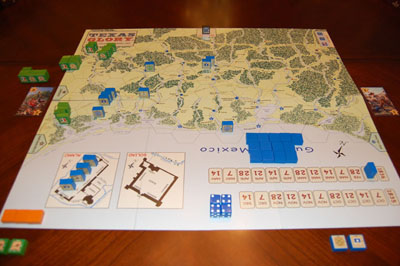
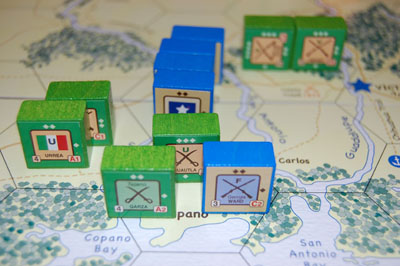
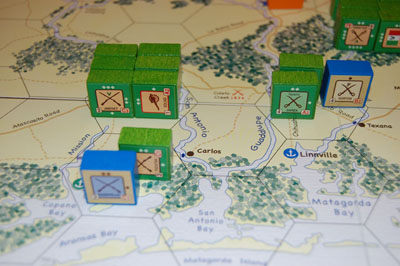
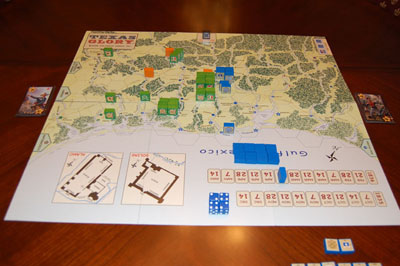
| 1836
Turn 1 Movement |
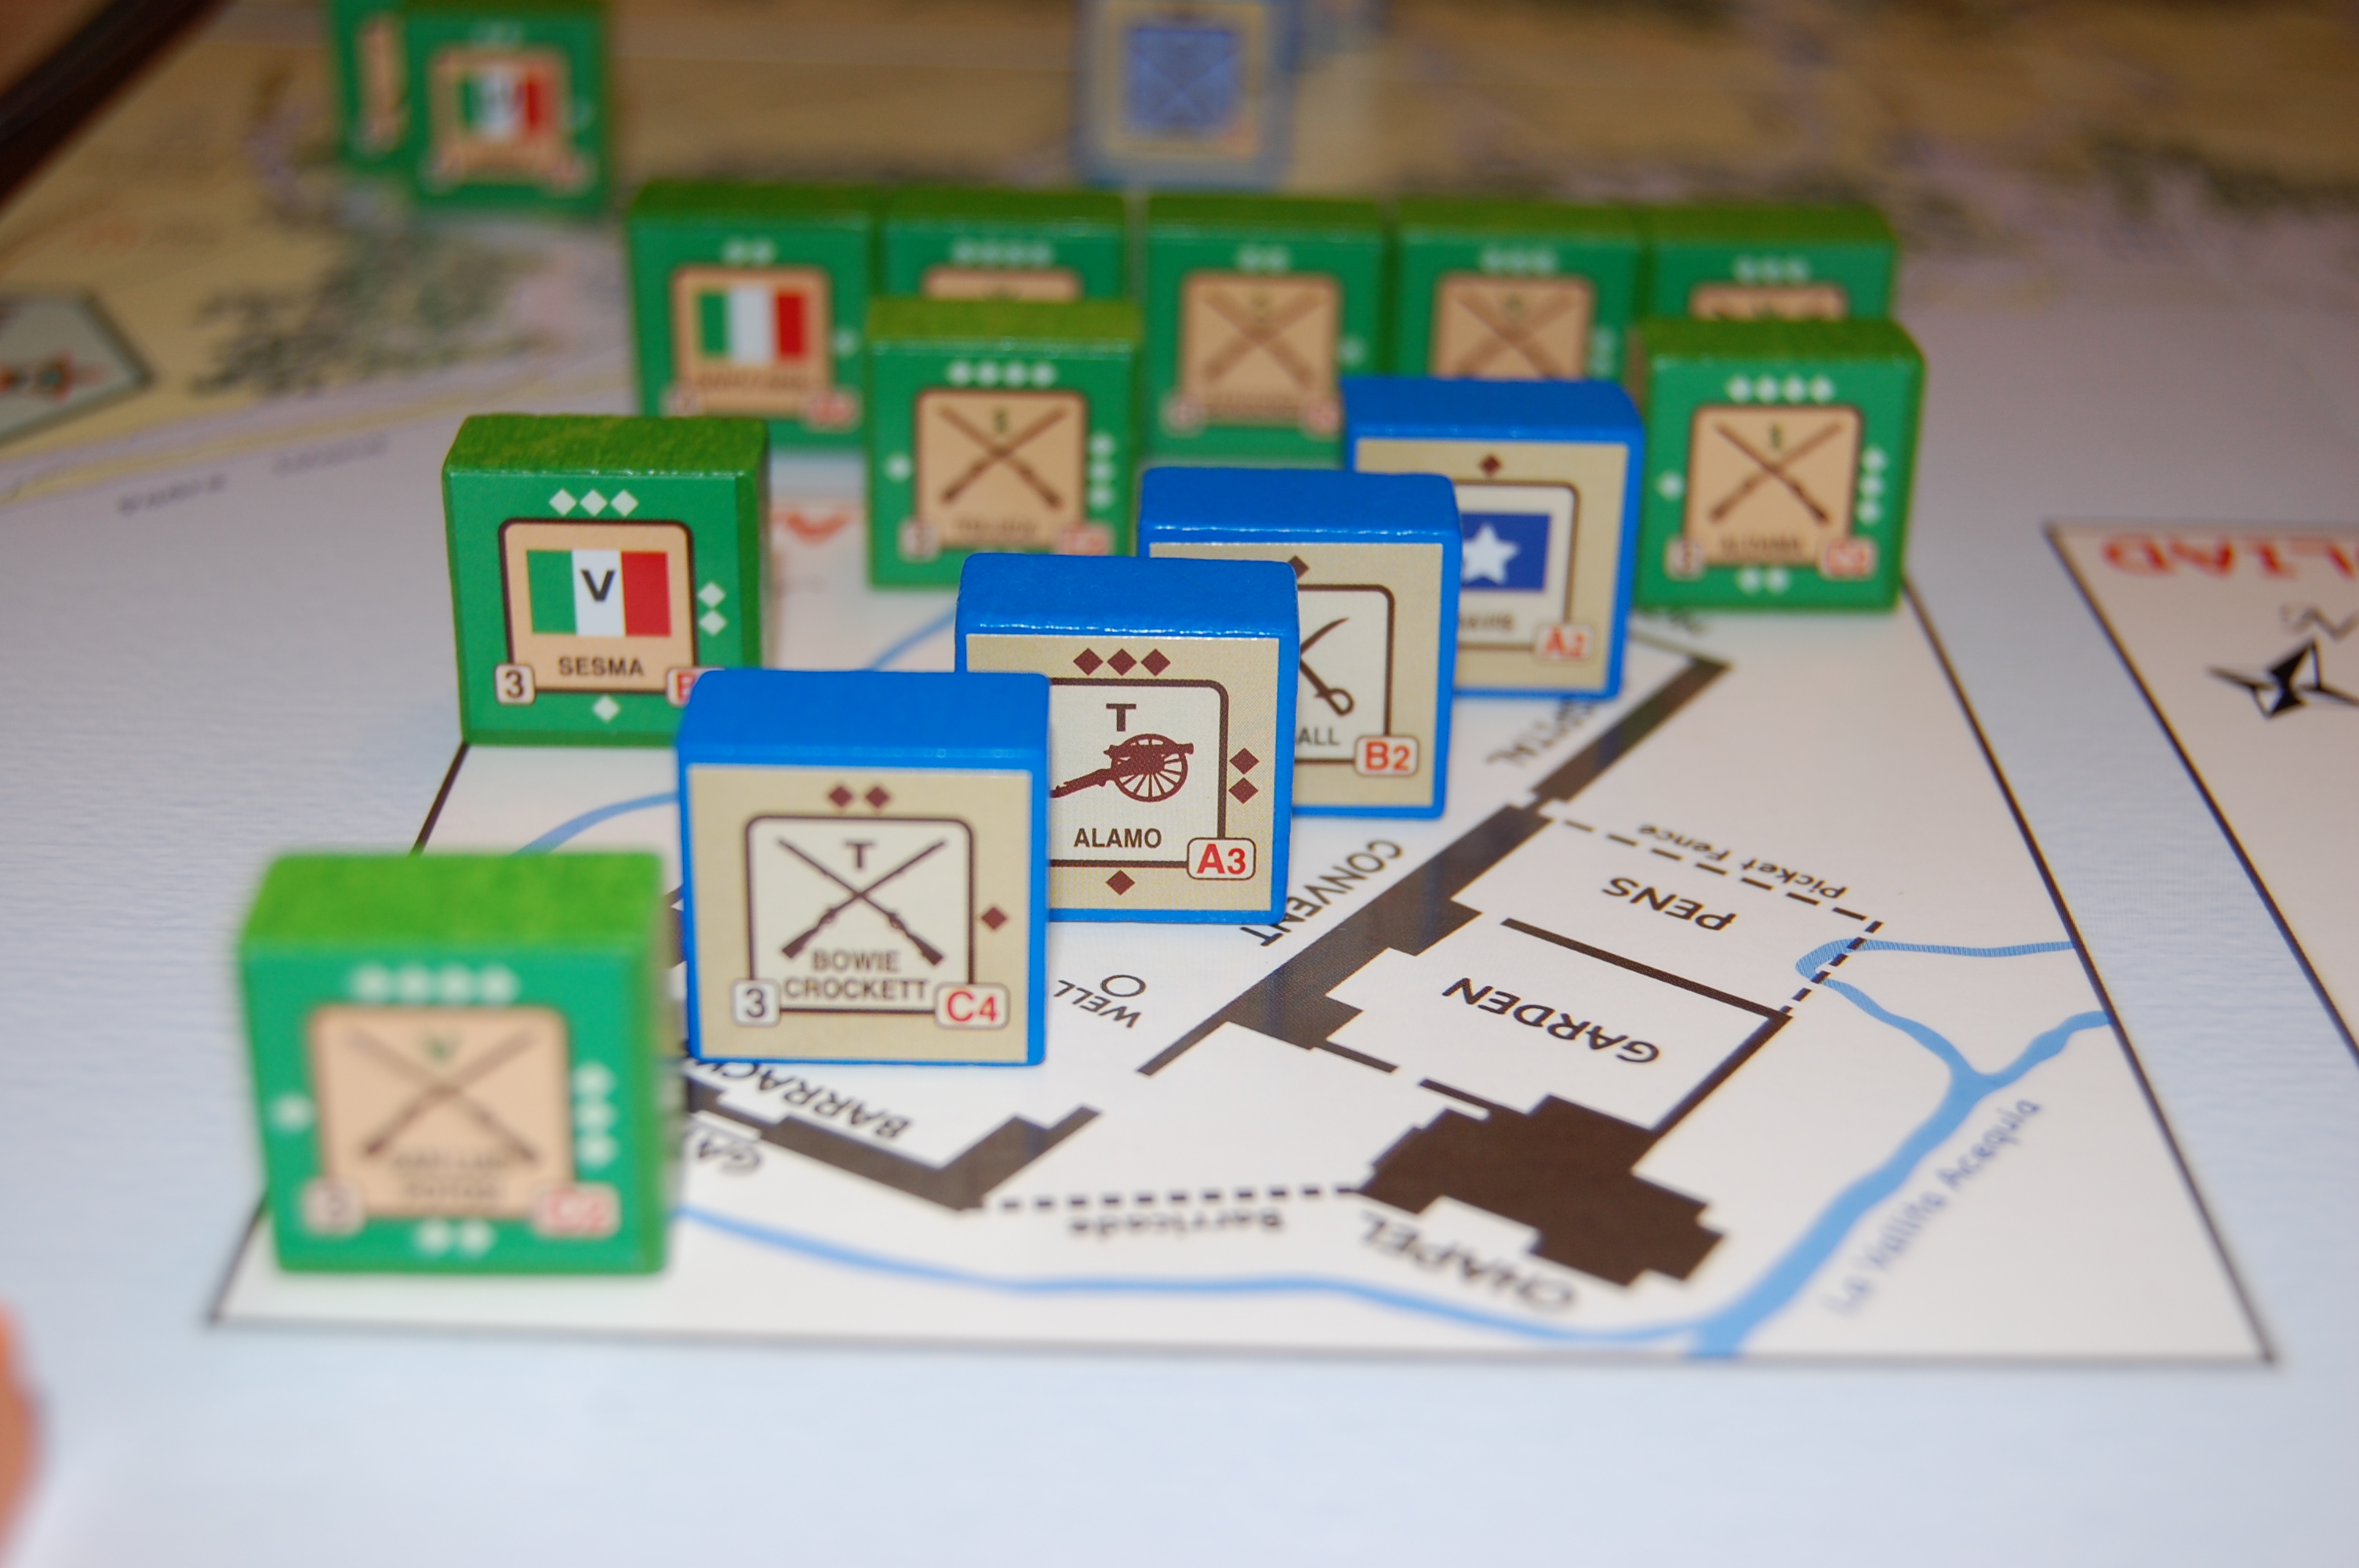
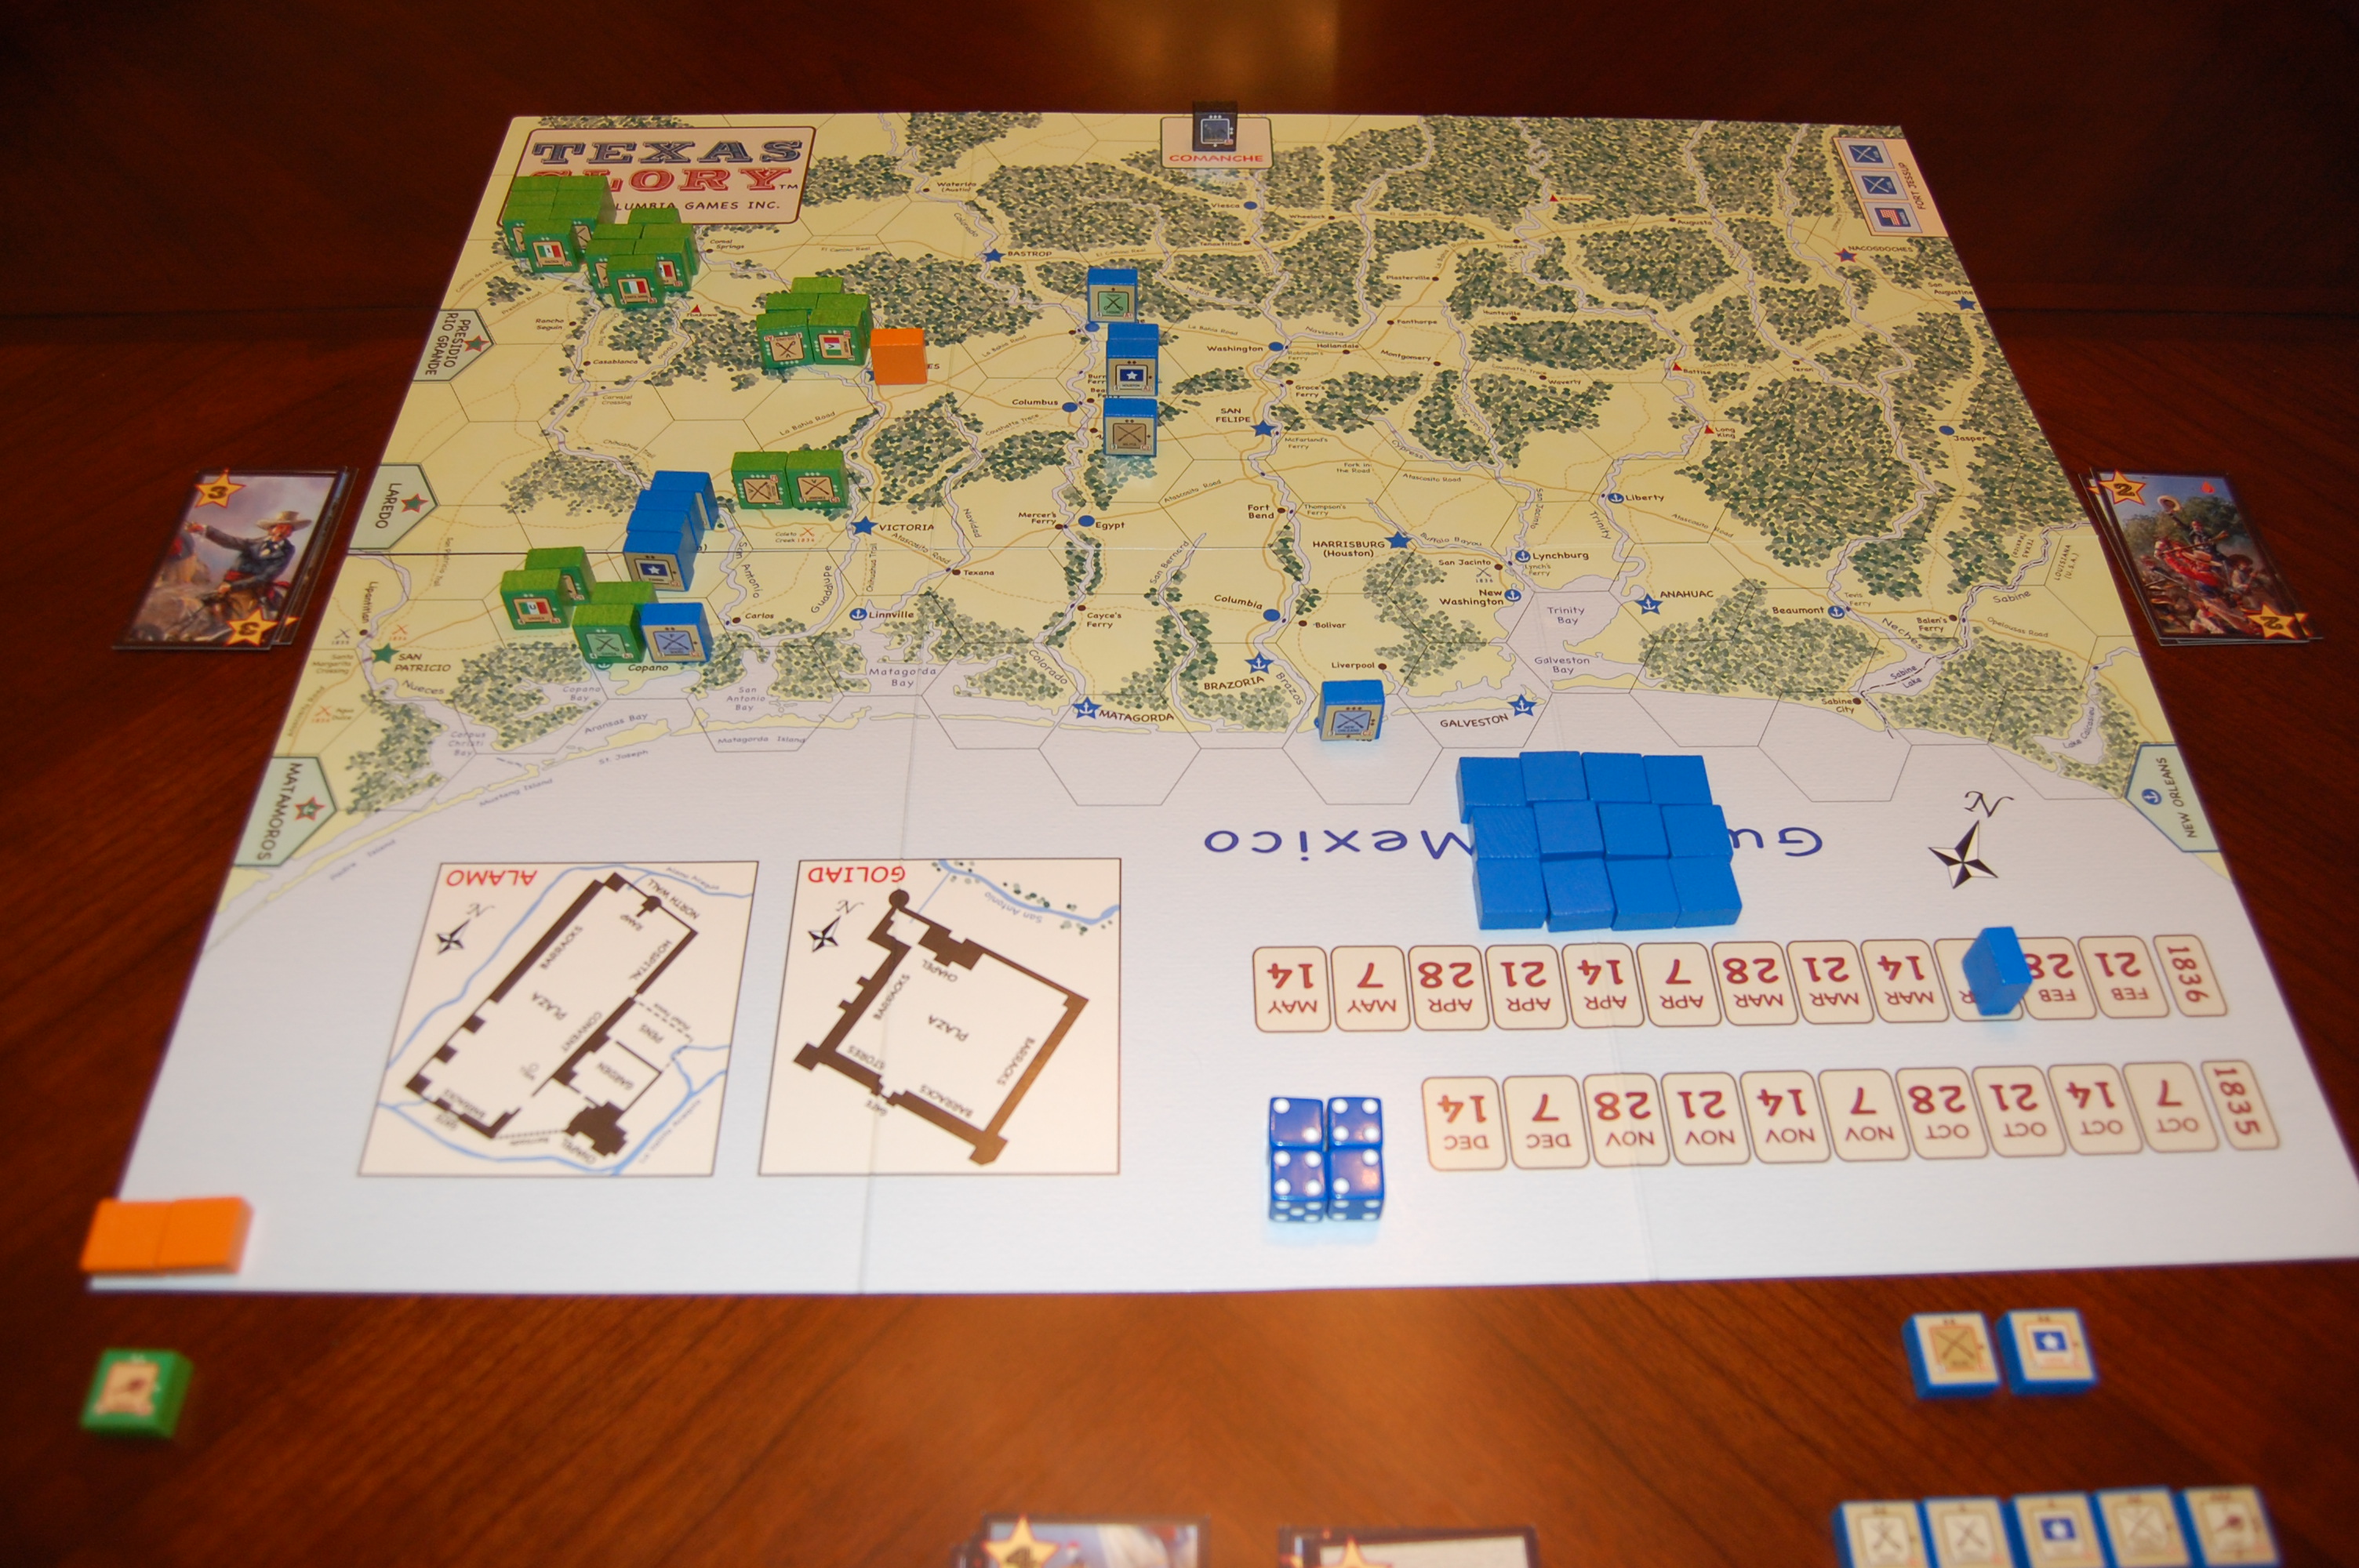
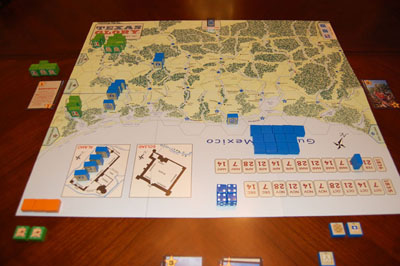
1836
Turn 1 Texans are besieged in the Alamo |
 |
 |
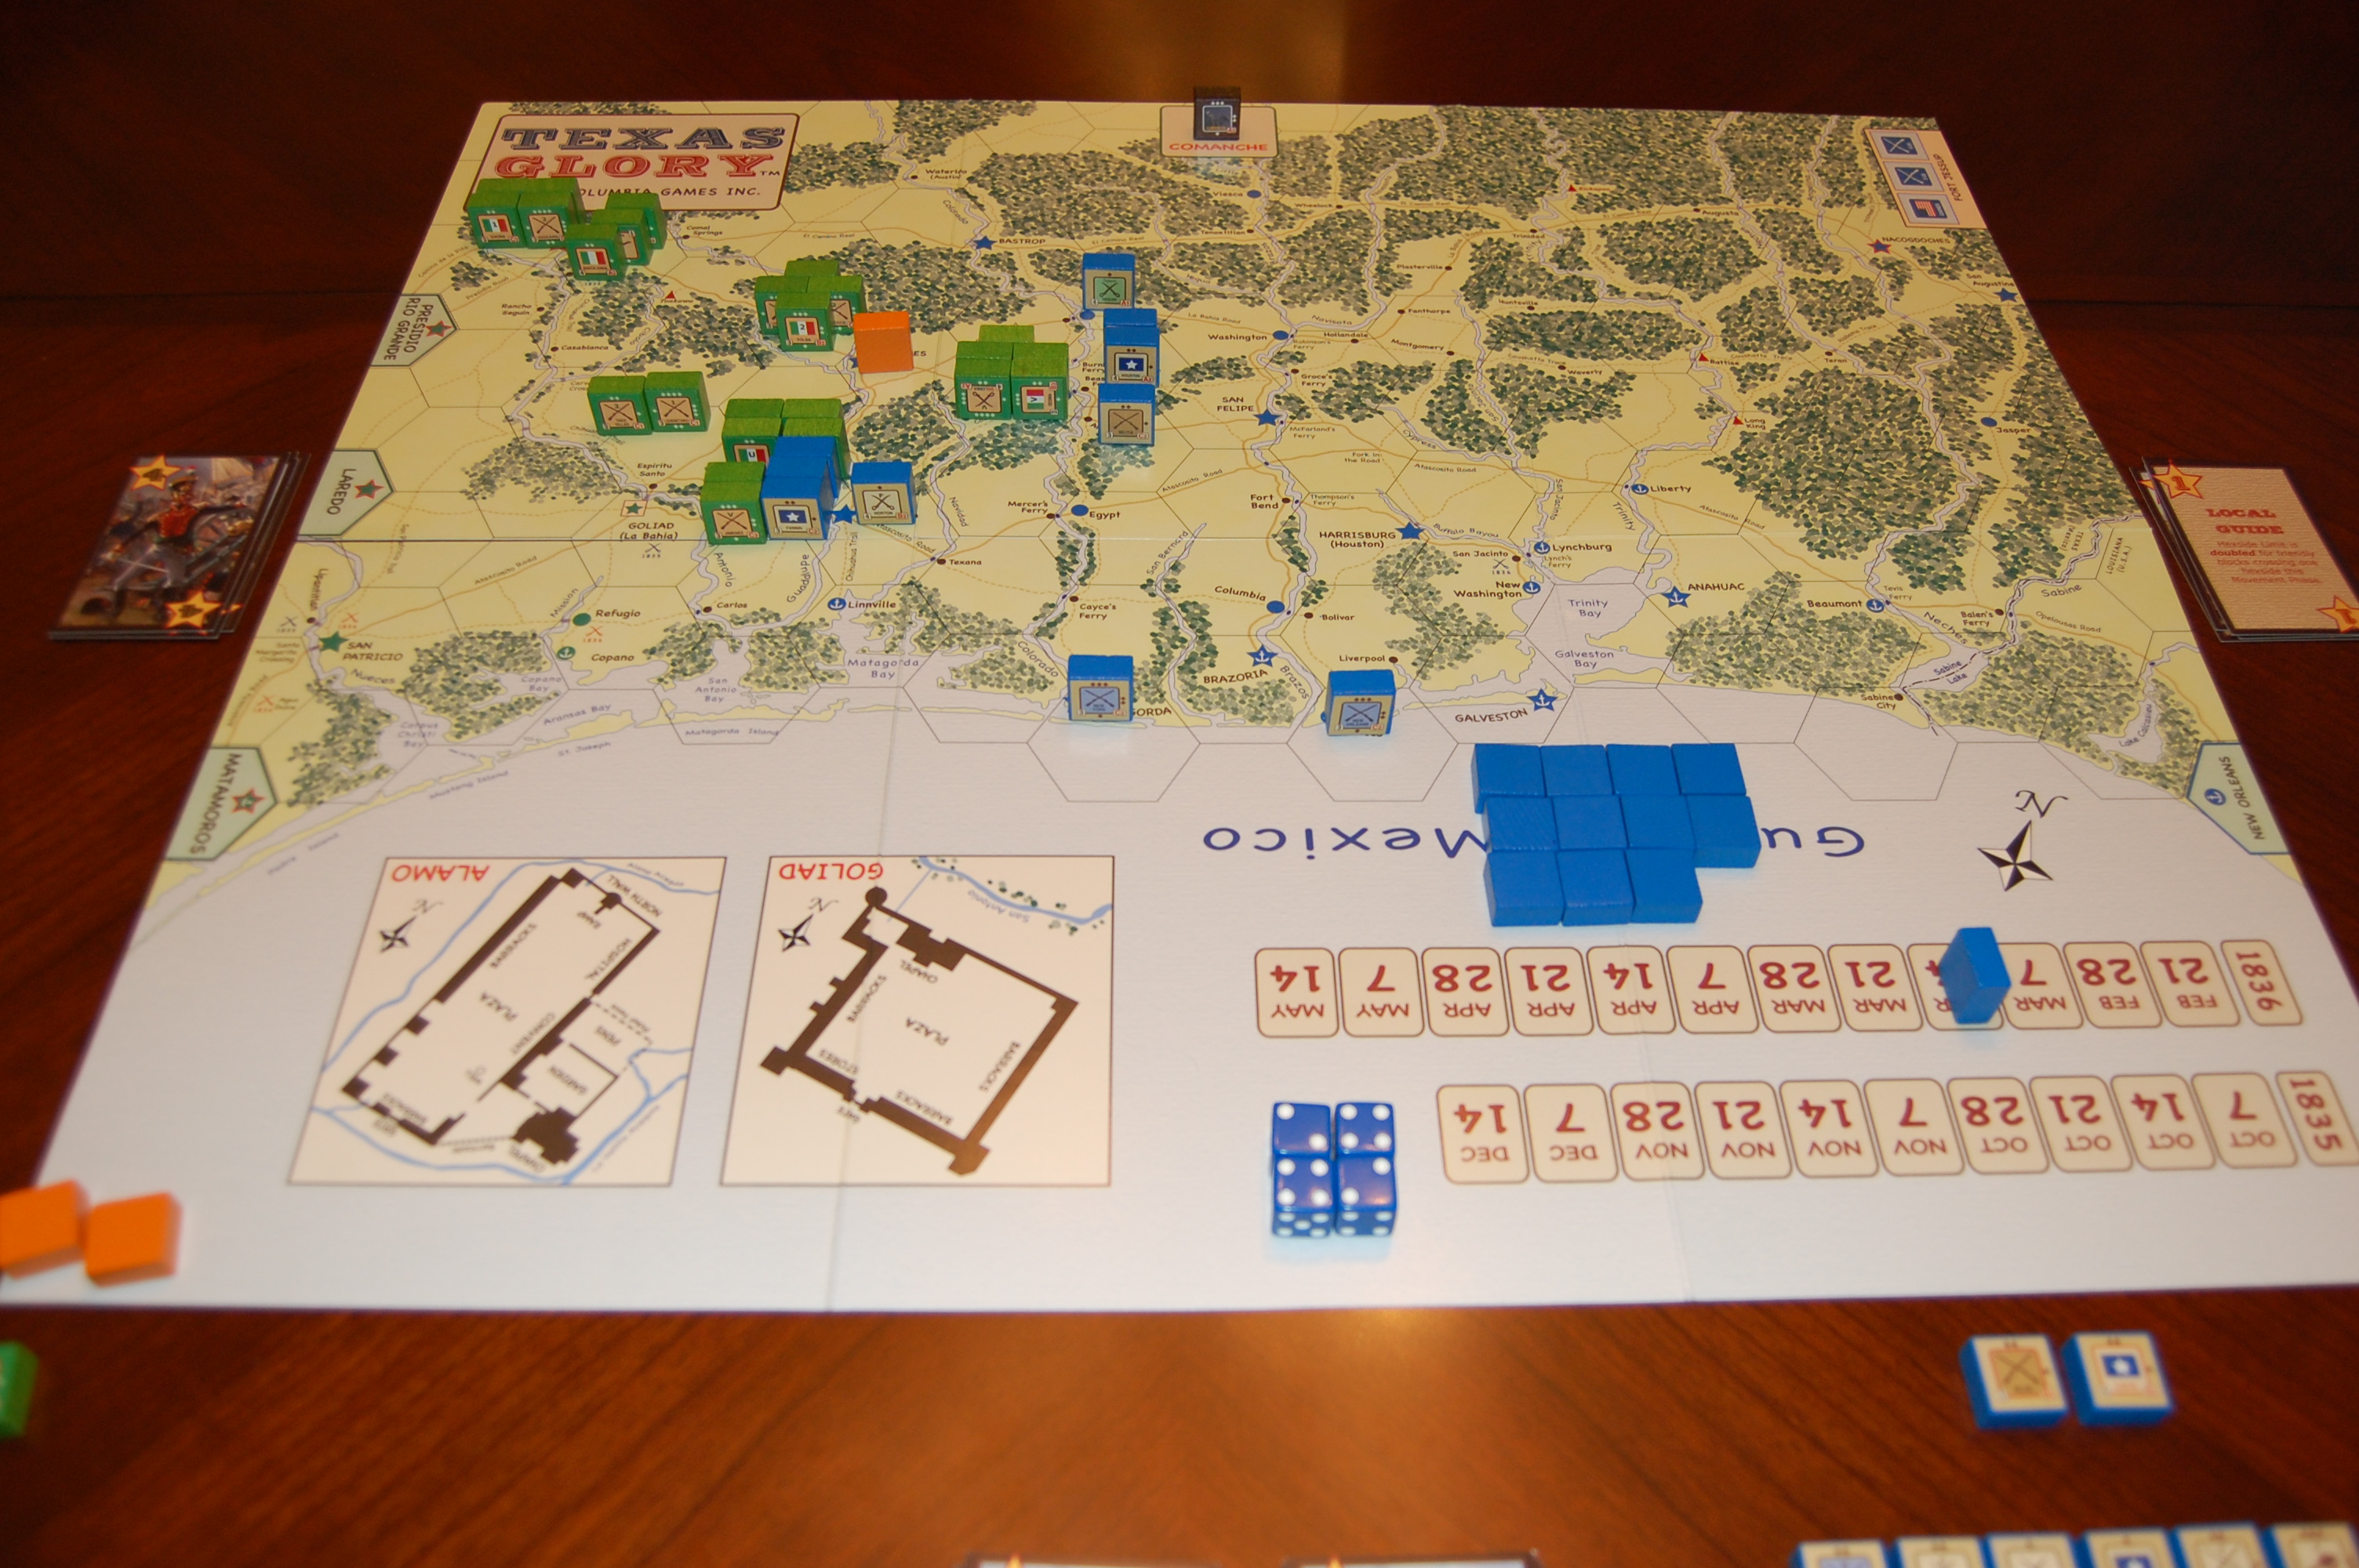
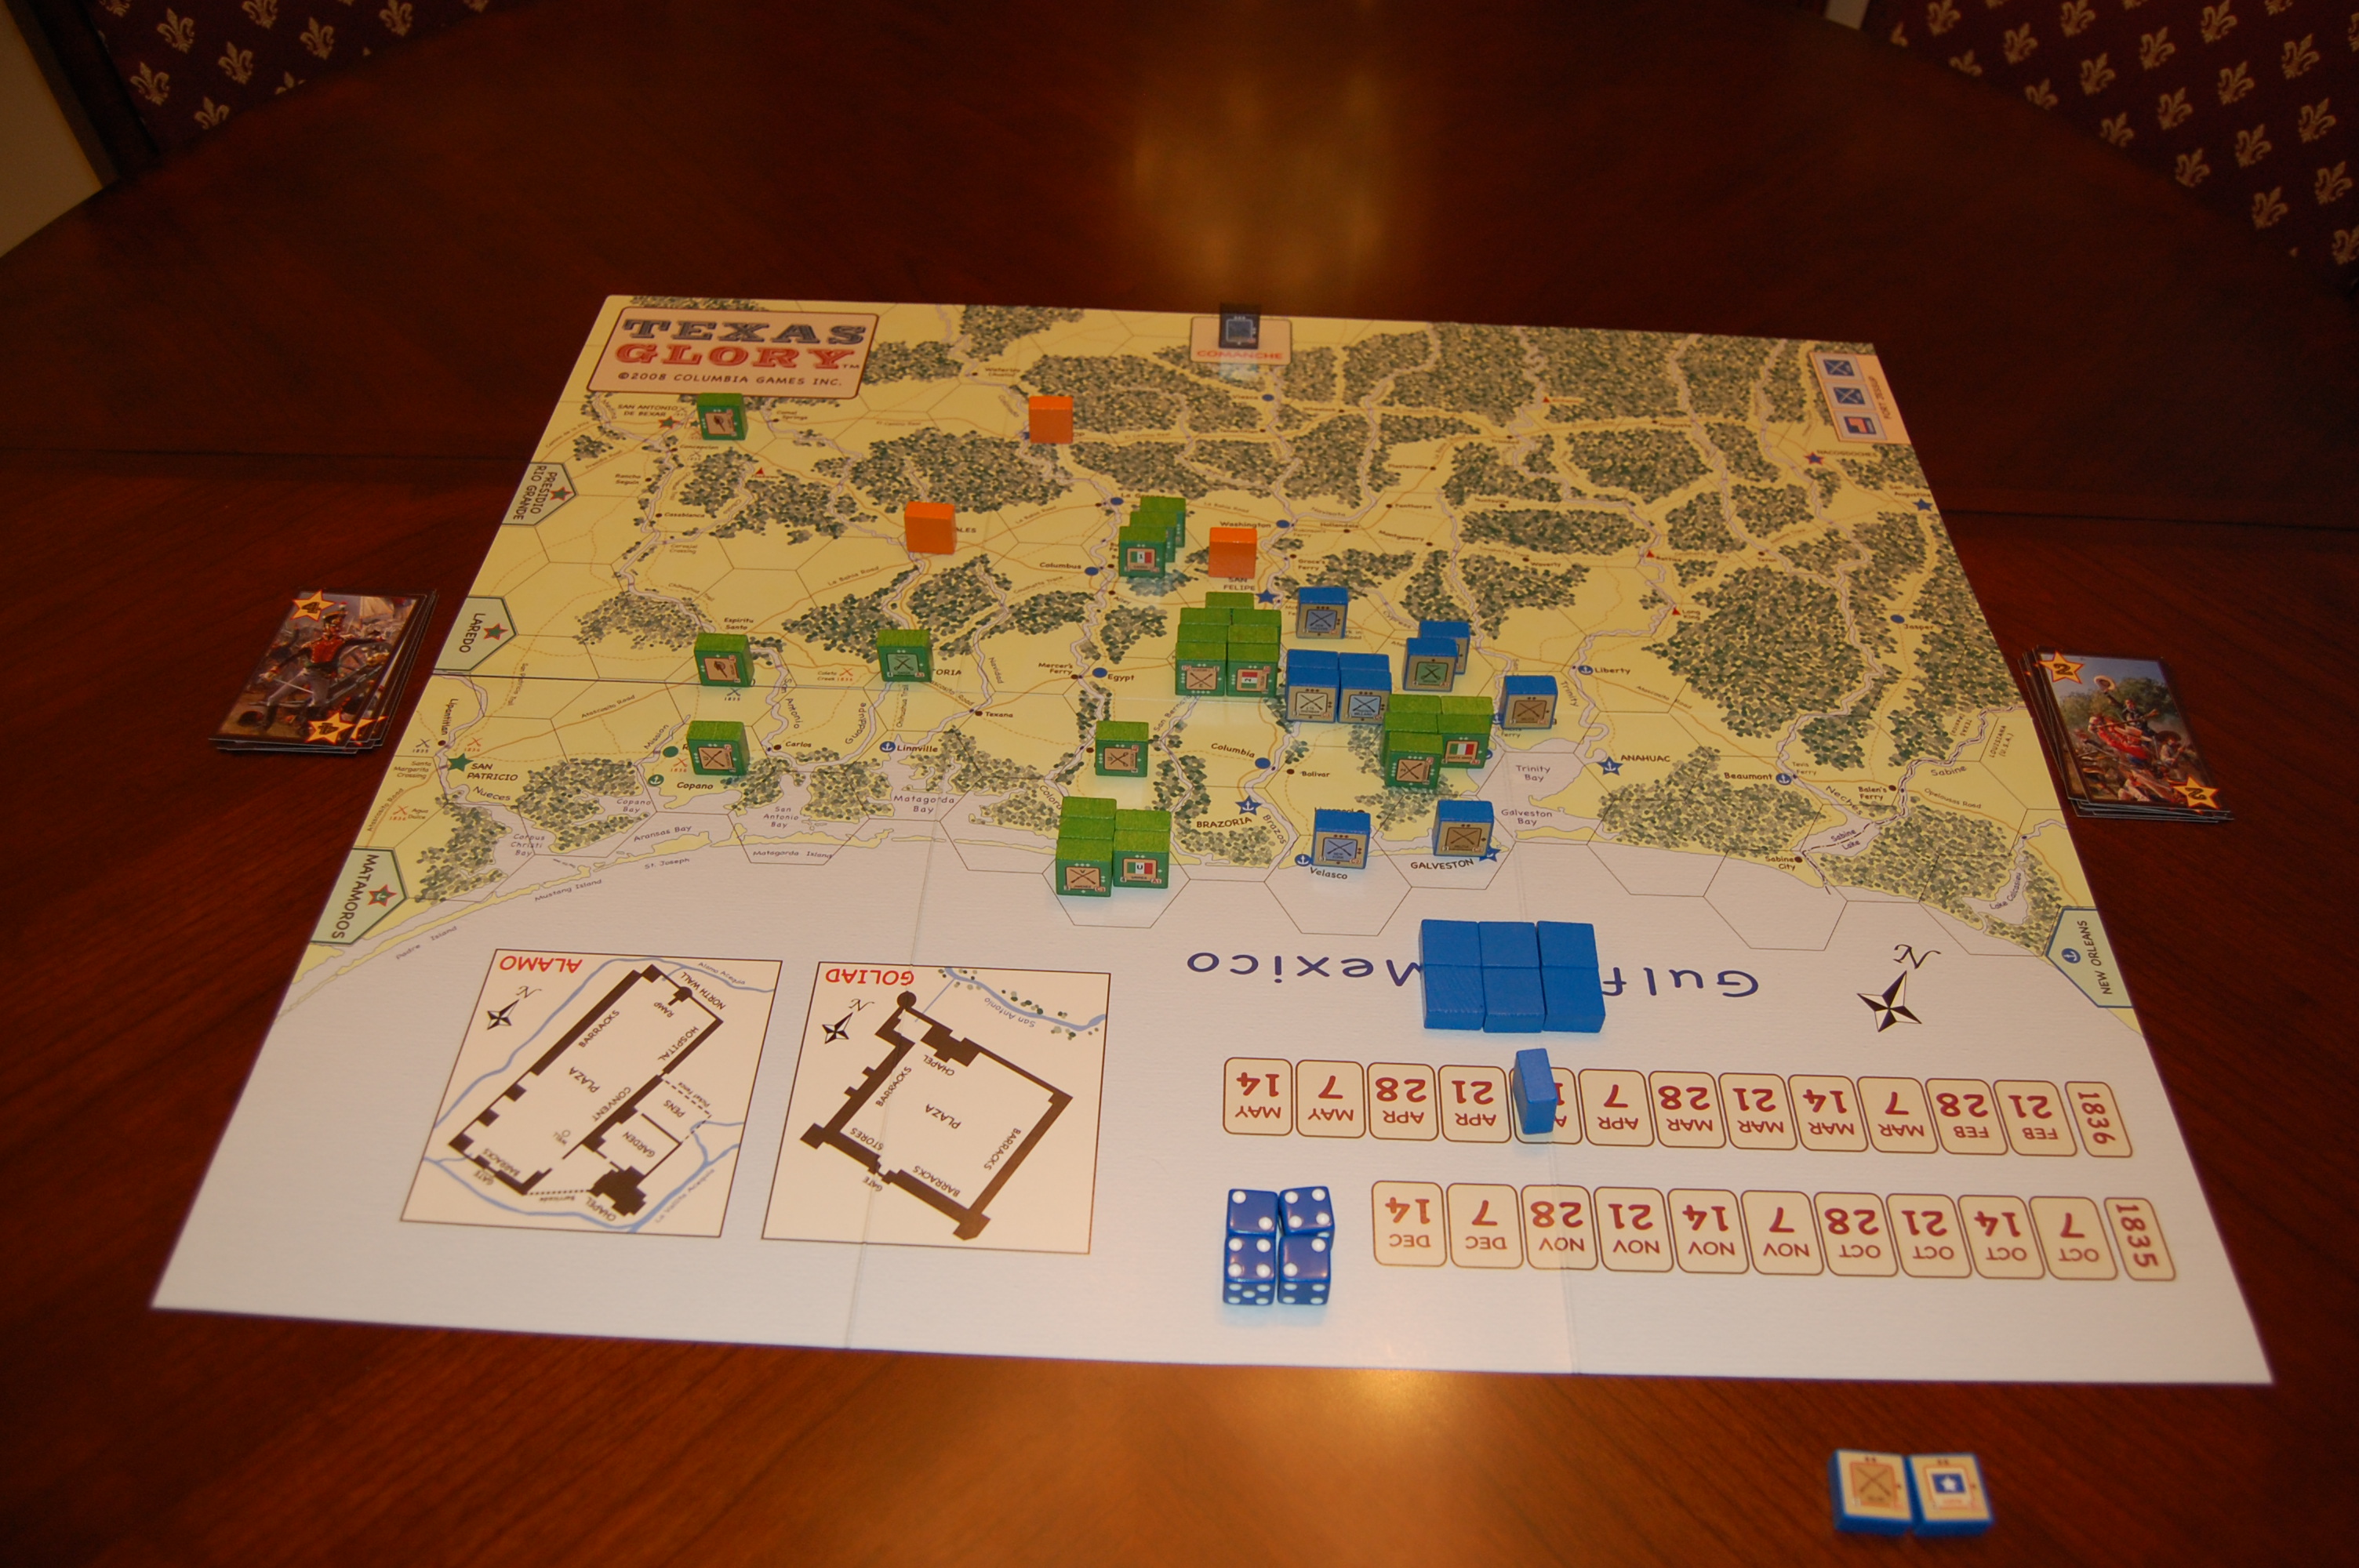
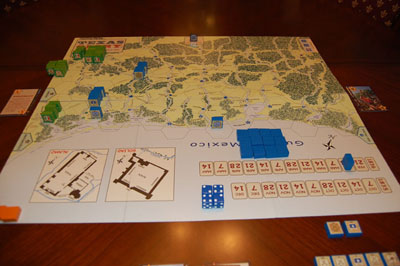
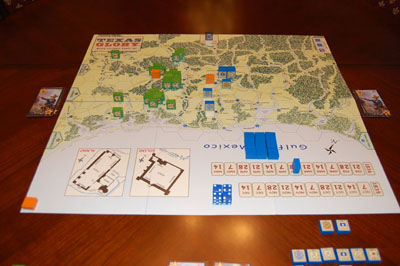
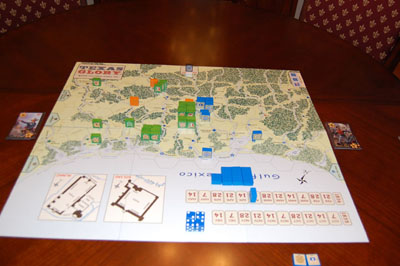
| 1836
Turn 1 End |
|
 |
|
Turn 2 (February 28) - The
Fall
of the Alamo.
The Mexican plays the Deguello event card, with only 1 CP but ensuring
initiative over the Texan, who plays a 2. For his one move,
the Mexican activates Santa Anna and moves Gaona’s brigade to San
Antonio and the Alamo from Presidio Rio Grande. The more powerful
Zapadores, Aldama and Toluca battalions go to the Alamo for the
assault, while Gaona, Queretaro and Guanajuato remain in San Antonio
with Santa Anna, reducing supply attrition risks for the Mexican
forces. Santa Anna and Dolores also advance to the Alamo.
Historically, Gaona force
marched the three better infantry units constituting half of his
brigade forward so as to be in a position to reach the Alamo for the
planned assault in response to Santa Anna’s demands in turn 2, while
the two others with his own HQ and artillery came up more slowly and
missed the assault by a day; in game terms this is reflected in the
limitations on the number of units that can be used to storm a besieged
mission fort, and in supply considerations that lead units to be spread
out.
The Texan then makes two moves: 1) Houston is activated and moves
himself and Burleson from Washington to Gonzales, using a force march
for Burleson (due to the extra point cost for the ferry en route)
though Houston can reach Gonzales with normal movement; and 2) Horton
makes an individual move from Victoria to join Fannin at Goliad.
Historically Houston left
at
the end of this week but did not arrive until the following week, while
Horton also historically arrived the following week.
The Mexicans storm the Alamo with the Aldama (4 steps), Toluca (4
steps), Matamoros (3 steps), Jimenez (3 steps), and San Luis Potosi (4
steps) infantry battalions, Sesma (3 steps) and the Zapadores (2
steps). Only four of these seven units can storm in one round,
but the three others can be brought up from reserve on the second round
of the attack to replace shot-up units in the front line. At full
strength, the Mexican storming units at the Alamo are a total of 23
steps.
Santa Anna and Dolores remain in reserve through the battle (though
they could also have entered the battle on the third round of the
Deguello battle if needed to replace other shot-up units).
Historically, the
Zapadores
were among the units sent in during the latter stages of the battle for
the final assault, while the Dolores cavalry (4 steps) was also on hand
for the battle but was held in reserve and used only to pursue fleeing
Texans who tried to break out in the last stages of the assault; in
game terms, the cavalry at reduced value of C1 is less effective
storming a mission fort than any of the more powerful infantry present,
and would be wasted in the role of storming a fort in this case unless
the infantry units became severely weakened.
They are pitted against the Alamo fortress artillery (3 steps),
Bowie/Crockett (2 steps), Travis (1 step), and Kimball (1 step,
fighting at C1 rather than B2 because it is defending inside the fort),
a total of only 7 steps but mostly with more effective
fire. The Texan fortress artillery and Travis (As) fire
first, followed by Sesma (B), and then by the Bowie and Kimball units
(Cs), and finally all of the three Mexican infantry chosen for the
first wave (Toluca, Aldama, and San Luis Potosi, who will be replaced
by Jimenez, Matamoros and the Zapadores in the second wave). In
three rounds of Mexican attacks, made possible by the Deguello card,
the Texans inflict 6 steps of losses on the Mexicans (2 from Toluca, 2
from Aldama, 1 from San Luis Potosi and 1 from Sesma), and are all
themselves destroyed, except for the last step of the Alamo artillery
which is captured and converted to the corresponding Mexican artillery
unit.
The number of Mexican
casualties at the Alamo has long been controversial, with much higher
claims being made, but this level of loss is consistent with the
Mexican casualty reports of some 70 killed and 300 wounded, of which
many later died for want of medical care; an analysis of the ending
strengths of the Mexican units that fought at the Alamo and survived
the campaign, as well as the losses the Mexicans later suffered at San
Jacinto mostly from units that fought at the Alamo, shows that the
Mexican losses at the Alamo were likely in the range of 400 men and
certainly not over 600, still 2-3 times greater than the men lost
defending the Alamo.
The Mexicans are at risk of supply attrition for the forces at the
Alamo (5 over supply limits, with the large force of 10 units there
including the captured Alamo guns, and suffer a step loss from
Dolores), though the victory improves their supply situation. As
reinforcements, the Mexicans receive all their remaining units, which
come in at Presidio Rio Grande – Tolsa, Morelos, Guerrero, 1st Mexico,
Guadalajara, and Tres Villas, and the Tampico cavalry. The
Texans receive a militia infantry unit (2 steps) at Gonzales.
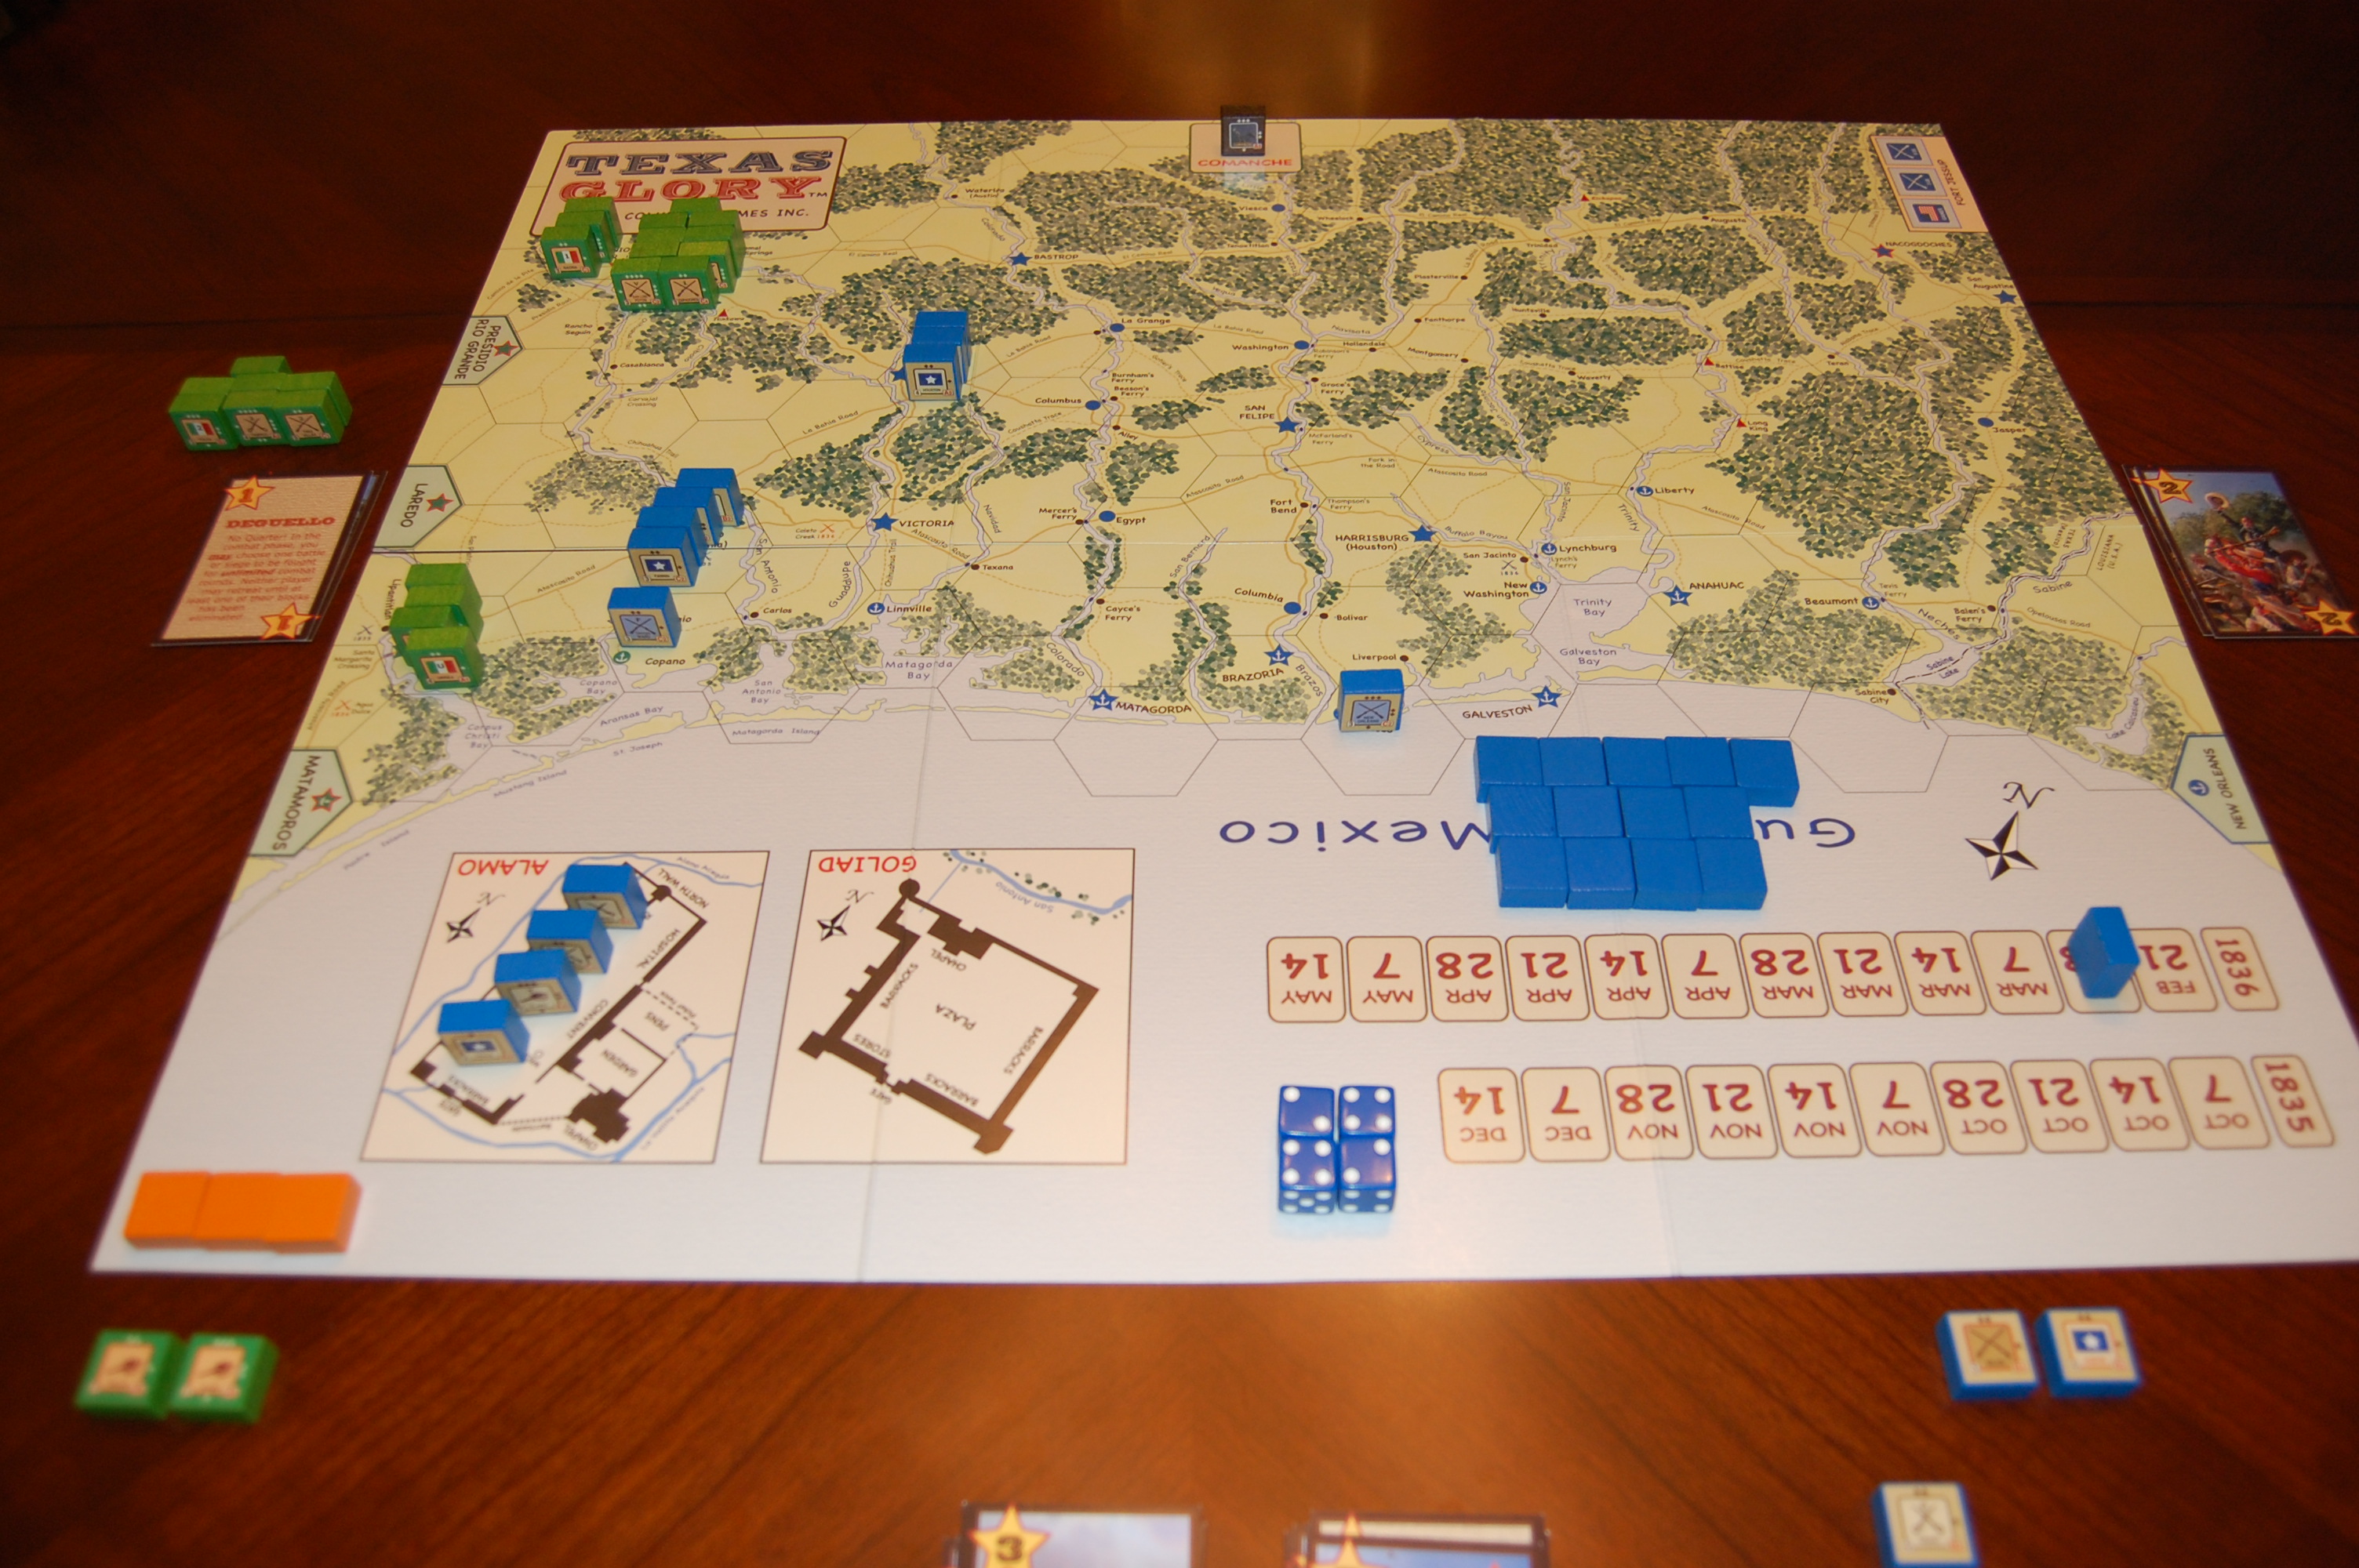
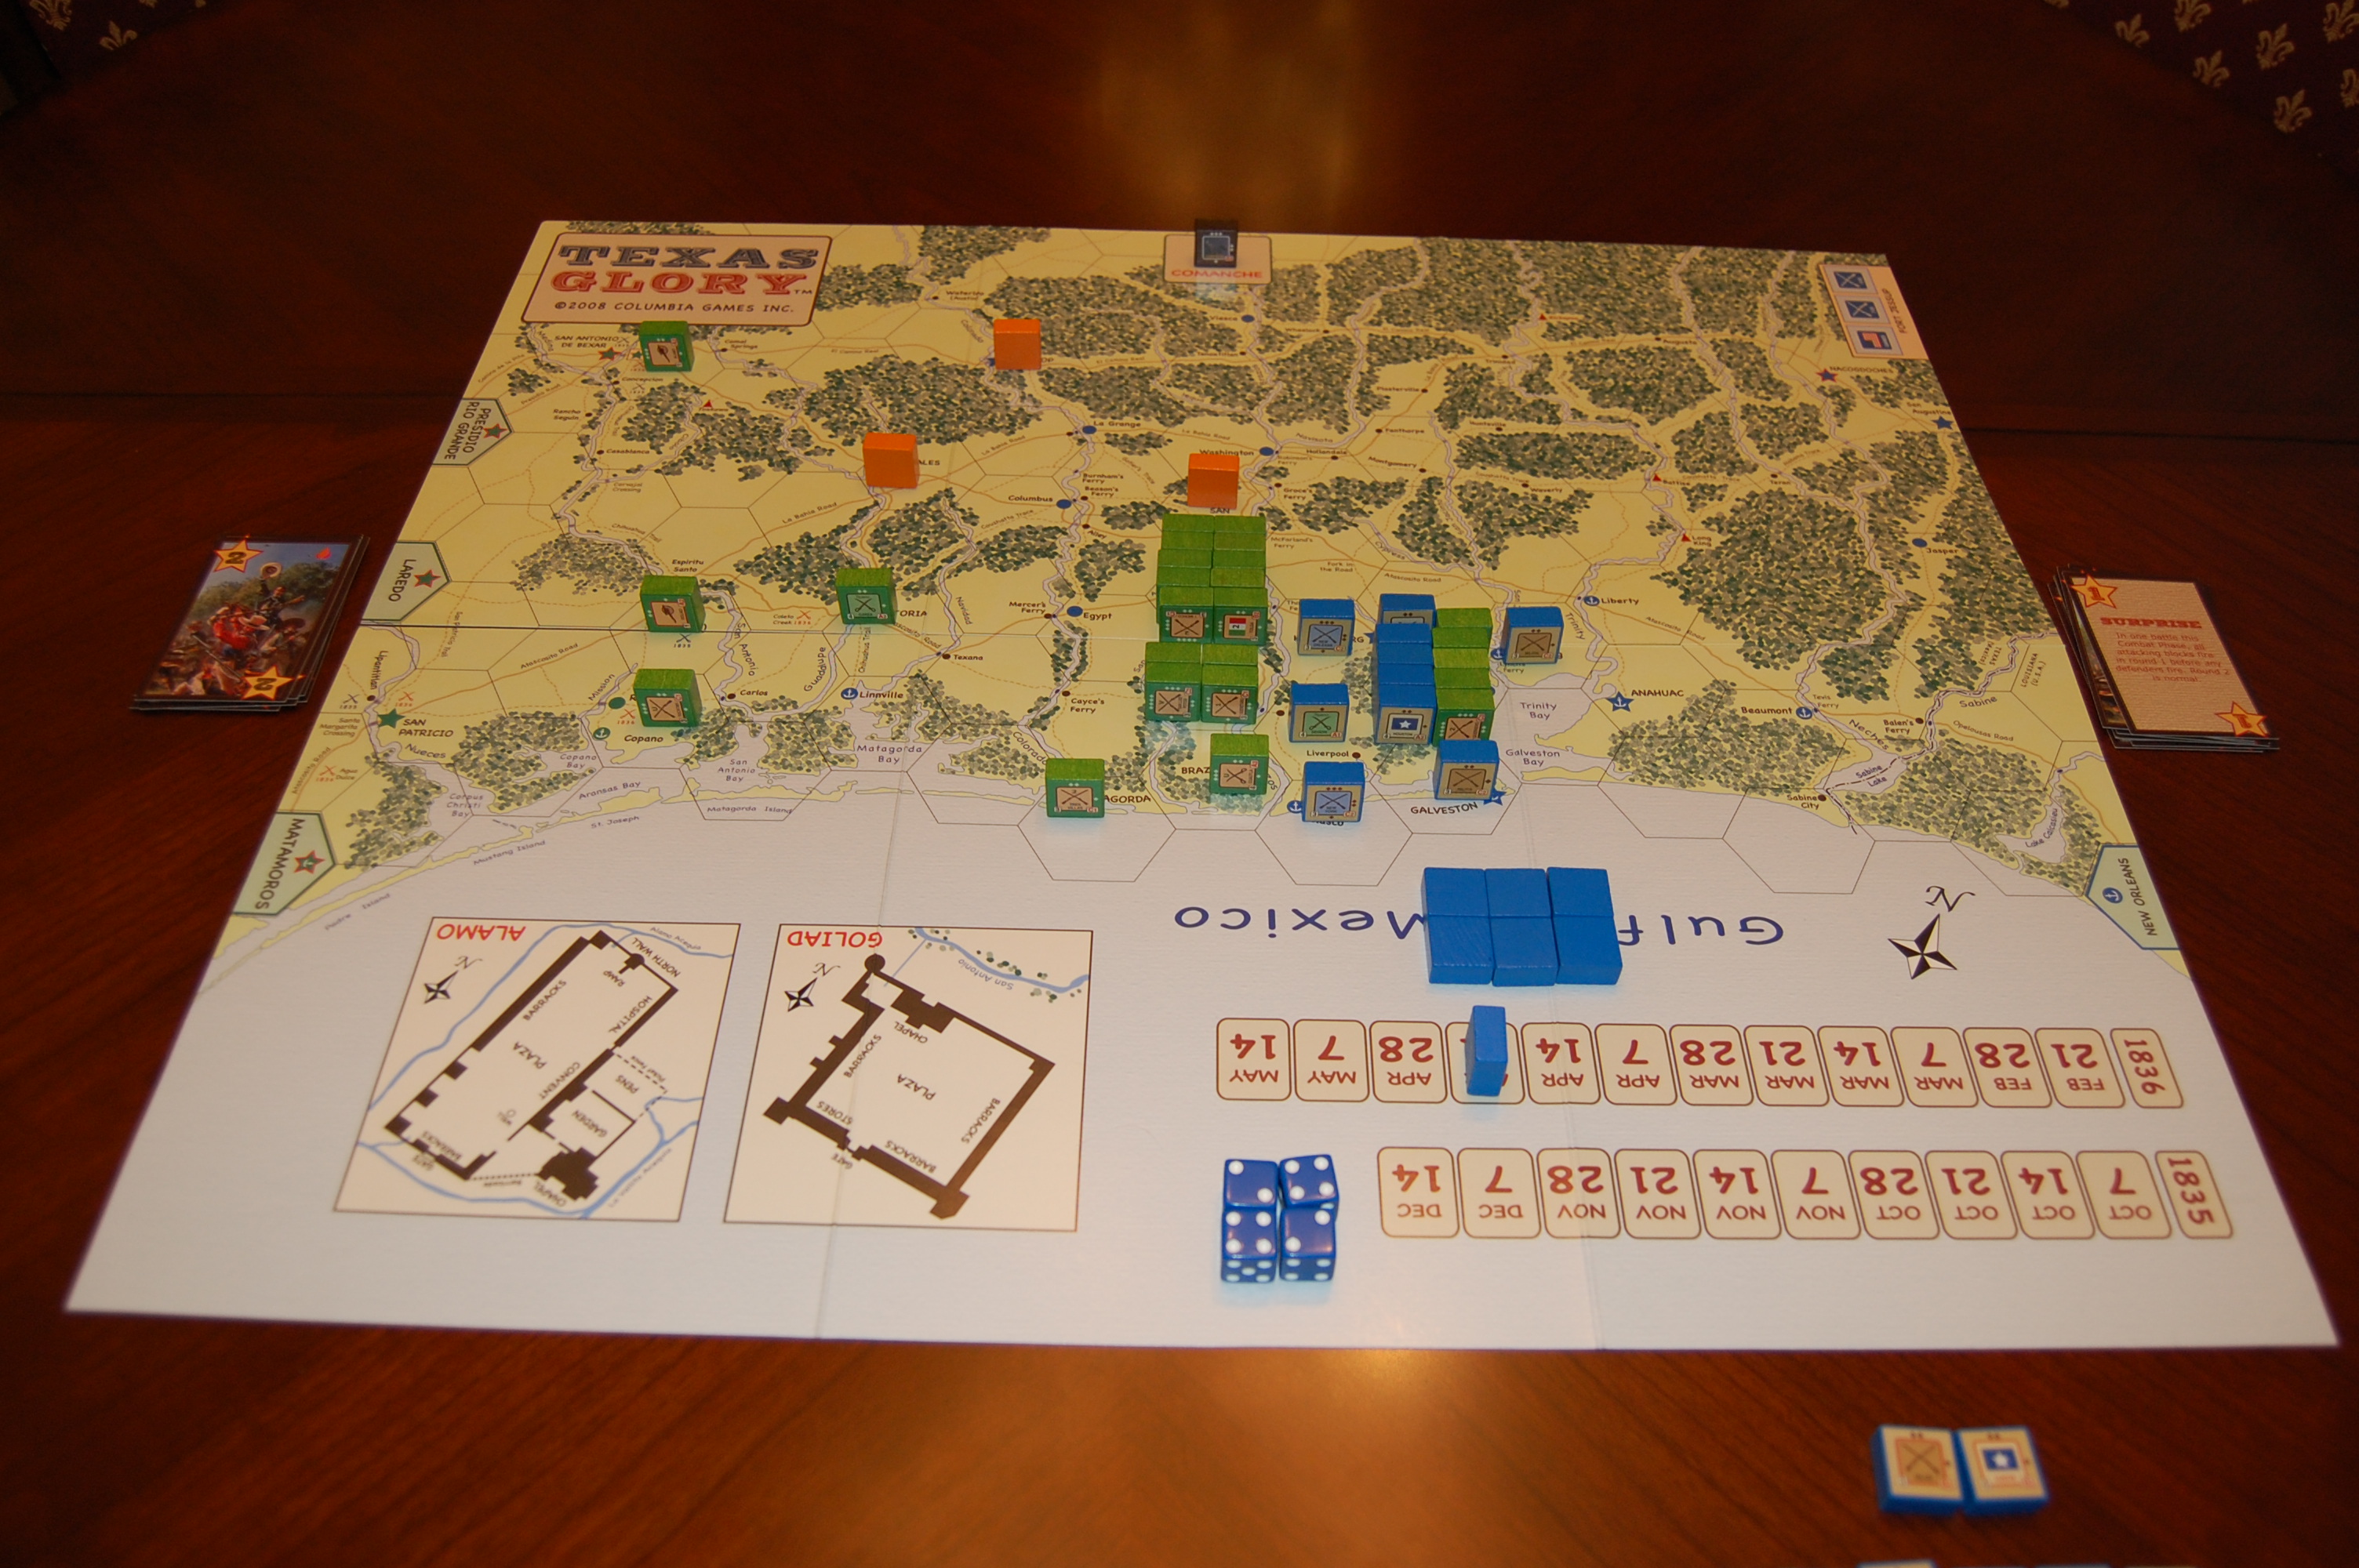
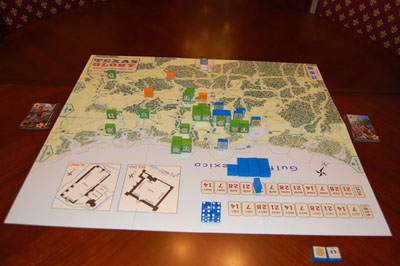
| 1836
Turn 2 Movement |
1836
Turn 2 Mexicans assault the Alamo.
After Round 1 of storming.
|
 |
 |
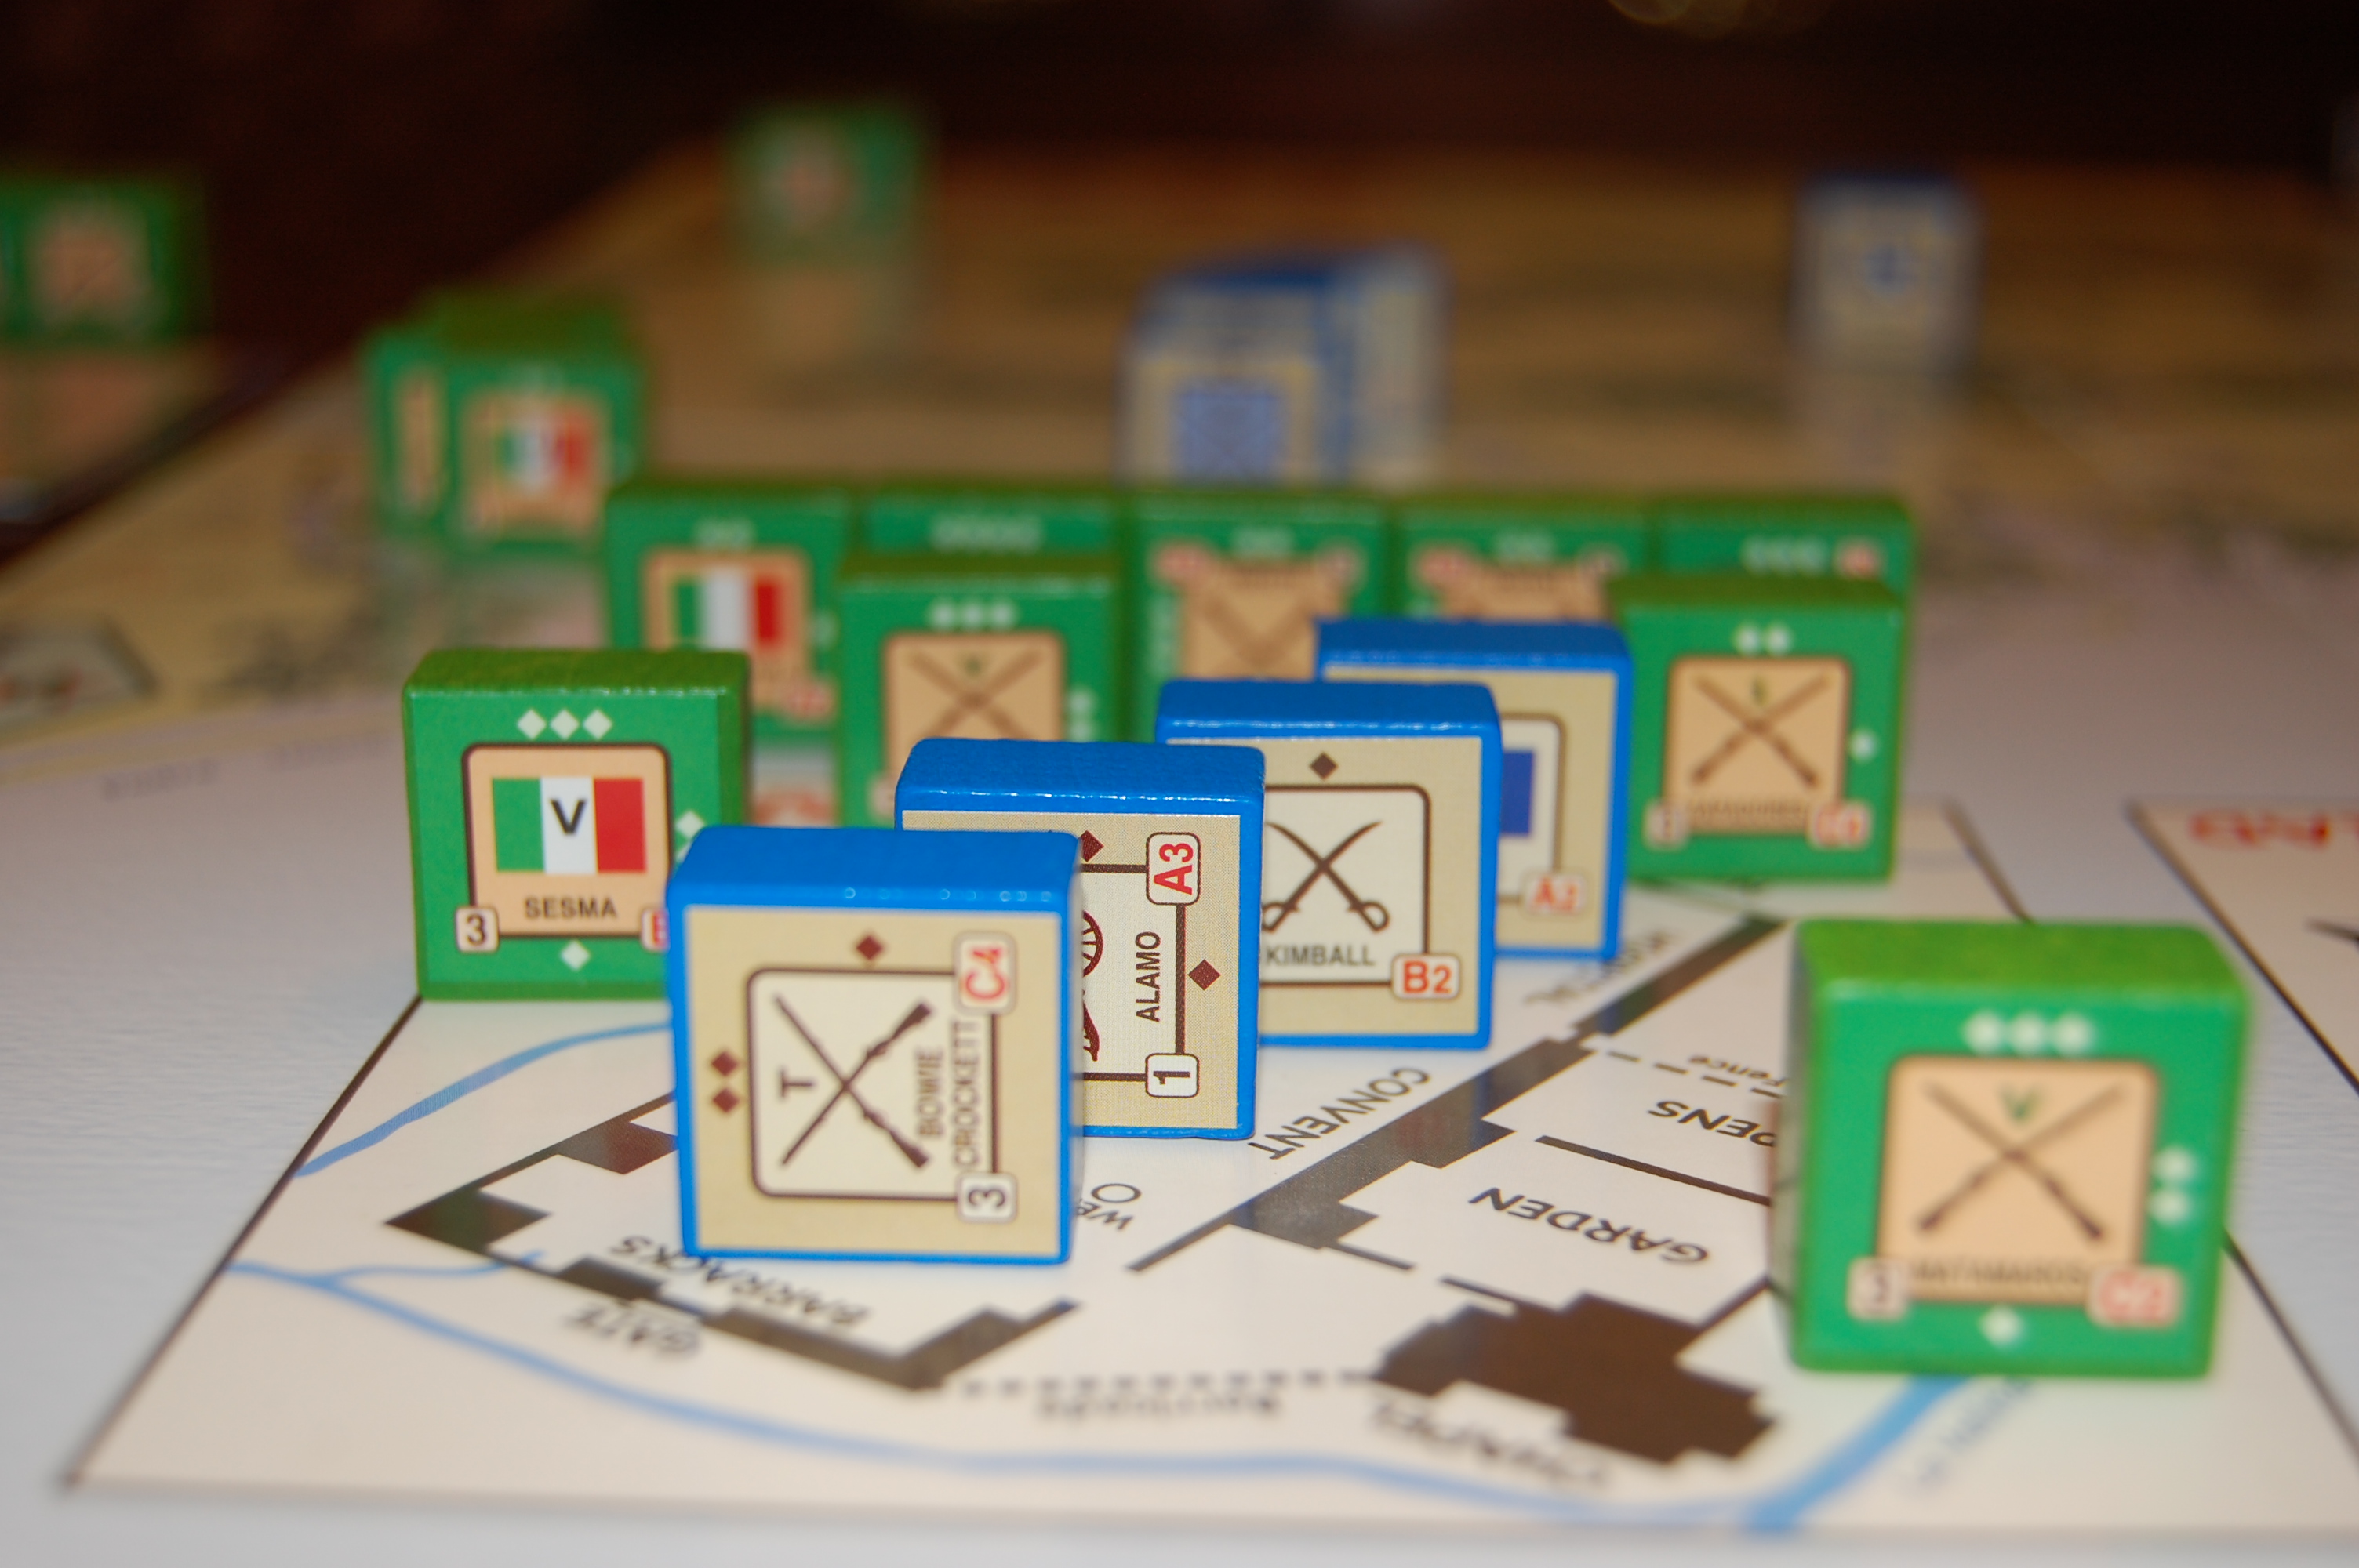
1836
Turn 2 Alamo assault continues.
After Round 2
of
storming. Texans eliminated in
round 3.
|
1836
Turn 2 End |
 |
 |
Turn 3 (March 7) -
Houston’s
Retreat Begins and the Battle of Refugio.
The Mexican plays a 3 CP card, and the Texan a 2 (with burn), giving
the Mexicans initiative. The Mexican makes two group moves: 1)
Santa Anna is activated (though he does not himself move this turn) and
from the large group assembled at the Alamo, the Mexicans send the
Jimenez and San Luis Potosi infantry battalions (6 steps) along the
trail to Goliad to join Urrea, crossing the Cibolo Creek at Carvajal
Crossing, reaching Espiritu Santo, and force marching to arrive at
Coleto Creek, and also send Sesma with the Dolores cavalry and the
Matamoros, Aldama and Toluca infantry battalions (12 steps) along the
road toward Gonzales, stopping at the ford just before Gonzales, while
Tolsa and his brigade, all of the seven Mexican units at Presidio Rio
Grande, advance to San Antonio and the Alamo, combining with Santa
Anna, Gaona, Queretaro, Guanajuato and the Zapadores who have remained
there; 2) Urrea is activated and with the Cuautla cavalry, Yucatan
infantry and Garza Tejano cavalry moves toward Refugio, sending Cuautla
and Garza across the ford into Refugio. The Mexicans also use
forage to add a step to the non-moving Alamo artillery after the
Mexican forces at the Alamo initially leave, and before Tolsa’s forces
arrive and put the Alamo back above its supply limits. The Texan
then makes one group move: 1) Houston is activated and he, along with
Burleson, the Militia infantry, and the Tejano cavalry, retreat from
Gonzales back across the Colorado this turn through Burnham’s
Ferry, placing the Tejano cavalry to cover the flank of the main
army at La Grange while the militia is positioned at Alley.
Before retreating, the Texan spends 1 CP to burn Gonzales, in order to
deprive the pursuing Mexicans of supplies along this march route,
though because all of his units are moving (and are already at full
strength in any case) he does not add any forage step to a Texan unit.
Historically the Texans
left
Gonzales at the end of this week but did not complete their movement
across the Colorado until the following week.
In the battle of Refugio, the Mexican Cuautla and Garza Tejano cavalry
(As) fire first and destroy Ward’s Georgia battalion (a C with 2 steps)
in a two-round battle, though Ward manages to inflict a one-step loss
on the Cuautla cavalry in the first round.
Historically, the battle
of
Refugio took place at the beginning of the next week. Though half
of the Georgia battalion escaped this battle, it failed to rejoin
Fannin and never fought effectively again; after wandering around in
the swamps, these troops surrendered to Urrea’s forces north of
Linnville after he won the battle of Coleto Creek and took
Victoria.
The Mexicans are at risk of supply attrition for Sesma’s force near
Gonzales (3 units over supply limits, and suffer another step loss
taken from the Dolores cavalry); between them, San Antonio and the
Alamo can supply all but two units of the large force of 13 Mexican
units there (6 for San Antonio and 5 for the Alamo/Concepcion, and the
Mexicans suffer a step loss from the Tampico cavalry that moved up to
the Alamo), while Fannin’s 4 units are supported by Goliad, and
Houston’s army of 4 units has dispersed sufficiently to remain in
supply. The Texans receive one reinforcement, the New York
battalion (3 steps), which lands in Matagorda. There are no more
Mexican reinforcement units.
Historically, the New
York
battalion came by sea from New Orleans.
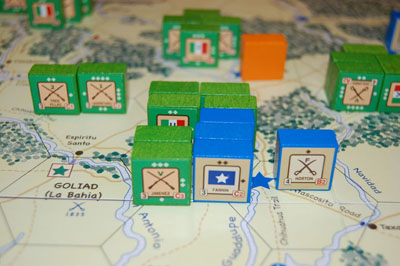
| 1836
Turn 3 Movement |
1836 Turn 3 Battle of Refugio |
 |
 |
| 1836
Turn 3 End |
|
 |
|
Turn 4 (March 14) -
Fannin’s
Forces Destroyed at the Battle of Coleto Creek.
The Mexican plays a 4 CP card, while the Texan plays the Local Guide
event with 1CP gaining initiative. For their one move, the Texans
activate Fannin and finally abandon the mission fort at Goliad, moving
with Fannin, the Goliad artillery and Wallace’s Lafayette battalion to
the site of the Coleto Creek battle (Local Guide increases the hexside
limit to allow them to move directly across the ford), while sending
the faster Horton cavalry ahead separately through Espiritu Santo to
Victoria (force march). Fannin’s decision to drag along the
slow guns and the blocking effect of the Mexicans already at Coleto
Creek means that most of his force cannot evade the Mexicans to reach
Victoria first (had they tried to march up the road from Espiritu Santo
toward Gonzales, the guns would have had to be abandoned and even the
rest of the force would have been in the path of Sesma’s advancing
Mexicans, with Houston already gone). The Mexicans then make two
group moves and one individual move: 1) Santa Anna is activated (though
he does not himself move), and moves Sesma from the ford at Gonzales
with the Dolores, Matamoros, Toluca and Aldama units through Gonzales
to reach the west bank of the Colorado at Columbus, while from the
forces gathered at the Alamo, Santa Anna also moves Tolsa with the
Guerrero and 1st Mexico infantry battalions and Tampico cavalry (14
steps) to the ford on the Guadalupe before Gonzales, and also sends the
Queretaro and Tres Villas infantry battalions (6 steps) toward Goliad,
crossing Cibolo Creek at the Carvajal Crossing and reaching Espiritu
Santo; and 2) Urrea is activated and, with the Cuautla and Yucatan
units, moves through Goliad and Carlos and continues on to Coleto Creek
to join Jimenez and San Luis Potosi there; and 3) the Garza Tejanos
also make an individual move to Coleto Creek (having been outside of
Urrea’s command radius at Refugio since not a regular part of his
brigade). The remaining step can be used for forage after the
other units move to add a step to the Alamo artillery, now that the
Alamo forces do not exceed their supply limit. In the battle of
Coleto Creek, since Fannin is unable to continue his retreat and is
pinned down by the Mexicans, he attempts to fight his way through in
the first round unsuccessfully against Jimenez (C, 3 steps) and San
Luis Potosi (C, 3 steps), 6 Mexican steps defending against 7 Texan on
the first round. The Goliad artillery fires first (A, 2 steps),
followed by the two Mexican infantry, and then by Fannin (C, 2 steps)
and Wallace (C, 3 steps). This was the Texans’ one chance
to break through in the initial round, but they fight poorly and only
manage to inflict one step loss on the Mexicans, taken from San Luis
Potosi, while suffering step losses themselves to Wallace and the
artillery (had Fannin eliminated or retreated the two defending Mexican
units on the first round, he would then have become the defender
against the Mexican reserves arriving on the second round, and could
have attempted to retreat from them into Victoria to join Horton).
Historically, Fannin
chose to
form a defensive position in the open with no water rather than press
on to the nearby creek in hope of breaking through to safety, a fatal
mistake. For game purposes, this tactical error is reflected in
the form of some poor die rolls.
As the Mexican reserves come in during the second round – Urrea
(A, 2 steps), Cuautla (A, 2 steps), Yucatan (C, 3 steps) and the
Tejanos (A, 2 steps), giving the Mexicans a total of 14 steps in
action, the two Mexican cavalry units and Urrea now fire first,
followed by the Goliad artillery, then the three Mexican infantry, and
finally Fannin and Wallace (who never actually get a chance to fire in
the second round, being eliminated first). After two rounds, the
Texans have lost six steps, with Fannin (2 steps) and Wallace (3 steps)
eliminated, and the Goliad artillery losing a step, so that it is
captured and exchanged for its Mexican counterpart unit. Fannin’s
forces only manage to inflict a 1 step loss on the Mexicans with their
artillery, the loss being taken from the Yucatan infantry.
This sequence of action
at
Coleto Creek slightly alters the historical entry into action of the
Mexican units, as Urrea’s cavalry first cut off the Texans from further
retreat before they were pinned down by the infantry, but it was the
arrival of Urrea’s artillery and reserves on the second day of the
battle that finally forced Fannin to surrender to avoid being destroyed
where he was trapped in the open.
Urrea’s forces regroup after the battle, with Urrea moving to Espiritu
Santo along with the Tejanos to join Queretaro and Tres Villas,
bringing them under command control, while San Luis Potosi, Jimenez and
Yucatan move back to Goliad along with the captured Goliad artillery
and Cuautla remains at Coleto Creek, within Urrea’s command
radius. The Mexicans are at risk of supply attrition for Urrea’s
forces at Espiritu Santo (1 unit over supply limits) as well as for
Tolsa’s force near Gonzales (2 units over supply limits, taking a step
from 1st Mexico); Sesma’s 5-unit force is now adequately supplied by
Columbus. The Texan receives one reinforcement, the Nashville
battalion (2 steps), which lands in Linnville.
Historically, the
Nashville
battalion moved by sea from New Orleans along the coast, with the
ultimate objective of reaching Copano; Linnville is the closest
friendly port for staging a sea attack the next turn.
| 1836
Turn 4 Movement |
1836
Turn 4 Battle of Coleto Creek |
 |
 |
| 1836
Turn 4 End |
|
 |
|
Turn 5 (March 21) - Mexicans
Mass on the Colorado and the Nashville Battalion Surrenders at Copano.
The Mexican plays a 3 CP card and the Texan also a 3, giving the
Mexican the initiative on ties. The Mexican makes two group
moves: 1) Urrea is activated and sends the Cuautla cavalry and Garza
Tejanos to Victoria, moving with the Tres Villas and Queretaro units to
Goliad to join Jimenez, San Luis Potosi and the Goliad artillery (his
entire force cannot cross the ford to Victoria yet on account of the
town still being occupied by Horton), while the low-grade Yucatan
infantry (within Urrea’s command radius as part of his original
brigade) is sent to Copano, remaining behind for the rest of the
campaign as a garrison around Goliad; 2) Santa Anna is activated and
moves Tolsa with the Guerrero and 1st Mexico battalions and Tampico
cavalry from the ford before Gonzales, through Gonzales to join with
Sesma’s group which has paused on the Colorado at Columbus; while Santa
Anna at last decides where to use Gaona and sends him with the Morelos
and Guanajuato battalions (10 steps) from San Antonio to force march to
the Colorado along the Camino Real (losing a step from Guanajuato),
halting at the ford on the west bank before Bastrop, with the ultimate
objective of continuing to Nacogdoches. The remaining Mexican CP
is used for forage to build up the non-moving San Luis Potosi infantry
at Goliad one step, bringing it back up to 3 steps, one short of full
strength. This is done before the other forces under Urrea move
to Goliad so that the supply limit of Goliad is not exceeded at the
time of foraging.
The dispirited remnants
of
Ward’s Georgia battalion historically were rounded up at this time by
the Mexican cavalry between Victoria and Linnville, without fighting,
while historically, the Yucatan battalion was involved in the execution
of the prisoners from the Fannin, Georgia and Wallace units that took
place at the end of this week.
The Texans makes two individual moves: 1) the Nashville battalion moves
by sea from Linnville to land at Copano behind Mexican lines in a sea
attack, at a cost of 2 CP, and 2) in an individual move, the New
Orleans battalion moves from Velasco up through Columbia, reaching Fort
Bend by force march with a ferry crossing, en route to join Houston’s
forces and hold the Colorado river crossing.
Historically, the New
Orleans
battalion had begun its march from Velasco in the previous week, and
got as far as San Felipe and the Atascosito crossing before joining
Houston’s later retreat across the Brazos.
Houston considered crossing the Colorado with his assembled forces to
counterattack Sesma before Tolsa could arrive, but decided not to do
so, reflected in game terms by the Mexican advantage in initiative this
turn. In the battle of Copano the Texan Nashville battalion (C, 2
steps) is destroyed by the Mexican Yucatan battalion (C, 2 steps), with
the Mexicans firing first (though both blocks are Cs, the Mexicans are
defending) and no Mexican losses. At Victoria, Horton (B, 1 step)
is eliminated by Urrea’s overwhelming force of the Mexican Cuautla and
Tejanos cavalry (As, 4 steps total), as both A cavalry blocks fire
first before Horton’s B can retreat, and the Mexican cavalry regroups
after the battle, Cuautla going on to Texana while the Tejanos remain
in Victoria as a garrison.
Historically, the
Nashville
volunteers surrendered in the face of the Mexican forces already
present when they arrived at Copano, and were spared the execution
suffered by Fannin’s forces. As for Horton’s cavalry, the
Mexicans took a number of Texan prisoners near Victoria, and though
Horton survived, as did a few of his men who later fought with
Houston’s cavalry, this cavalry unit did not appear in action again for
the rest of the campaign.
Urrea’s forces at Goliad are at risk of supply attrition (2 units over
supply limits, taking a step loss from Queretaro) as are Sesma’s and
Tolsa’s at Columbus (4 units over supply limits, taking step losses
from Guerrero and Tampico) and even Gaona’s near Bastrop (1 unit over
supply limits, taking a loss from Morelos). The Texans receive
Sherman (3 steps) as reinforcements at San Felipe.
| 1836
Turn 5 Movement |
1836
Turn 5 Failed Texan Sea into Copano
|
 |
 |
| 1836
Turn 5 End |
|
 |
|
Turn 6 (March 28) - The Runaway
Scrape, Texans Retreat Across the Brazos
The Mexican plays a 3 CP card and the Texan a 3 (with burn), giving the
Mexican initiative. The Mexicans make three group moves: 1) Santa
Anna is activated and leaves the San Antonio/Alamo area with the
Zapadores and Guadalajara battalions, moving to Gonzales, while leaving
behind the Alamo artillery to garrison the Alamo; 2) Urrea is activated
and moves all his forces at Goliad except the artillery, including San
Luis Potosi, Jimenez, Queretaro and Tres Villas, to Victoria to rejoin
the Tejano cavalry there (because most of Urrea’s troops at this point
are not from his original brigade, they must remain in the same hex
with him to remain under command control and move as a group); and 3)
Gaona is activated, and with the Morelos and Guanajuato battalions,
crosses the Colorado and enters Bastrop where they remain for the
turn.
By this point in the
historical
campaign, the Mexican cavalry had been reduced heavily by attrition;
the Dolores and Tampico cavalry especially were shadows of their
original strength with only 2 steps each (and actually closer to 1 step
historically, though the game supply rules do not allow that rapid a
loss since attrition must be taken from the strongest units), most of
the cavalry having been dismounted and left behind in San Antonio as a
garrison given their small combat value without horses. The
Cuautla cavalry fared better, moving through areas where supplies were
more plentiful.
The Texan then makes two moves: 1) Houston is activated and with
Burleson, the militia and the Tejanos retreats from their positions
along the Colorado river at La Grange, Beason’s Ferry, and Alley, most
of the units moving to Groce’s Ferry while the militia goes to
McFarland’s Ferry, and Houston also moves another block within his
command range, bringing Sherman from San Felipe to join his main army
at Groce’s Ferry; 2) the New York battalion at Matagorda moves to
Columbia, escaping before Urrea arrives. Before Sherman leaves
San Felipe, the Texan also spends 1 CP to burn it to deny the town’s
supplies to the Mexicans, as the Texans prepare to retreat over the
Brazos, though since the unit there is moving, it cannot take a forage
step (and did not need one, being at full strength). There are no
battles this turn. The Mexicans are at risk of supply attrition
for most of their groups, including Urrea (1 unit over supply limits at
Victoria), Sesma and Tolsa (4 units over supply limits at Columbus,
losing a step from 1st Mexico), and Santa Anna (1 unit over supply
limits at Gonzales as it has now been burned, losing a step from
Guadalajara), but not Gaona who is now safely in Bastrop; the Texans
have no supply difficulties as Groce’s Ferry can supply the 4 units
there. The Texans receive Millard (3 steps) as a reinforcement at
Harrisburg, reflecting the experienced “deserters” from the U.S. army
across the Sabine beginning to arrive as volunteers.
| 1836
Turn 6 Movement |
1836
Turn 6 End
|
 |
 |
Turn 7 (April 7) - The Runaway
Scrape Continues, Mexicans Advance to San Felipe
The Texan plays a 4 CP card and the Mexican a 3 (with burn), giving the
Texan initiative. The Texans make three individual moves: 1)
Millard is moved up from Harrisburg to join Houston at Groce’s Ferry;
2) the New Orleans battalion is moved from Fort Bend across the Brazos
to McFarland’s Ferry; and 3) the New York battalion is moved from
Columbia to Velasco, staying ahead of Urrea. The Texans do not
need to use the remaining CP (if a non-moving unit such as Burleson had
suffered a loss in earlier force marches or due to supply, the Texans
could uses the remaining 1 CP for forage at Groce’s Ferry to bring it
up to full strength, as long as they do so before Millard arrives and
puts the forces in that hex above the supply limit). The Mexicans
then make two group moves: 1) Santa Anna in Gonzales is activated and
moves Sesma, Tolsa, the Dolores and Tampico cavalry, and the Matamoros,
Aldama, Toluca, Guerrero, and 1st Mexico infantry battalions, all at
the Alley ford, across the Colorado to reaches San Felipe, while Santa
Anna with the Zapadores and Guadalajara battalions also cross the
Colorado at Alley and reach San Felipe, rejoining the rest of the army,
and Santa Anna then continues with Matamoros, Aldama, and Toluca to
Fort Bend while the rest of the main army remains behind in San Felipe;
and 2) Urrea is activated and moves with the Jimenez, San Luis Potosi,
Queretaro and Tres Villas infantry to Texana to rejoin the Cuautla
cavalry, leaving the Tejano cavalry behind to garrison Victoria and
guard against the possibility of further sea movement into Linnville
(the need to cross ferries is now slowing Urrea’s advance
significantly). The Mexicans also use 1 CP to burn Bastrop and
collect a step of forage for a unit there, Morelos, that has suffered
attrition losses, bringing it back to full strength. The Texans
now face some risk of supply attrition at Groce’s Ferry (1 unit over
supply limits), while the Mexicans face some attrition risks for the
army under Santa Anna in Fort Bend (1 unit over supply limits) and more
severe attrition risks for the larger army under Sesma and Tolsa in the
ruins of San Felipe (6 units over supply limits, taking step losses
from Tolsa and Guadalajara), highlighting the perils of trying to
concentrate a large army with little available supply. Urrea continues
to face supply attrition risks at Texana as well (3 units above supply
limits), while Gaona’s smaller force at Bastrop faces some risk of
supply attrition (1 unit over supply limits) as well now that the town
has been burned, though this means that the Mexicans will not need to
leave any garrison there when they continue their march. The
Texans receive Lamar’s cavalry (2 steps) at Anahuac.
Historically the Texan
cavalry
was organized with Houston’s army at Groce’s Ferry, but now that San
Felipe is burnt and occupied Anahuac is now the nearest victory town
apart from Harrisburg where the cavalry can enter. Harrisburg
might appear to be the more logical choice for Lamar to enter, to cover
the line of the Brazos, but the Texans have made a strategic choice to
leave Harrisburg open, bait to draw Santa Anna forward there which he
snaps up on the next turn.
| 1836
Turn 7 Movement |
1836
Turn 7 End
|
 |
 |
Turn 8 (April 14) - Santa Anna
Strikes Across the Brazos, Houston Counterattacks and Cuts Off Santa
Anna
The Mexican plays a 4 CP card and gains initiative over the Texan with
a 2. The Mexicans make three group moves: 1) Urrea is
activated and crosses the Colorado at Cayce’s Ferry with the Cuautla,
Jimenez, Queretaro, San Luis Potosi, and Tres Villas units, and moving
to Matagorda (which remarkably has not been not burned) with all his
units except the Cuautla cavalry which remains just north of the town,
still in Urrea’s command radius, to reduce supply risks; 2) Gaona is
activated and, after receiving new orders cancelling the original plan
to march directly on Nacogdoches and redirecting him to rejoin Santa
Anna instead, leaves Bastrop, and continues down the Colorado on the
east side stopping at Beason’s Ferry (which has more supply value now
than the burned San Felipe); and 3) Santa Anna is activated and moves
from Fort Bend with to Harrisburg across the unguarded Thompson’s Ferry
with his entire “flying column” force, the Matamoros, Aldama and Toluca
battalions, continuing on to New Washington while also bringing the
powerful Guerrero across Thompson’s Ferry to garrison Harrisburg, and
bringing the attrition-weakened remaining units of the main army,
Sesma, Tolsa, the 1st Mexico, Guadalajara, the Dolores and Tampico
cavalry, and Zapadores, up to Fort Bend, available either to reinforce
Santa Anna or block any Texan counterattack over the Brazos as
needed. The Mexicans use their remaining 1 CP to forage, adding a
step to a non-moving unit – this can be the understrength Goliad
artillery to secure the fort against any surprise attacks. At
this point, Santa Anna has the options next turn to advance on Anahuac
or alternatively to make a sea attack on Galveston, and is within
striking distance of taking the last victory town needed to win the
campaign.
Historically, only part
of the
three units with Santa Anna moved directly with him, the full Matamoros
battalion and most of the two other battalions, Aldama and Toluca, plus
two companies of the 1st Mexico, a total of 7 steps of infantry plus 2
steps for Santa Anna (700 infantry and 50 cavalry), while Cos (not in
command of any brigade at this point, and so not in play in the game)
with Guerrero was originally given an independent mission by Santa Anna
to march down to Velasco from Fort Bend to clear up the Texans there,
but then received new orders to join Santa Anna instead. Cos then
brought up the Guerrero battalion and the remainder of the Aldama and
Toluca battalions, plus two companies of the Guadalajara battalion,
another 3 steps of infantry (Cos in reality had a total of some 500 men
in Guerrero and the elements of the other battalions, but left 100 of
these men behind on the march), just before the battle of San Jacinto
in the following turn and before Houston’s scouts could cut off the
available roads and bridges, blocking any other Mexican
reinforcements.
Houston, receiving information that Santa Anna is with the moving force
that left San Felipe, sees his opportunity too and moves with unusual
aggressiveness. The Texans make two moves: 1) Houston is
activated, and with Burleson, Sherman, Millard and the Tejanos moves
down from Groce’s Ferry to Fork in the Road, from which Houston,
Burleson, Sherman and Millard continue on to Harrisburg (two crossing
the ford over Buffalo Bayou and two others coming around its end),
placing themselves in between Santa Anna’s force and the remainder of
the Mexican army, while leaving the Tejanos on the opposite side of
Buffalo Bayou due to ford hexside limitations, and the Militia at
McFarland’s Ferry (also in Houston’s command radius) is sent to cover
Lynchburg against a possible crossing by Santa Anna, while New Orleans
remains at McFarland’s Ferry to cover the Atascosito Road against the
Mexicans at Fort Bend; and 2) Lamar’s cavalry from Anahuac also moves
up to Buffalo Bayou to join with the Tejanos on the opposite side from
the bulk of Houston’s army. Only Houston (A) is able to fire
before Guerrero (a C, like all the Mexican infantry), which is not hit
and retreats to join Santa Anna’s force at New Washington. Santa
Anna is cut off but could still win the war. All now
depends on who receives the initiative next turn. The
Texans do not face supply difficulties, with 4 units at Harrisburg, but
the Mexicans still do to some extent, despite the dispersal of Santa
Anna’s main army. They are 4 units over supply limits for Sesma’s
and Tolsa’s forces at Fort Bend (suffering step losses from Tampico,
Sesma, and Dolores, which are all now down to 1 step each), though
Urrea’s force at Matagorda and Santa Anna’s and Gaona’s groups at least
are now in supply. As reinforcements, the Texans receive a
militia infantry unit (2 steps) in Galveston.
Historically, Harrisburg
was at
least partially burned by either the Texans or the Mexicans, who both
blamed the other for its destruction, but more likely the damage was
done by Santa Anna. He was furious that the Texan Government,
which had relocated there from Washington, had managed to escape him
just in time and fled by sea from New Washington to Galveston.
The appearance of the militia in Galveston as a Texan reinforcement
reflects the movement of the Government there. In game terms,
with Harrisburg changing hands twice this turn and Houston ending up
making his camp there before the battle of San Jacinto, this burning
cannot readily be recreated since burning takes place as a foraging
action during movement, and neither side had the necessary CPs to do
so.
| 1836
Turn 8 Movement |
1836
Turn 8 Houston retakes Harrisburg
|
 |
 |
1836
Turn 8 End
|
|
 |
|
Turn 9 (April 21) -
Houston
Strikes and Santa Anna’s Army Destroyed at the Battle of San Jacinto.
The Texan uses the Surprise event card, giving him initiative this turn
even though the card provides only 1 CP and the Mexican plays a
2. Initiative, both in movement and in controlling the
order of battles, is essential for the Texan’s plans this
turn. The Texan activates Houston and moves him with
Burleson, Sherman, and Millard from Harrisburg to New Washington,
Critically, the Texans also move three other units also in Houston’s
command radius, bringing New Orleans to Harrisburg to block any
possible reinforcements to Santa Anna from Fort Bend along the main
road, sending Lamar to New Washington through Harrisburg and Bolivar
across a forest hexside (since the four-hex road limit directly to New
Washington has already been fully used by Houston’s main force, and
requiring Lamar to use a force march for the five total movement points
needed), and having the Tejanos also move across Buffalo Bayou through
Harrisburg and continue to Bolivar, where they remain to prevent any
possible reinforcements that way through Columbia. The Texans
have now made it impossible for the Mexican army at Fort Bend to
reinforce Santa Anna this turn or for Santa Anna to retreat.
Historically the Tejanos,
a
very small unit with only about 20 men, did fight at San Jacinto but
Texan scouts also played a critical role in cutting off any possible
Mexican retreat across the bayou bridge and blocking further Mexican
reinforcements, reflected by the role of the Tejanos here. The
Tejanos could alternatively join the battle by moving back through the
Lynchburg ferry, though all the other hexsides through which the New
Washington/San Jacinto hex can be entered have now been fully used by
other, more powerful Texan units. The New Orleans battalion
represents the 200-300 men who remained in Houston’s camp at Harrisburg
during the battle of San Jacinto; counting these forces, Houston had
about 1100 men under his direct command at this point, apart from
scattered militia and the New York battalion at Velasco which never
managed to join up with Houston before the end.
The Mexicans have two moves: 1) Urrea is activated and, leaving behind
the low-grade Tres Villas battalion in Matagorda as a garrison, moves
from there to Columbia and Brazoria with the Queretaro, Jimenez,
Cuautla, and San Luis Potosi units; and 2) Gaona is activated and comes
from Beason’s Ferry to Fort Bend with the Morelos and Guanajuato
battalions, rejoining Sesma and Tolsa there. Rather than sending
their depleted forces at Fort Bend to attack the Texans in a futile
effort to relieve Santa Anna this turn, which could not succeed before
the battle at San Jacinto, the Mexicans have instead opted to bring up
all of Urrea’s and Gaona’s stronger forces, putting them in a better
position to attack across the Brazos in force the following turn if
Santa Anna survives and rescue El Presidente.
Historically, Urrea left
Matagorda during the previous week and reached Columbia and Brazoria on
the 21st and 22nd, and then began to move some of his units across the
Brazos in preparation for a march on Velasco, but this plan was
abandoned after news arrived of the defeat at San Jacinto; though Urrea
could continue his move through Columbia to Bolivar with his Cuautla
cavalry or a force-marched infantry unit and attack the Texans there,
this would still not save Santa Anna by giving him a clear retreat,
since the Texan covered all possible lines of retreat with his advance
and will choose the order of battles this turn. Gaona could also
attack across to Harrisburg with one of his infantry battalions using a
force march for the ferry crossing, but this similarly would not
succeed in opening a retreat route for Santa Anna in time, as the Texan
controls the order of the battles. Alternatively, the Mexicans
could now have crossed the Brazos with the depleted forces already at
Fort Bend and either attacked Harrisburg or moved north of Harrisburg,
but this would not have enabled them either to reach Anahuac or to
reinforce Santa Anna in time.
In the decisive battle of San Jacinto, the Mexicans have 12 steps (10
in the four infantry units, including 2 each for Aldama and Toluca, 3
for Matamoros and 3 for Guerrero, plus 2 for Santa Anna), while Houston
has 13 steps (2 for himself, 9 for the Burleson, Sherman and Millard
infantry units and 2 for Lamar’s cavalry unit). Though the Texans
are the attackers, they gain Surprise through the event and by firing
first eliminate seven steps of Mexican strength, over half of the
Mexicans, in the first round of the battle (about an average result for
the powerful Texan units). The Mexicans, less lucky, inflict no
Texan losses with their remaining force of Santa Anna (A) and the four
Mexican infantry battalions (Cs), now each at one step (rather poor die
rolling, as on average they might have hoped to inflict about two hits
even with this crippled force). The Mexicans cannot retreat with
all routes blocked by the Texans at Harrisburg, Bolivar and Lynchburg,
and must continue to fight, their only hope of success holding out one
more round with Santa Anna so that the attacker would have to
retreat. In the second round of the battle, Santa Anna fires
first (A, now at one step, inflicting no damage), followed by Houston
and Lamar (As, inflicting two steps of damage and killing two of the
Mexican infantry battalions), then the few surviving Mexican infantry
(two Cs, both at one step each, doing no damage) and the Texan infantry
(Cs, easily killing the two remaining Mexican infantry battalions and
the last step of Santa Anna). Santa Anna is captured trying to
flee the disaster disguised as a common soldier, and is given away by
some of his fellow Mexican prisoners who hail him as El
Presidente. Again the Mexicans have fought rather poorly in the
second round (though by this point on average they could only hope for
about one hit with the remnants of their army) while the Texans are
able to win the battle by achieving at least average results with their
undamaged force. The entire Mexican defending force, including
Santa Anna, has been eliminated with no losses to the Texans, resulting
in an immediate Texan victory.
| 1836
Turn 9 Movement |
1836
Turn 9 Battle of San Jacinto
|
 |
 |
1836 Santa Anna captured during the battle
|
1836
Turn 9 End |
 |
 |
The lopsided historical
result
of San Jacinto – an army of at least 1150 Mexican troops, along with a
couple hundred more men in support, killed or captured by a Texan force
of about 800-900 men while suffering only about 40 casualties – can be
readily understood in game terms through the use of the Surprise card
that allows the Texans to strike first, and a bit of poor die rolling
on the Mexican side. The Texans can be expected to do this well
with their Surprise first strike, the three powerful infantry units
together with Lamar and Houston on average able to inflict 6-7 hits,
and if they suffer no losses in the first round can do the same again
on the second round. However, the Mexicans fall short on both
rounds of what they should have been able to do on average, as even
their surviving units – Santa Anna 2 steps, and one step each of the
four infantry battalions – could normally on average inflict 2 hits on
the first round, and 1 hit on the second round even after two of the
infantry battalions have been eliminated. A Texan army reduced by 3
steps on round two, coming off each of the three infantry battalions,
could still on average expect to inflict 4-5 hits, but this is a much
closer situation, and the Texans could fall just one short of what is
needed to finish off Santa Anna, possibly enabling El Presidente to get
out of Houston’s trap if the Mexicans move first the next turn.
Had the Mexicans fought better at San Jacinto and covered Santa Anna’s
escape, therefore, the campaign could have continued with a chance of
Mexican victory. The poor performance of the Mexican troops, who were
seized with panic and fled toward the end of the battle though there
was nowhere to run, is reflected in game terms by below-average die
rolls – much as Fannin’s tactical mistakes at Coleto Creek were.
Battle has its risks for both sides and is not predictable.
Had the game continued past the battle of San Jacinto, the Texans would
have had no supply difficulties for the main force of 5 units at New
Washington, while the Mexicans would have again faced a risk of supply
attrition for Sesma’s and Tolsa’s forces at Fort Bend, now joined by
Gaona (7 units above supply limits, though any losses would now come
off the stronger units in Gaona’s forces), but not for Urrea (Columbia
and Brazoria being well able to supply his 5 units). The Texans
would have received a reinforcement, either militia or one of the U.S.
units placed in the holding box at Fort
Jessup.
Total of action cards played: 3 4s, 6 3s, 5 2s, and 4 1s
(including Deguello, Local Guide and Surprise). Remaining unused:
2 2s, 3 1s (including Runaways), and 2 0s (Comanche, Storm).
The game as history ended in a decisive victory for the Texans at the
end of Turn 9, with the elimination (capture) of Santa
Anna. The Mexicans had taken both mission forts and several
victory towns including San Antonio, San Patricio, Gonzales, Victoria,
Bastrop, San Felipe and Brazoria (with Harrisburg taken by the Mexicans
but recaptured the same turn), but not enough for a victory, as the
Texans still held five victory towns (Nacogdoches, San Augustine,
Galveston, Anahuac and Harrisburg). After the defeat at San
Jacinto, historically, the Mexican forces at Fort Bend, Columbia and
Brazoria combined and began to retreat back across the Colorado and
Guadalupe rivers to Goliad, which they reached by Turn 12 despite heavy
rains along the way that turned the march route into a “sea of mud,”
collecting up their garrisons from Matagorda and Victoria along the
way. Houston’s army continually shadowed the Mexicans,
staying a little distance behind. Had Santa Anna somehow escaped
San Jacinto or the Mexicans continued the war despite his capture (as
Urrea and many of the junior officers would have preferred to do, being
overruled by the chief-of-staff Filisola and the other senior generals)
through Turn 12, to win they would also most likely have had to take
Anahuac, the closest target in reach, where Santa Anna had planned to
go after taking Harrisburg and New Washington. This would have
required fighting their way through or past a powerful, concentrated
Texan army at Harrisburg; Urrea and Gaona still had some good units to
spearhead an attack, including Cuautla, Jimenez, San Luis Potosi,
Morelos and Gaona’s own guns, but the rest of the army under Sesma and
Tolsa was seriously depleted and apart from the Zapadores in little
condition to push forward effectively. Galveston could possibly
have been taken by sea attack instead, but to get there the Mexicans
would have had to move from Matagorda or Brazoria with enough force to
defeat the militia there plus any reinforcement unit that the Texan
might have placed there at the end of Turn 9 (assuming the Texan drew a
militia unit rather than a U.S. unit that would have to be placed at
Fort Jessup), a one-unit landing (the most that is now possible)
requiring 2 CPs and unlikely to succeed. Nacogdoches and San
Augustine could still have been reached in time were there no Texan
opposition, but with their remaining forces the Texans probably could
have blocked a Mexican effort to get there in the limited time left
even without U.S. intervention, considering the small number of good
action cards remaining. Had Turn 9 been completed and the
campaign continued to its end, U.S. units would also likely have
started to appear in Fort Jessup from the reinforcement pool, but as no
U.S. unit had been placed from the reinforcement pool in Fort Jessup
before turn 9, U.S. intervention would not take place before Turn 12 –
possibly protecting Nacogdoches and San Augustine, but not early enough
to aid the rest of the Texan army in defending Anahuac or
Galveston.
At the end of the campaign on Turn 9, the remaining forces were :
Texas - Houston (2 steps), Burleson (3 steps), Sherman (3 steps),
Millard (3 steps), Lamar (2 steps) at New Washington/San Jacinto;
Tejanos (1 step) at Bolivar; Militia infantry (2 steps) at Lynchburg;
New Orleans (3 steps) at Harrisburg; New York volunteers (3 steps) at
Velasco; Militia infantry (2 steps) at Galveston; total 24 steps
available, with three U.S. units still in the reinforcement pool, along
with two Militia infantry and one Militia
cavalry.
Mexico - Sesma (1 step), Tolsa (2 steps), 1st Mexico (2 steps),
Guadalajara (2 steps), Zapadores (2 steps), Gaona (2 steps), Morelos (4
steps), Guanajuato (3 steps), Dolores (1 step), Tampico (1 step), at
Fort Bend; Urrea (2 steps), Cuautla (2 steps), Jimenez (3 steps), San
Luis Potosi (3 steps), Queretaro (3 steps) at Brazoria and Columbia;
Alamo artillery at Alamo (3 steps - 2 rebuilt by forage), Goliad
artillery at Goliad (2 steps – 1 rebuilt by forage), Yucatan (2 steps)
at Copano; Tres Villas (2 steps) at Matagorda; Tejanos (2 steps) at
Victoria; total 44 steps available. Though the Mexicans
also had 1000 troops in San Antonio and the Alamo at the end, these
were either dismounted cavalry from the Dolores and Tampico/Guanajuato
regiments, or infantry wounded in the Alamo battle and sick troops, of
little or no combat value.
Total combat-related losses:
Texas - 3 steps leaders (Fannin, Travis), 4 steps cavalry (Grant,
Kimball, Horton), 5 steps artillery (Alamo, Goliad), and 9 steps
infantry (Wallace, Ward, Bowie, Nashville), total 21 steps.
Mexico - 3 steps leaders (2 for Santa Anna, 1 from Sesma), 1 step
cavalry (from Cuautla), 16 steps infantry (Toluca, Aldama, Matamoros,
Guerrero, and 1 each from San Luis Potosi and Yucatan), total 20 steps.
Total other losses (attrition from supply and force march):
Texas - None. The Texans, who were retreating toward their
sources of supply, on balance suffered little from attrition,
desertions during the retreat being offset by new
recruits.
Mexico - 2 steps leaders (1 from Sesma and 1 from Tolsa), 6 steps
cavalry (3 from Dolores, 3 from Tampico), 7 steps infantry (2 from 1st
Mexico, 2 from Guadalajara, 1 from Guanajuato, 1 from Queretaro, 1 from
Guerrero), total 15 steps. The Mexicans suffered much more
heavily from attrition than the Texans, especially in the cavalry and
artillery due to losses of horses and draft animals, but the losses
were not evenly balanced among the three main Mexican
forces. Urrea’s troops suffered few attrition losses, 1
step from the Queretaro infantry, even though they did face some supply
risks along their march route, as they often were able to move through
unburned towns during their advance and regularly resupplied
themselves. Gaona also suffered relatively little, 1 step
from the Guanajuato infantry (the other step loss from Morelos having
been rebuilt by forage), for while he did have to stop sometimes in
areas without good sources of supply during his advance, he usually
avoided forced marches and pillaged Bastrop for
supplies. Sesma, Tolsa and Santa Anna suffered the
worst, as their forces were most concentrated and all the victory towns
on their line of march after San Antonio had been burned by the Texans
until they reached Harrisburg, so that they had little opportunity to
resupply their forces. They lost 2 steps from Sesma and Tolsa, 6
steps from Dolores and Tampico, and 5 steps from Guerrero, Guadalajara
and 1st Mexico (though part of the losses from the Guadalajara and 1st
Mexico infantry regiments, historically, were the two companies taken
from each, about 1/4 of their strength, that were used to reinforce
Santa Anna and Cos at San Jacinto and make up for attrition losses
among their other infantry battalions, and the one step loss from
Guerrero reflects the men left behind by Cos who failed to reach San
Jacinto). That the infantry battalions were in relatively better shape
than the cavalry or leaders suggests, in game terms, that during parts
of the advance some of them may have been in separate hexes from the
larger groups as long as they remained within command radius. In
game terms, Santa Anna managed to solve his command control problems at
the expense of neglecting logistics. By concentrating his forces
excessively on many occasions, he ensured that they remained able to
move even after brigades had been intermingled and units were often not
under their original commanders, and safeguarded against any possible
Texan counterattack prior to San Jacinto, but he paid the price in
serious supply attrition.
Apart from his poor attention to logistics, Santa Anna was probably
overcautious in his mid-game after the fall of the Alamo, taking too
long to dispatch Gaona from San Antonio on a mission while waiting to
see what Houston would do, and remaining safely in the rear until he
had sent all of his brigades forward and Urrea had destroyed Fannin’s
forces before advancing himself, rather than leading his army from the
outset and pressing the Texans more closely. To make up for this,
he attempted a bold maneuver with his “flying column” as the campaign
moved into its final phase, one that actually put him ahead of the
Texan main army and could well have led to victory. However, he
failed to realize that the Texans had laid a trap, separating El
Presidente from the main body of his army. The most critical
Texan failure, in contrast, occurred in the early game when Houston
failed to compel Fannin to move more quickly and escape from Goliad,
and Fannin tried to break out only when it was too late and he would
have done better to defend the fort instead. Houston made up for
this error by carefully preserving the rest of his army and building it
up, and then seizing a one-time opportunity to strike back for a
decisive win. Though Houston is sometimes criticized for
overcaution, he made an exceptionally bold choice in the San Jacinto
phase of the campaign once he realized that Santa Anna had moved out
ahead of his main army, taking the calculated risk of inserting the
small Texan army between two powerful enemy forces that, if better
coordinated, could well have joined to crush him. Instead,
Houston struck first and destroyed the weaker of the two Mexican forces
with Santa Anna just in time, an outcome that while reasonable to hope
for with a Surprise attack was by no means guaranteed, had the Mexicans
fought better. A failure to kill the last step of Santa Anna in
the second round of battle, even if the rest of the Mexican force was
lost at San Jacinto, would have allowed the Mexicans to continue the
campaign, and, if they gained initiative the next turn and control over
the order of battles, to push across the Brazos and possibly rescue
their leader before the Texans could finish the job.
Events used during the campaign: Surprise (at San Jacinto) and Deguello
(at the Alamo) can be regarded as certain or likely to have occurred
given the outcomes of those battles, and the use of Local Guide (at
Coleto Creek) also helps to explain Fannin’s movements, giving him the
initiative to escape from Goliad before being besieged but then
overwhelmed by superior Mexican maneuver. Given the movement of
the Mexican forces it does not appear that they would have had the
opportunity to use other events in game terms (Runaways), as they never
slowed down to a 1 action for any turn except when they played
Deguello. If the Texans had a Runaways card on Turn 1 or 3,
they could have played it against the Mexicans and gained initiative
even while only doing one move themselves as they did
historically. There was no turn during which one or both
sides did not move at all, so the Storm and Comanche events did not
happen during the historical campaign.
Click
here to order Texas Glory now.
|